Fennec Shand Sniper Rifle Cosplay Tutorial (3D Printed)
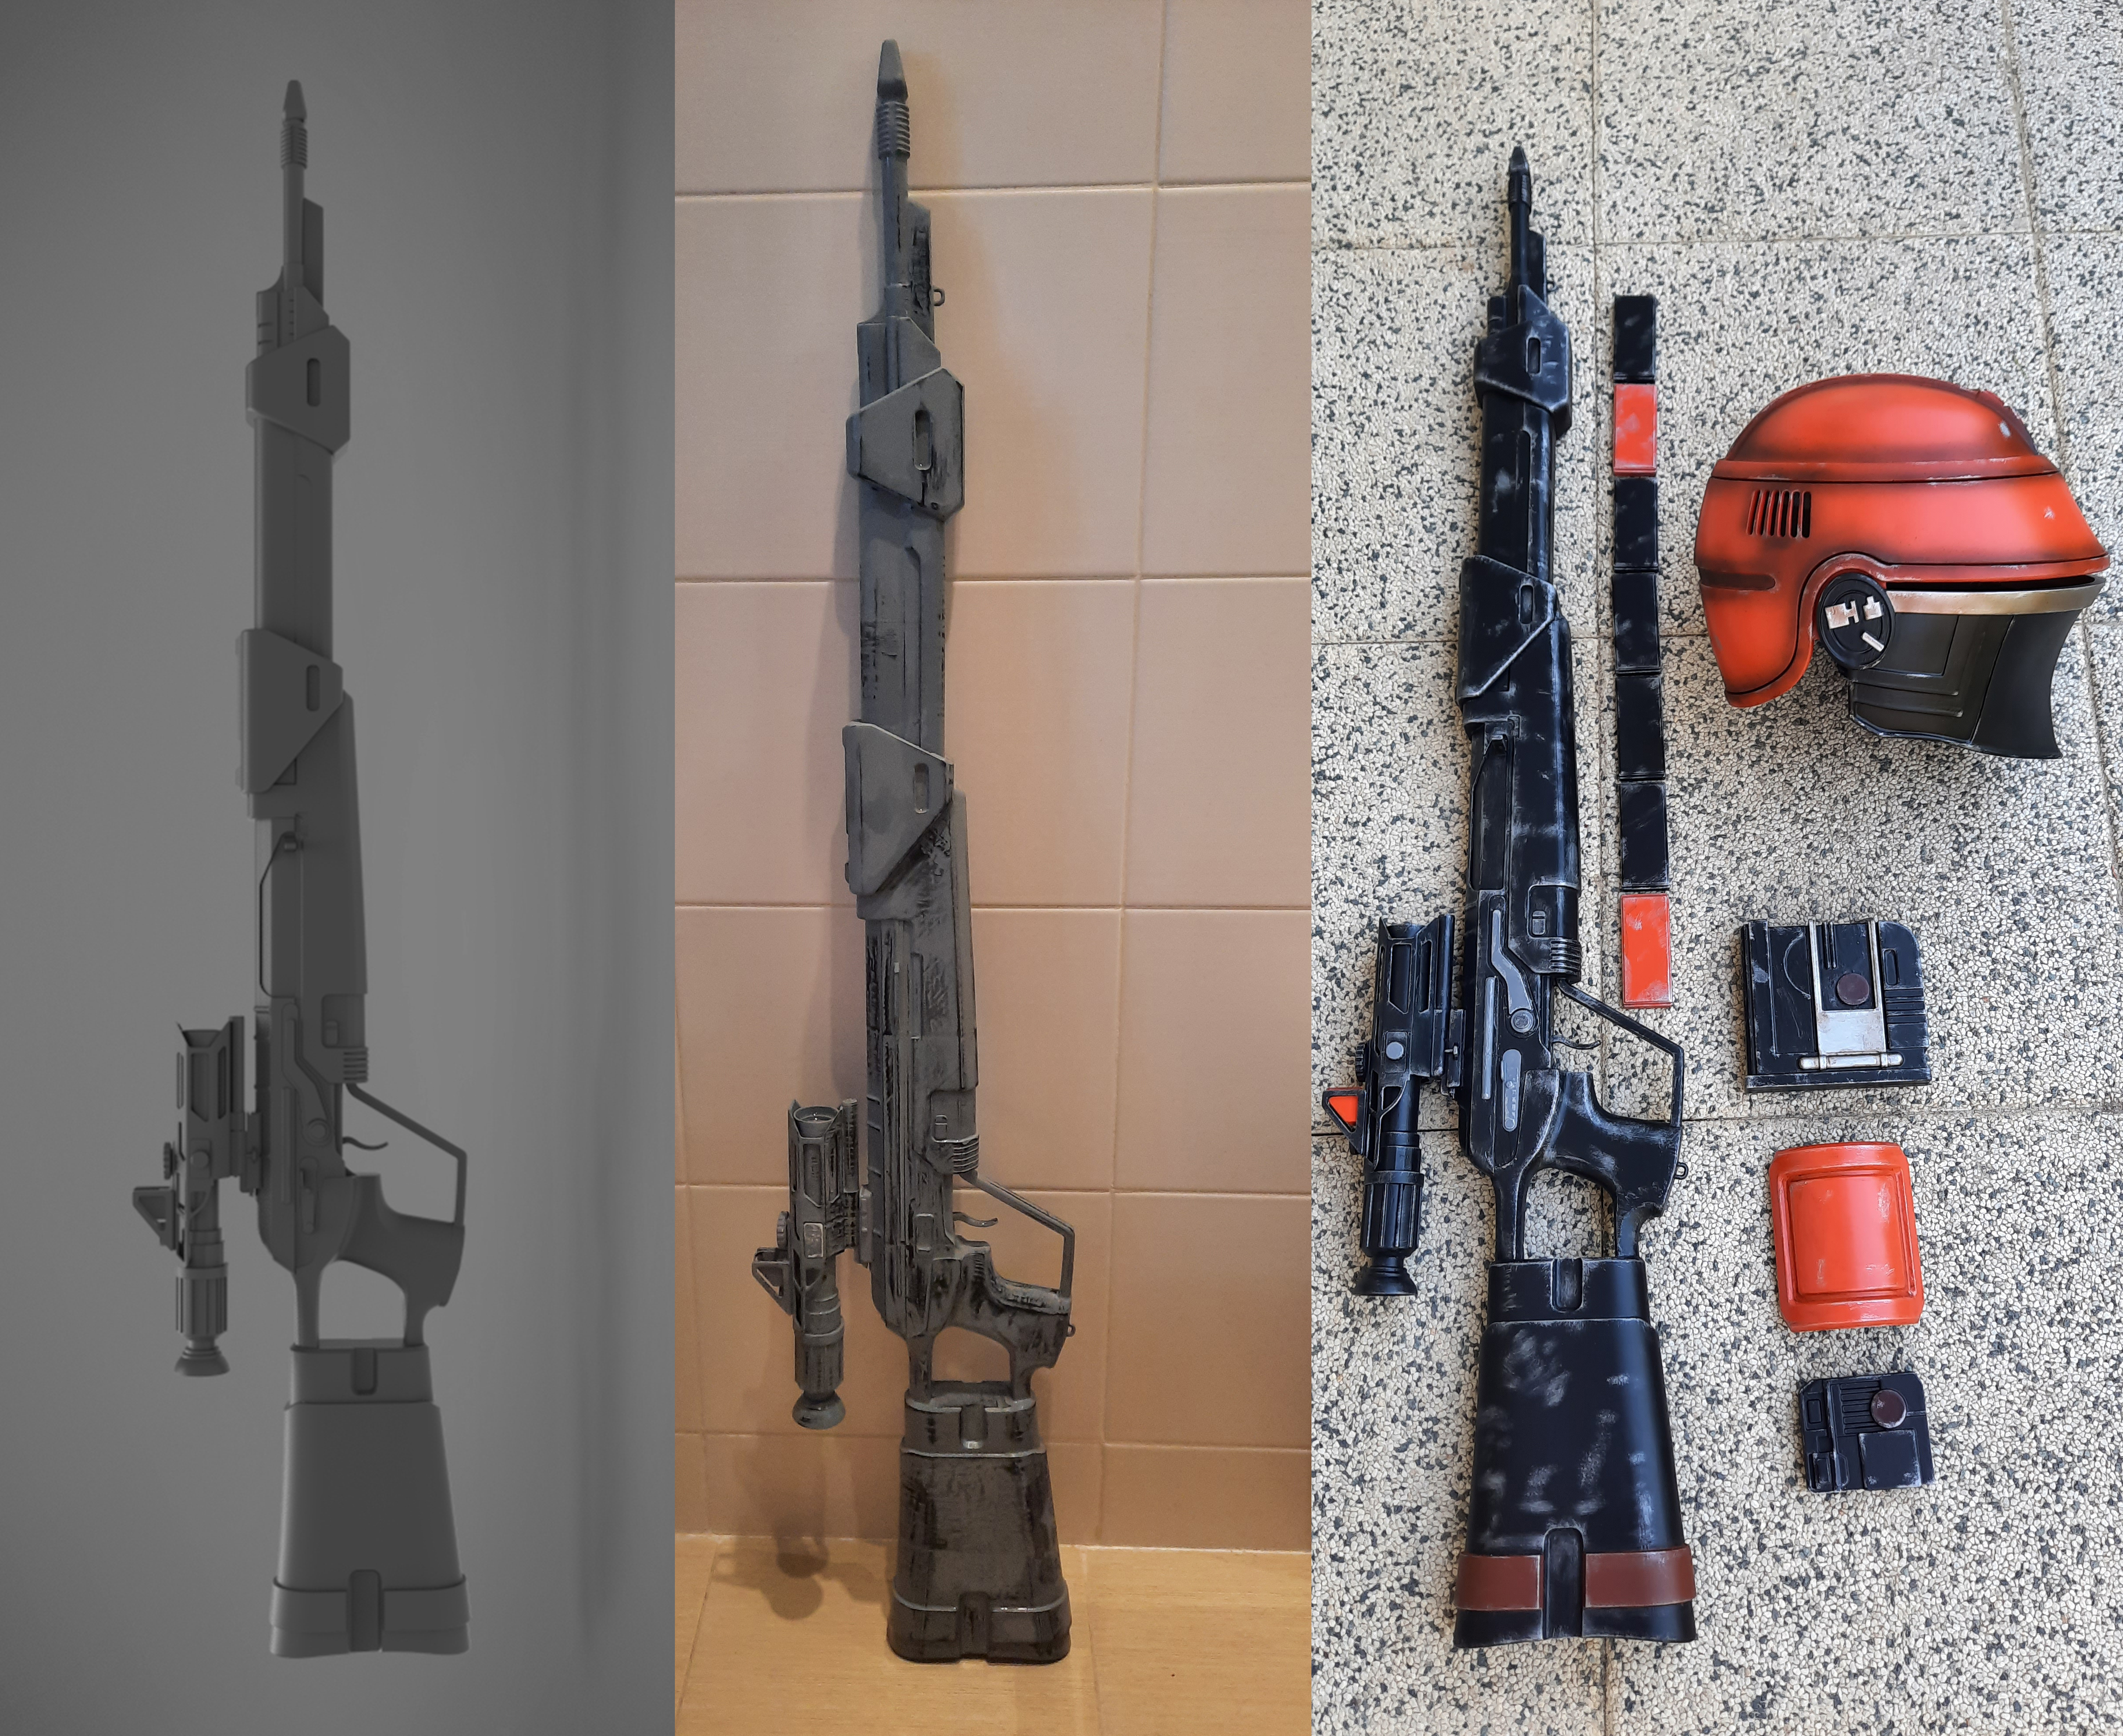
Fennec Shand is an assassin from The Mandalorian series and The Bad Batch. She uses a modified MK sniper rifle. While on the planet Tatooine, when two bounty hunters took a job to hunt her down, Fennec attempted to kill them with the sniper rifle. It is a tall firearm with a nice design, so we decided to create it as a cosplay prop. The 3D model is available at 3Demon, the photos were provided by Andrea.
Let’s get started!
Supplies
- 3D printer
- 3D printing filament
- Files for printing
- Soldering iron
- Glue (two-component epoxy adhesive)
- XTC 3D resin
- 3D pen (optional)
- Primer, Filler
- Sandpaper, Hand Grinder
- Spray paint, Acrylic paint

Step 1: Printing


The STL files are prepared for easy printing. We decided to print from PETG filament (thermoplastic polyester) because it is quite durable, sits well on the printing bed, has an excellent adhesion of layers, low deformation of layers while cooling, and it doesn’t smell too badly.
All the MK rifle parts were printed with a 0.3 mm layers, speed was set to 60 mm/s. Smaller parts were printed with 0.2 mm layers.
Step 2: Assembly

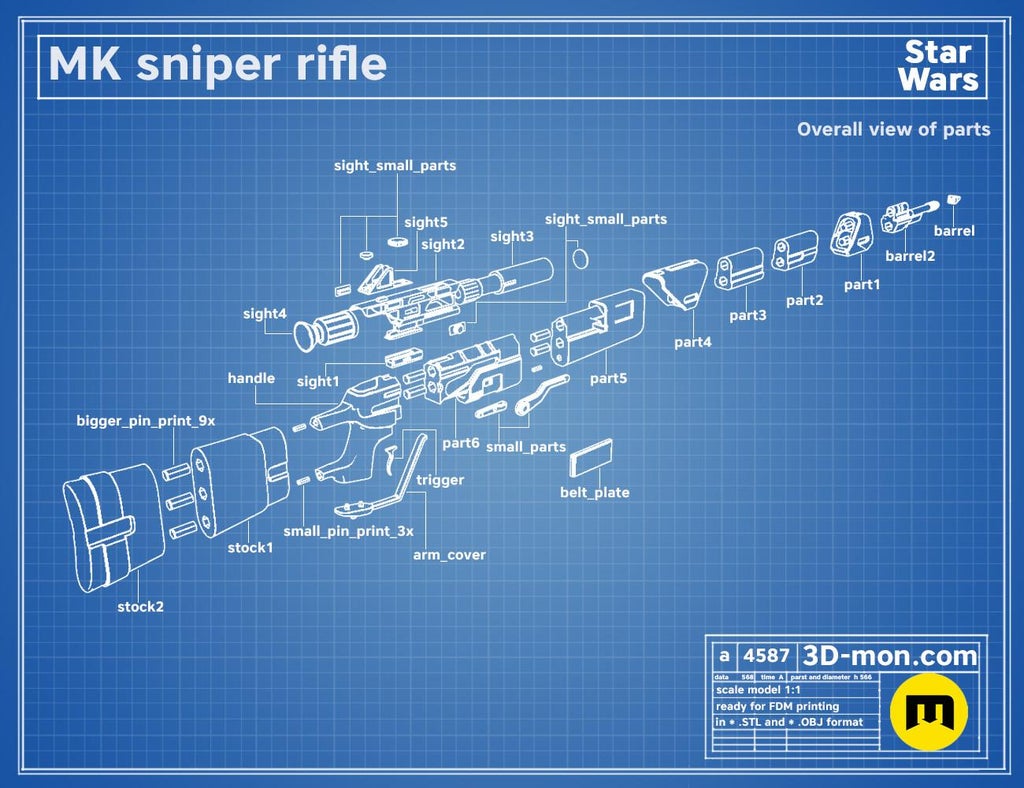
To strengthen the final prop, the individual larger parts are connected by hexagonal pins. It is very easy to put the model together and you can always check the blueprint provided with the printing files.
When gluing PETG (but also PLA) a common instant glue/ superglue will suffice. Or you can use a two-component epoxy glue.
Step 3: Surface Smoothing

All 3D printed parts have visible layers. To achieve a nice realictic look, the surface must be smooth. We like to fill some remaining gaps with 3D pen and smooth it out with a soldering iron. Same goes with some errors like bumps or hard to remove leftovers from printing. You can get rid of them easily with the soldering iron.
The next step is to cover the whole prop in resin. It fills the layers and makes the surface easier to work with.
When the XTC 3D resin is dry, the surface will still remain slightly sticky. We recommend soaking the model in water for a few minutes, then you can further process it.
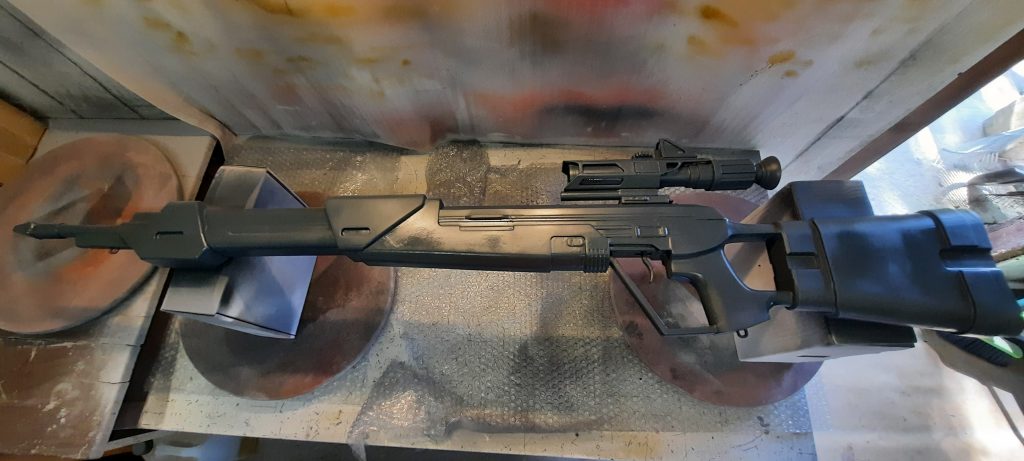
The next step is sanding followed by adding a putty if needed, more sanding, a few layers of spray putty filler (sanding after each layer) and finally wet sanding the putty filler.
The last photo shows the Fennec Shand’s MK sniper rifle ready for a layer of basecolor.
Step 4: Painting

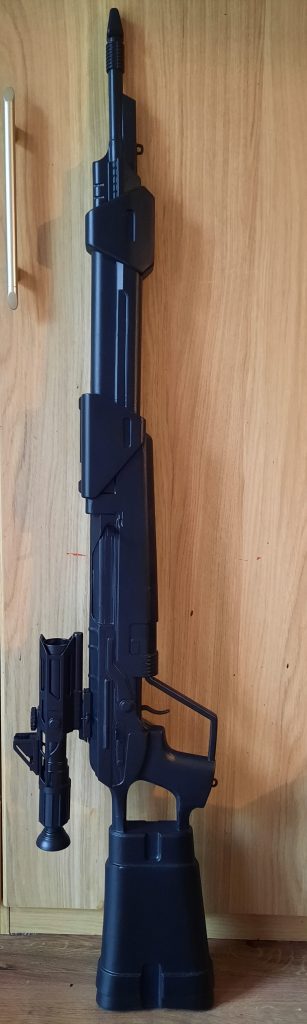
An acrylic spay paint color was used as a basecolor. We chose a shade called “gunmetal grey”.
Once the basecolor was dry, we spray painted the rifle again this time with a matt black.
For detailes in different color, use a masking tape, airbrush or basic soft paintbrush.
The rifle won’tt look realistic enough without some scratches and battle damage. We talk about that in another tutorial – Fennec Shand helmet and accessories.
A small circe was cut out of a black foil to look like a glass lens in the scope.
Another small piece of orange acrylic glass (perspex, or plexiglass) was used at the top of the scope.
Step 5: Done!
The rifle is done now! It is a perfect prop for cosplay, which will surely get much admiration at any convention, Mandalorian cosplay meetup or other events!
Let us know how you liked the article!
For more Star Wars blasters, have a look at our collection of available 3D models!
If you like to use other social media, you can find us there as well! Linktree
Leave a Comment