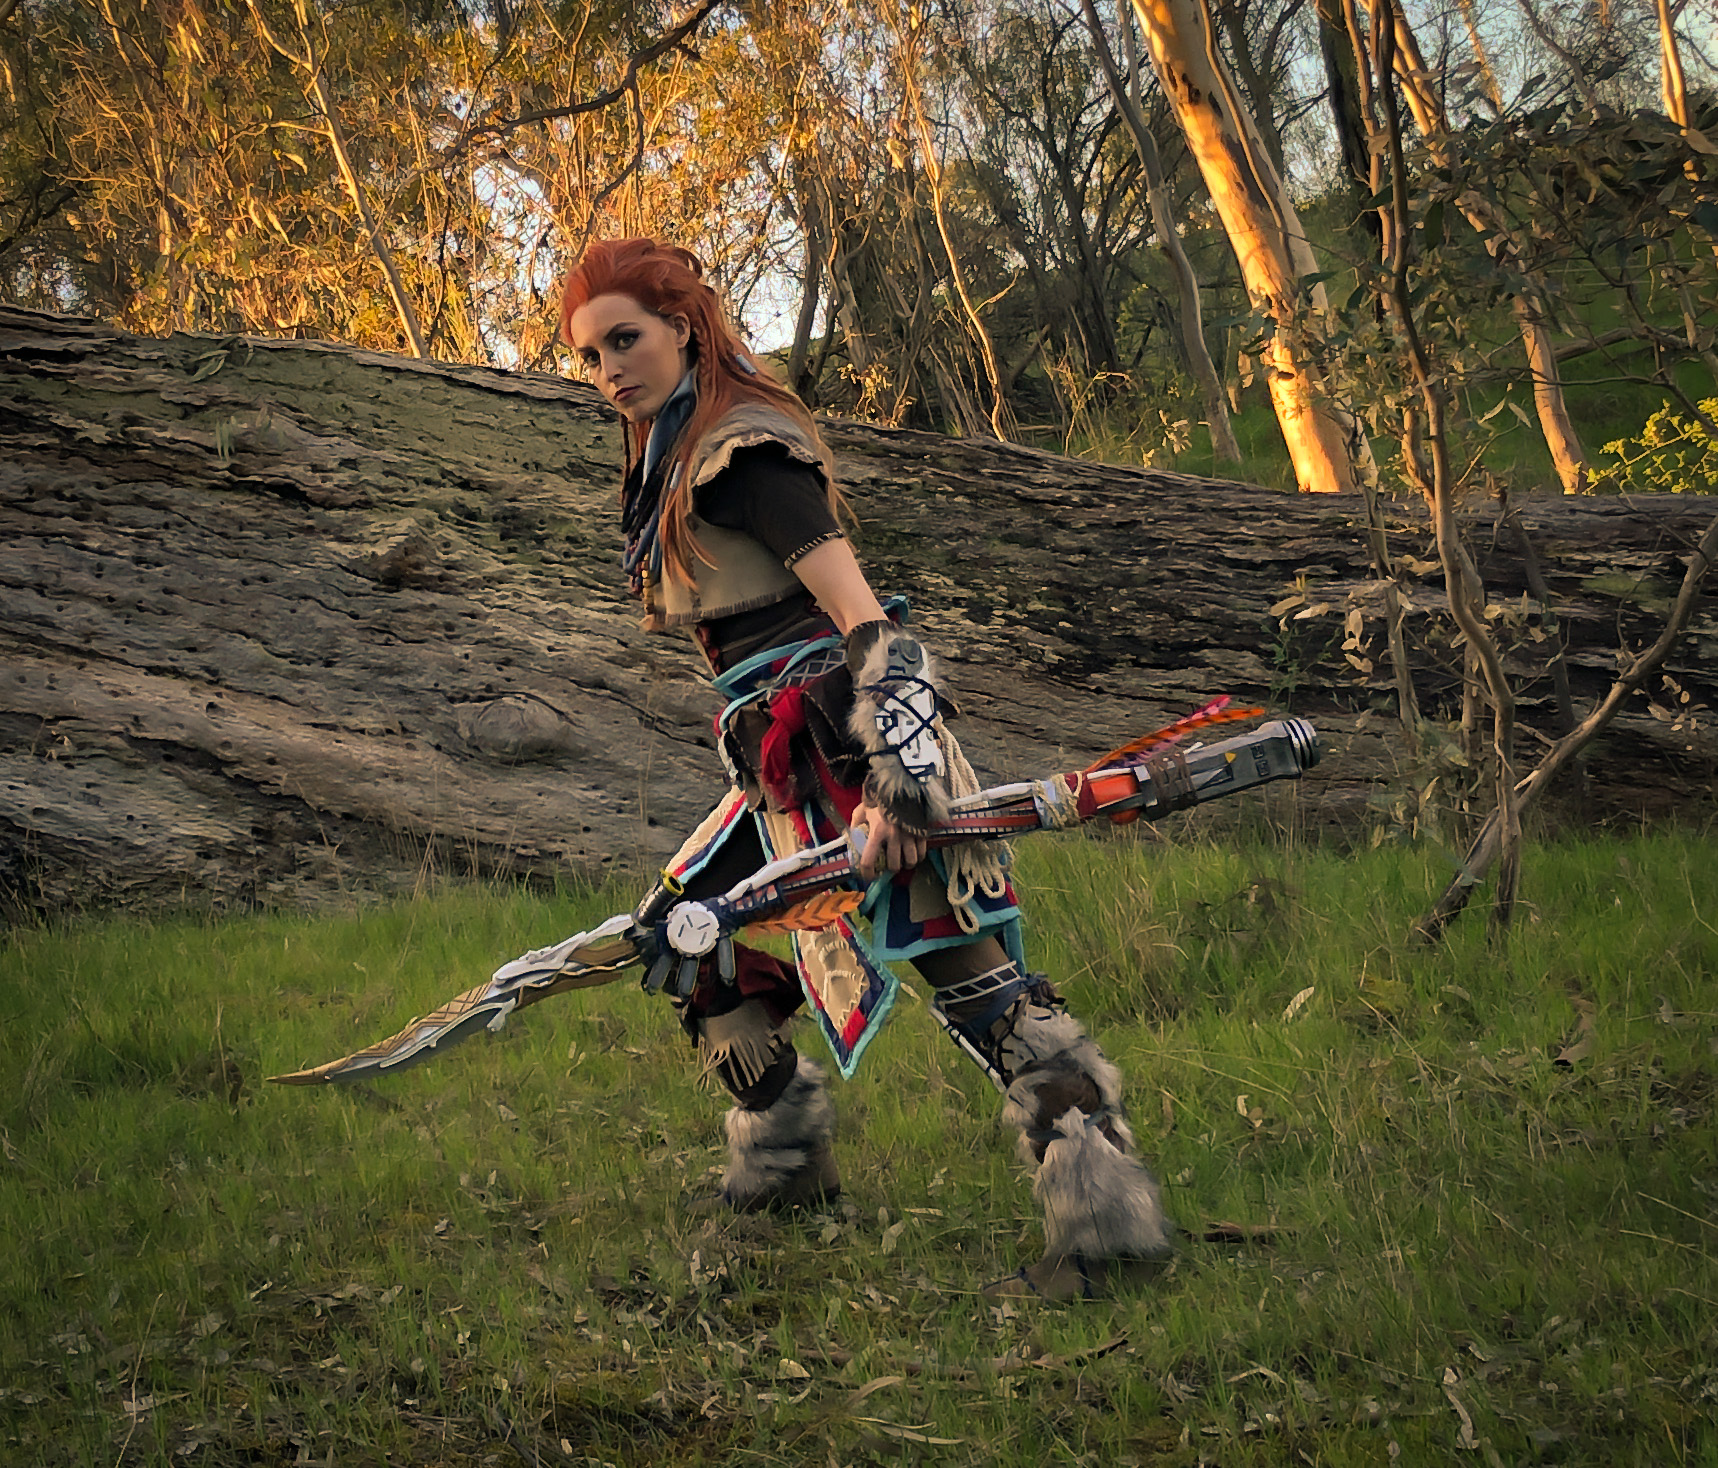
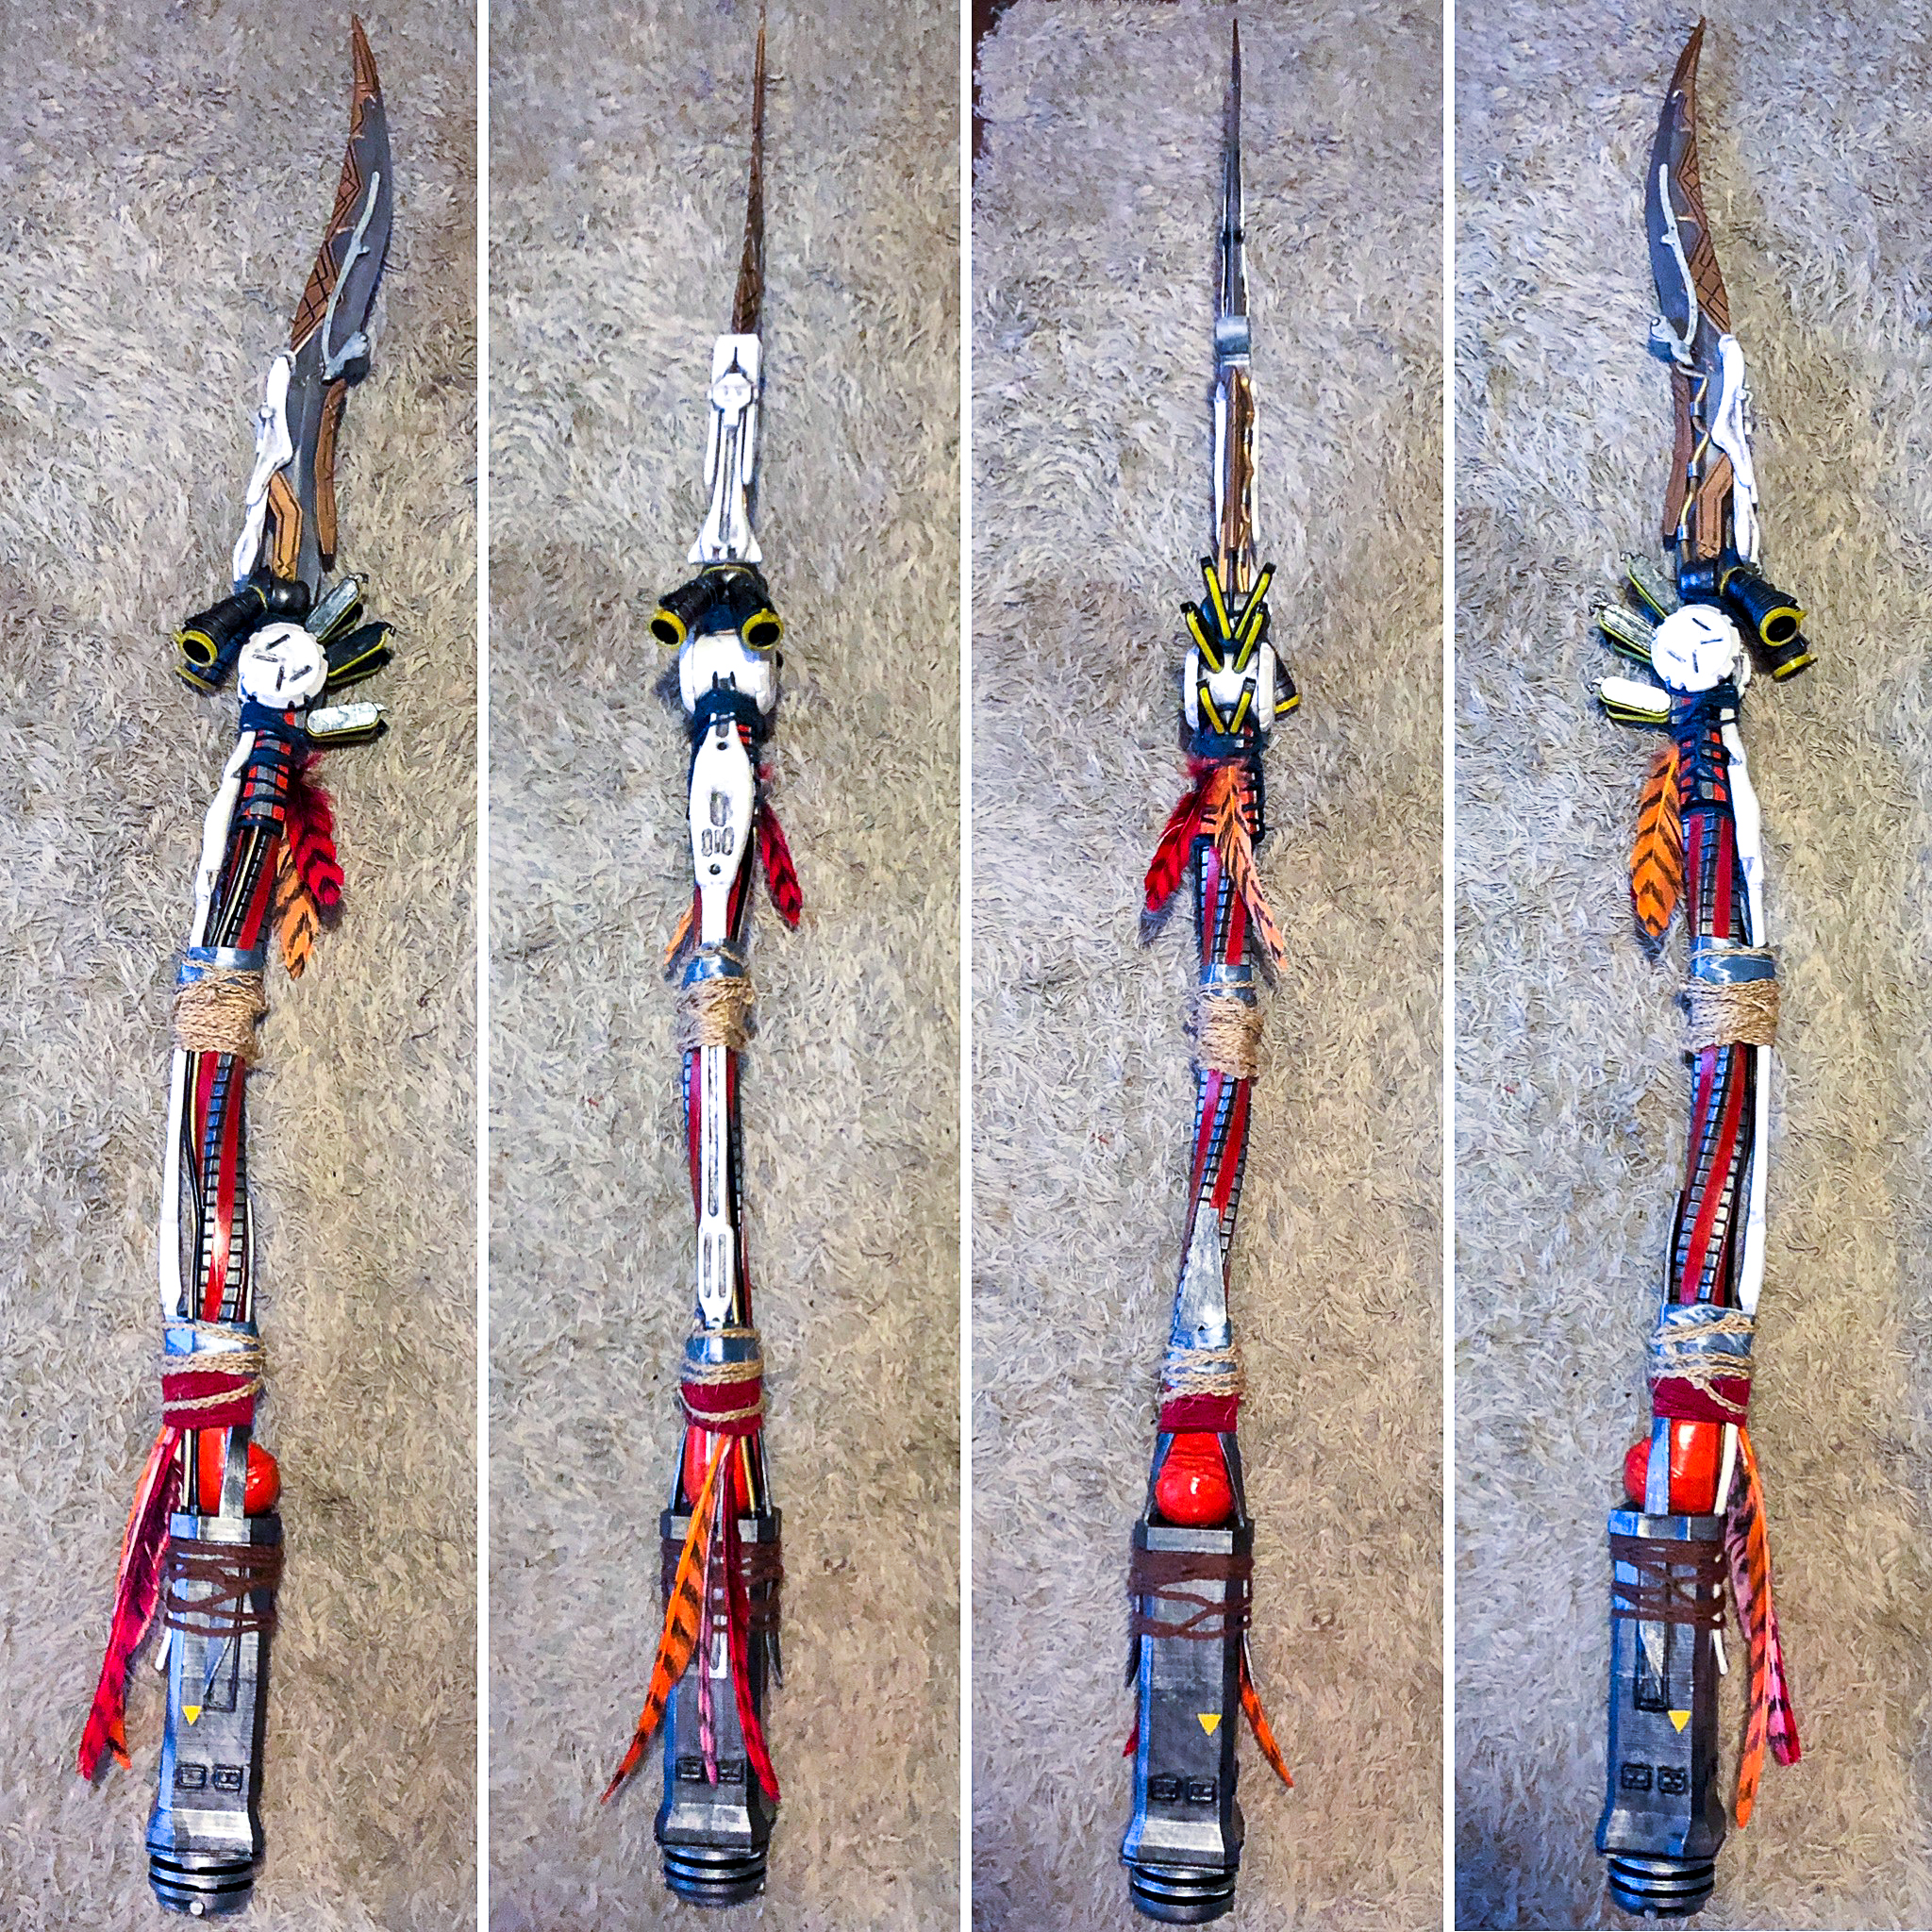
A powerful hi-tech spear gifted to Aloy by Sun-King Avad in the Horizon: Forbidden West videogame. Aloy is for sure a popular character among cosplayers, as she owns quite a collection of various outfits and weapons. Her main and most important weapon is her spear. In this tutorial, Tiffany Dean Cosplay will guide you through the process of creating the spear prop for cosplay using her 3D printer!
Supplies:
To create the Champion's spear from Horizon Forbidden West, you'll need:
- 3D Printer
- Filament (PLA)
- 3D model - STL files by 3Demon
- Superglue
- Putty
- Spray filler
- Sandpaper
- Primer
- Acrylic paints, brushes
- Silver and white spray paint
- Clear glossy coating spray
- Red and orange feathers
- Natural and blue cord/rope
- Pieces of fabric

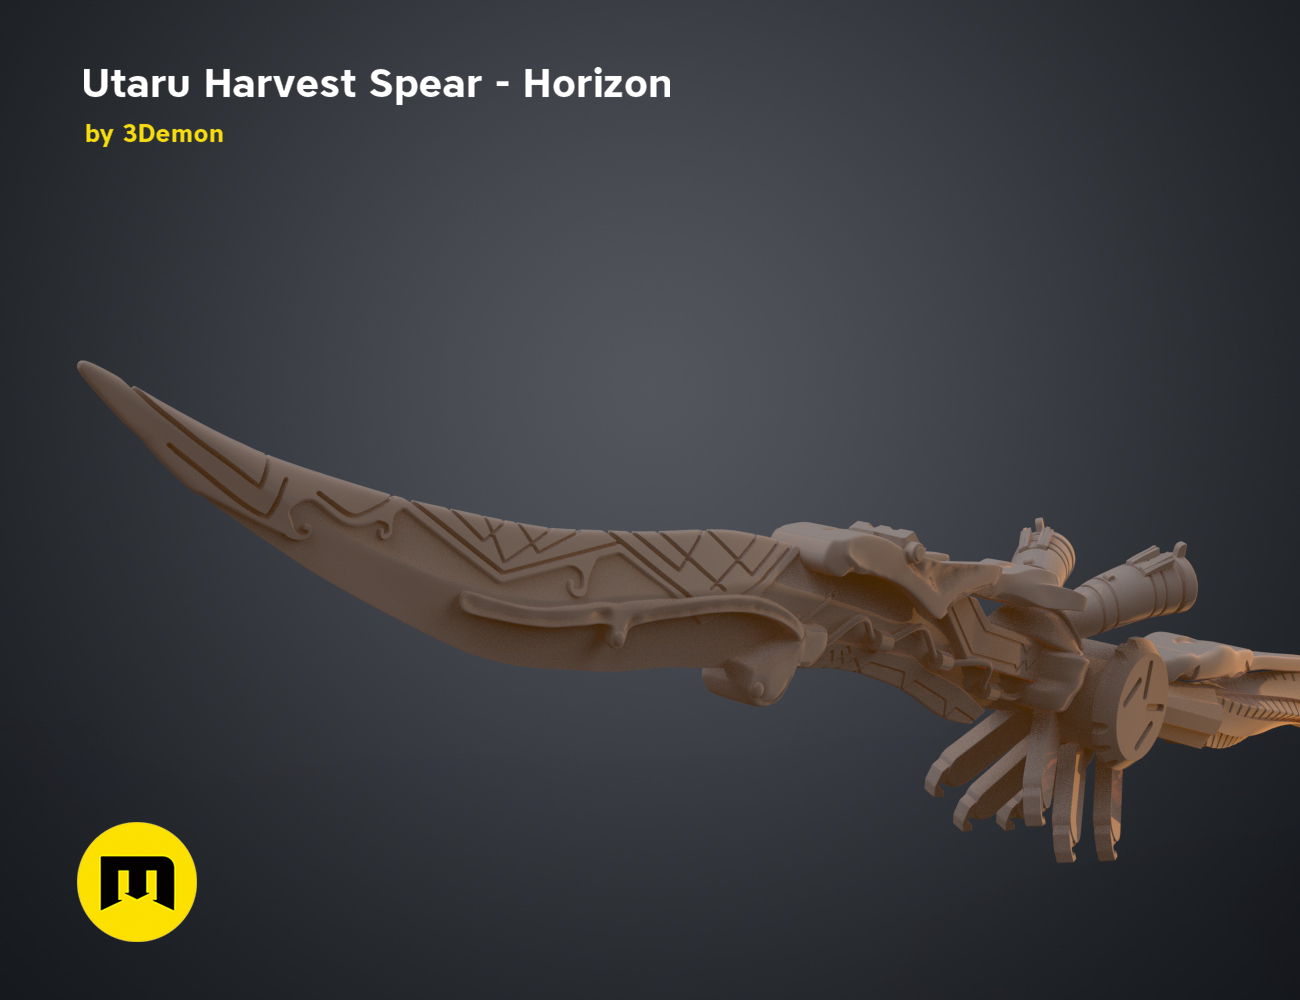
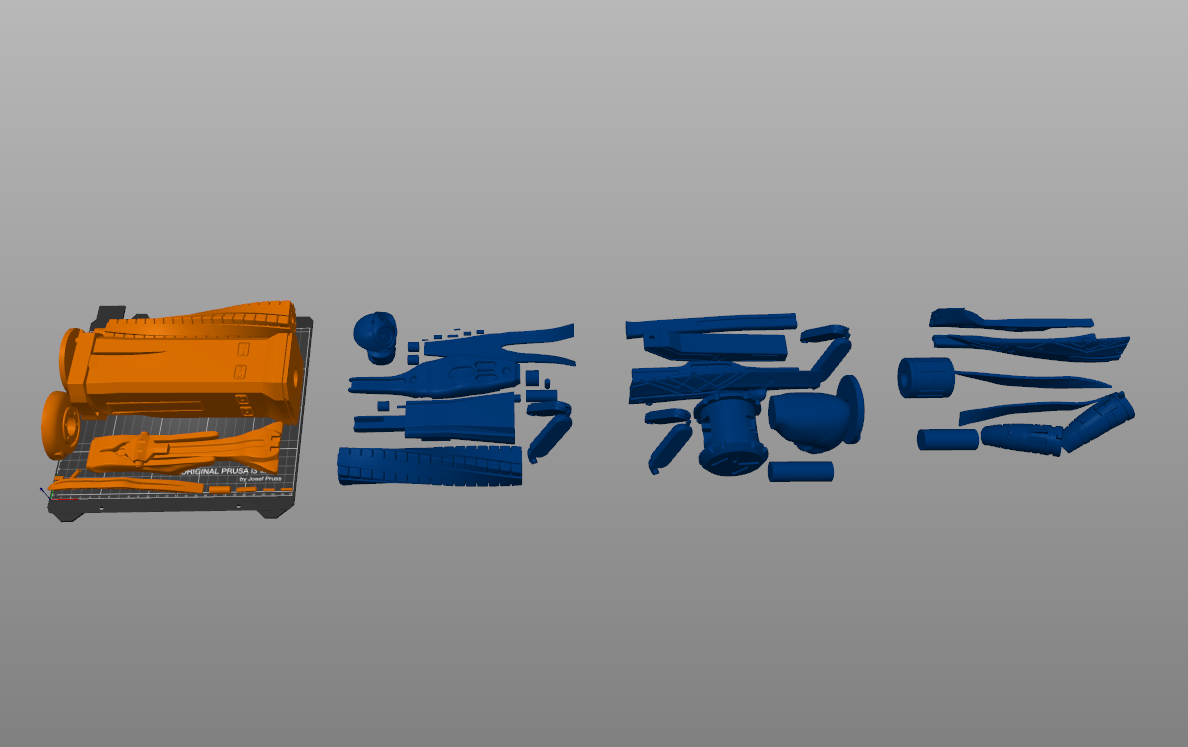
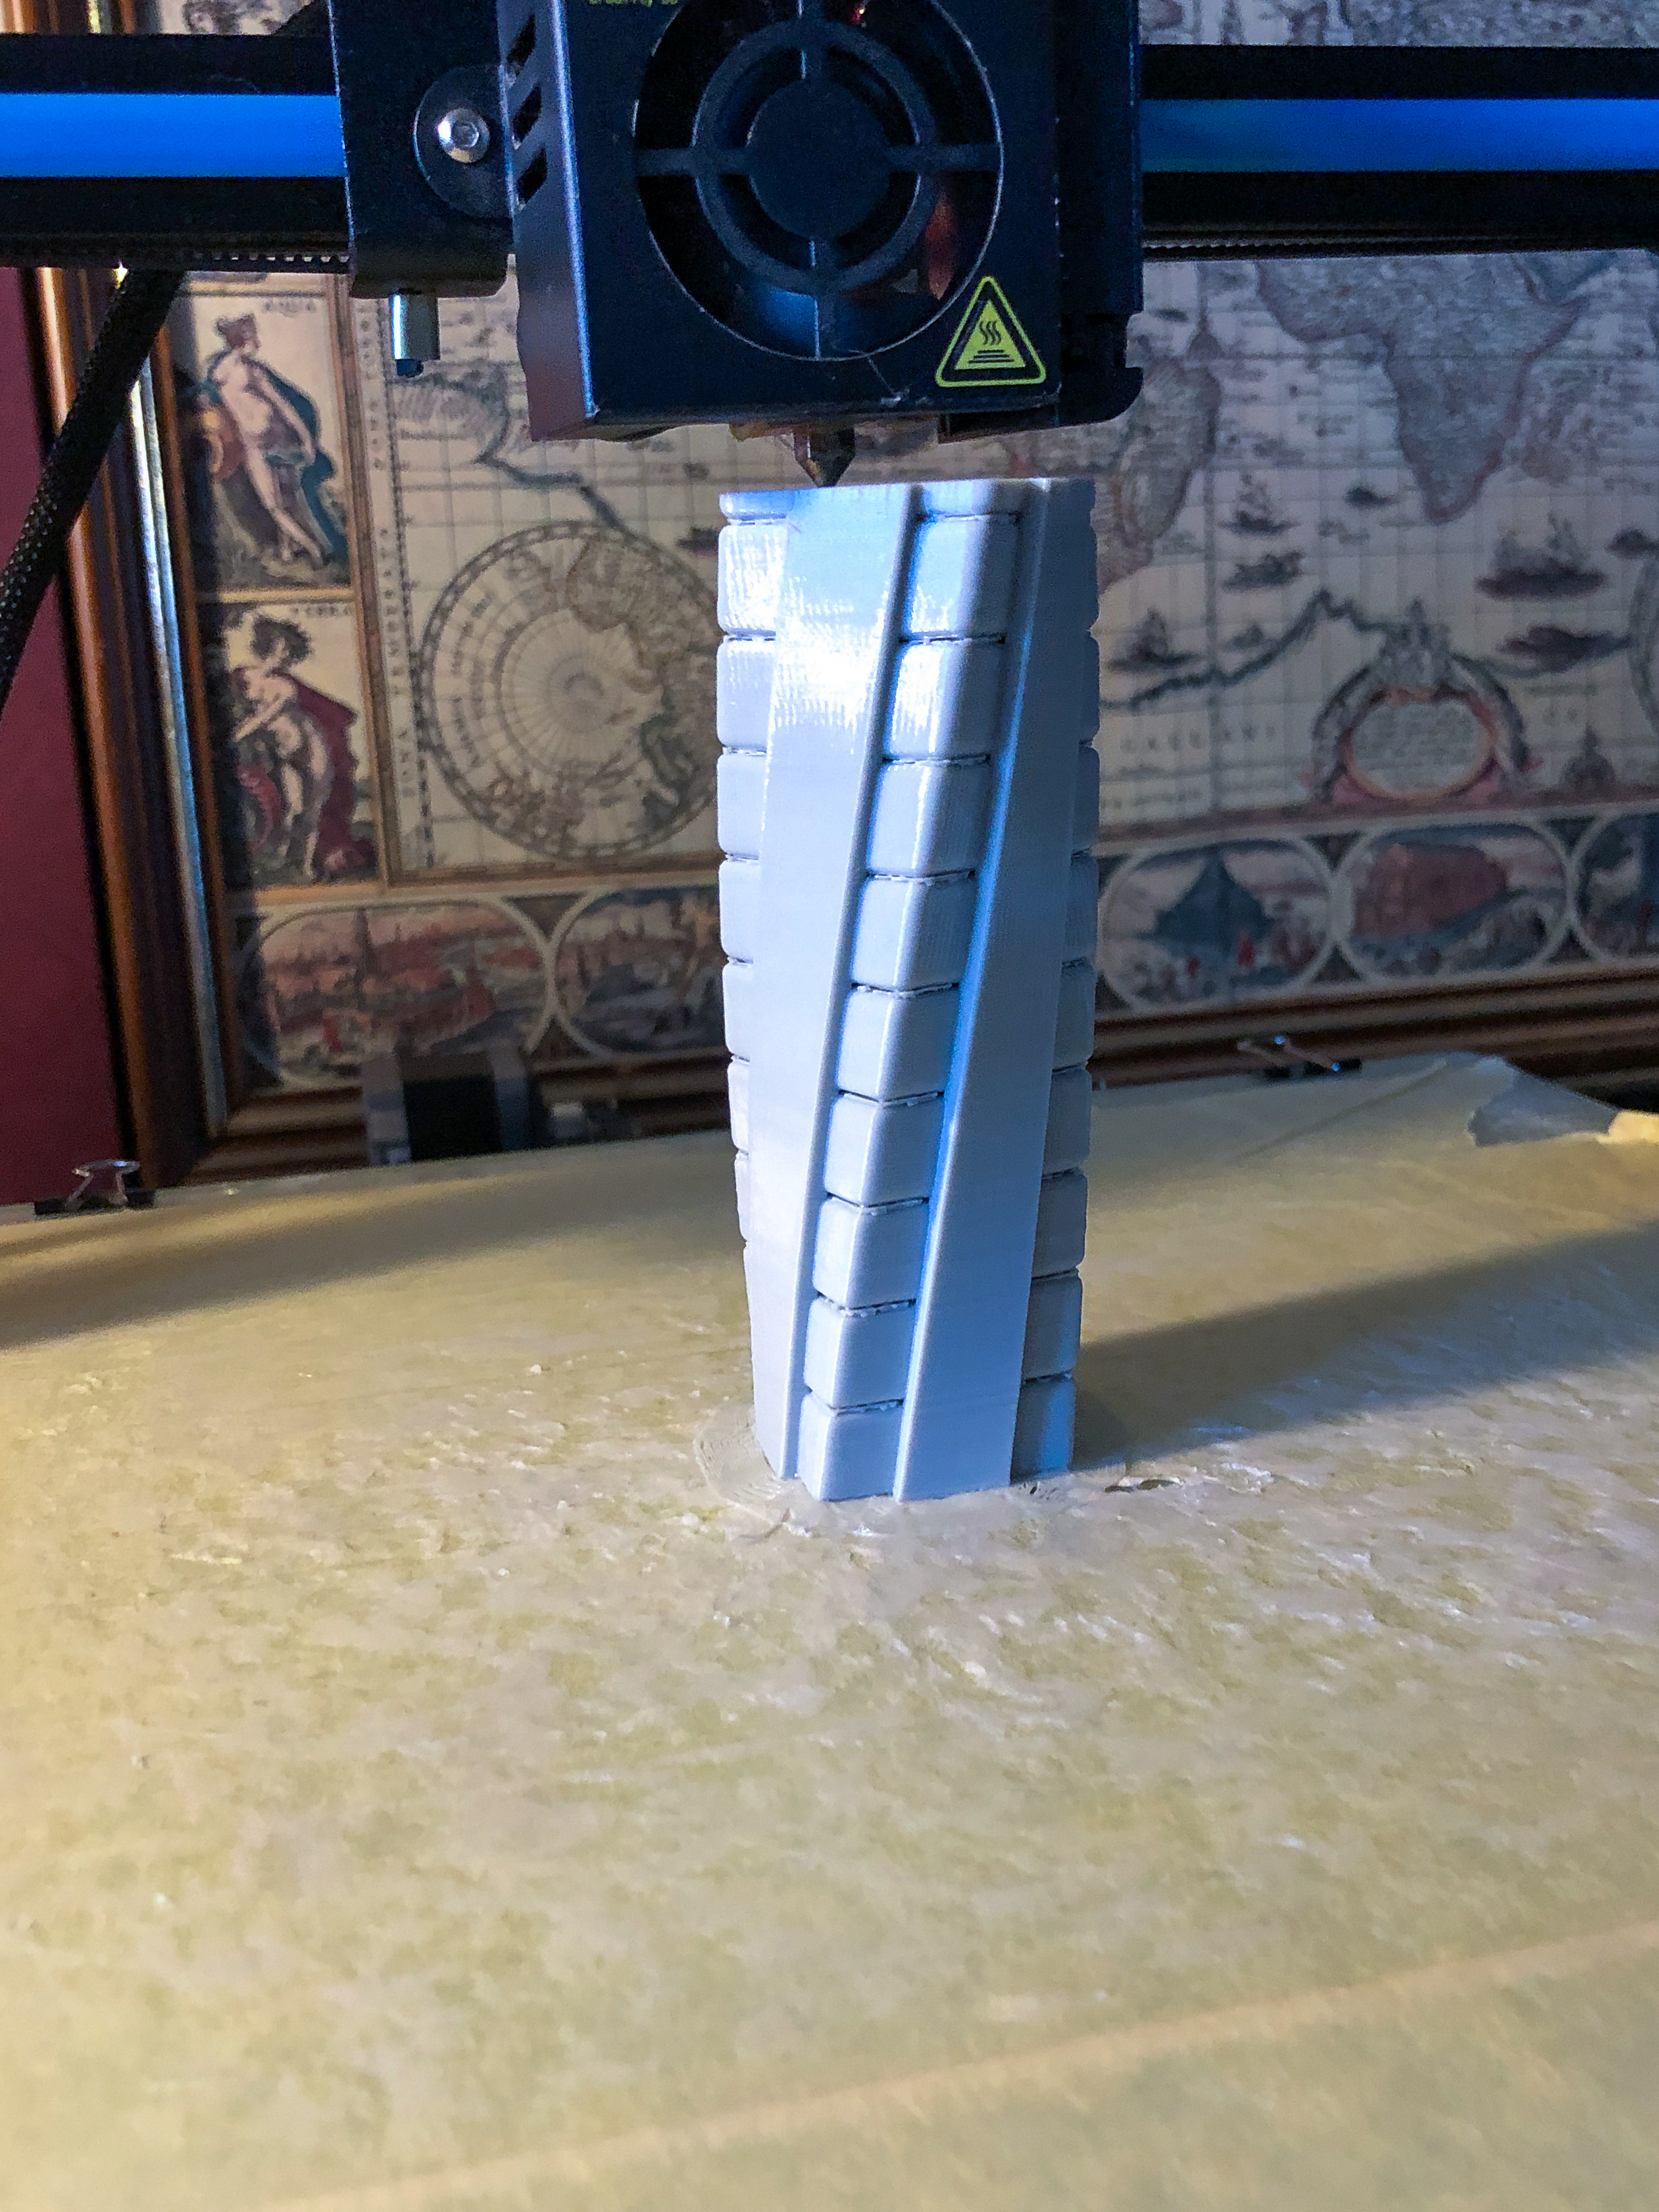
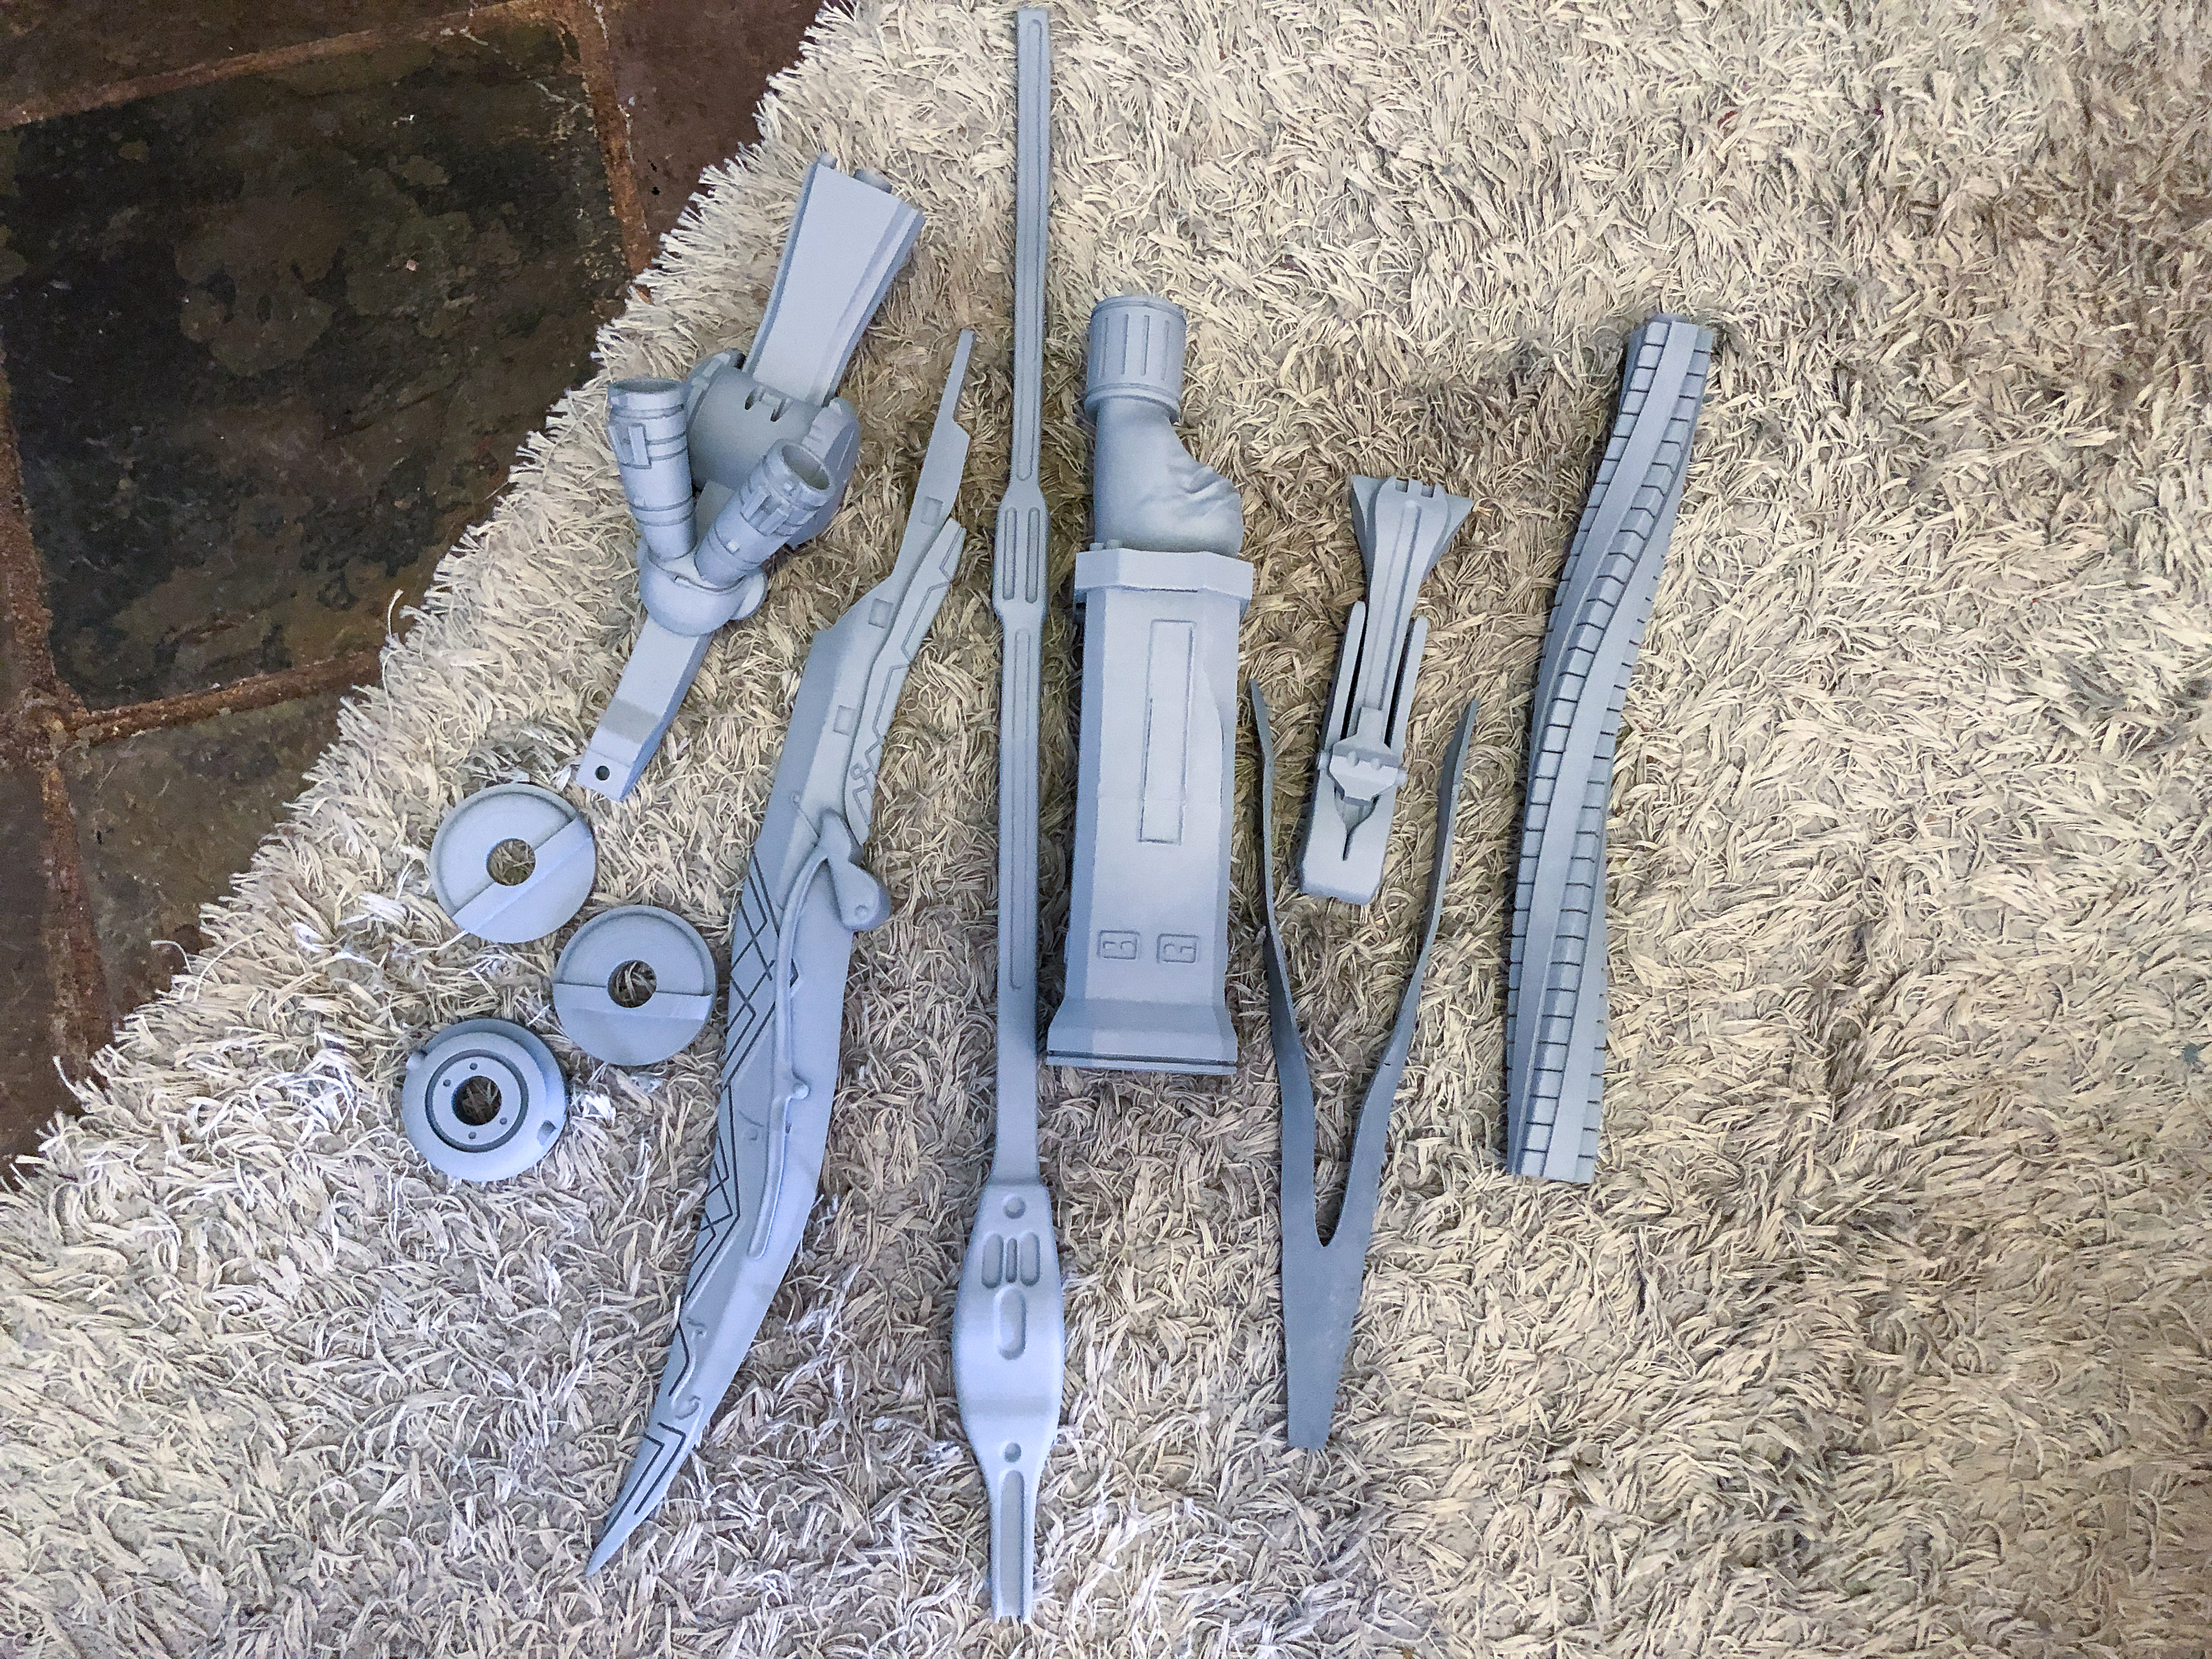
Step 1: 3D Print All the Parts
At 100% scale the model’s dimensions are approximately:
- Width 173 mm
- Length 1500 mm
- Height 105 mm
Firstly before 3D printing all the parts, you need to measure how tall your spear should be (use Aloy's photos as a reference), and then you'll need to scale each piece accordingly before sending it to your 3D printer.
Don't worry if you have just an average 200mmx200mm printer. The spear design is cut into pieces that fit this 3D printer. And it's also placed on the surface the way we would print it to save you time. Sometimes it might require some supports.
3D printer setting:
- Layer height 0.2 mm
- Infill 15%
- Supports 45°
For parts that are tall but have a small base, use a 10 mm brim for better bed adhesion.
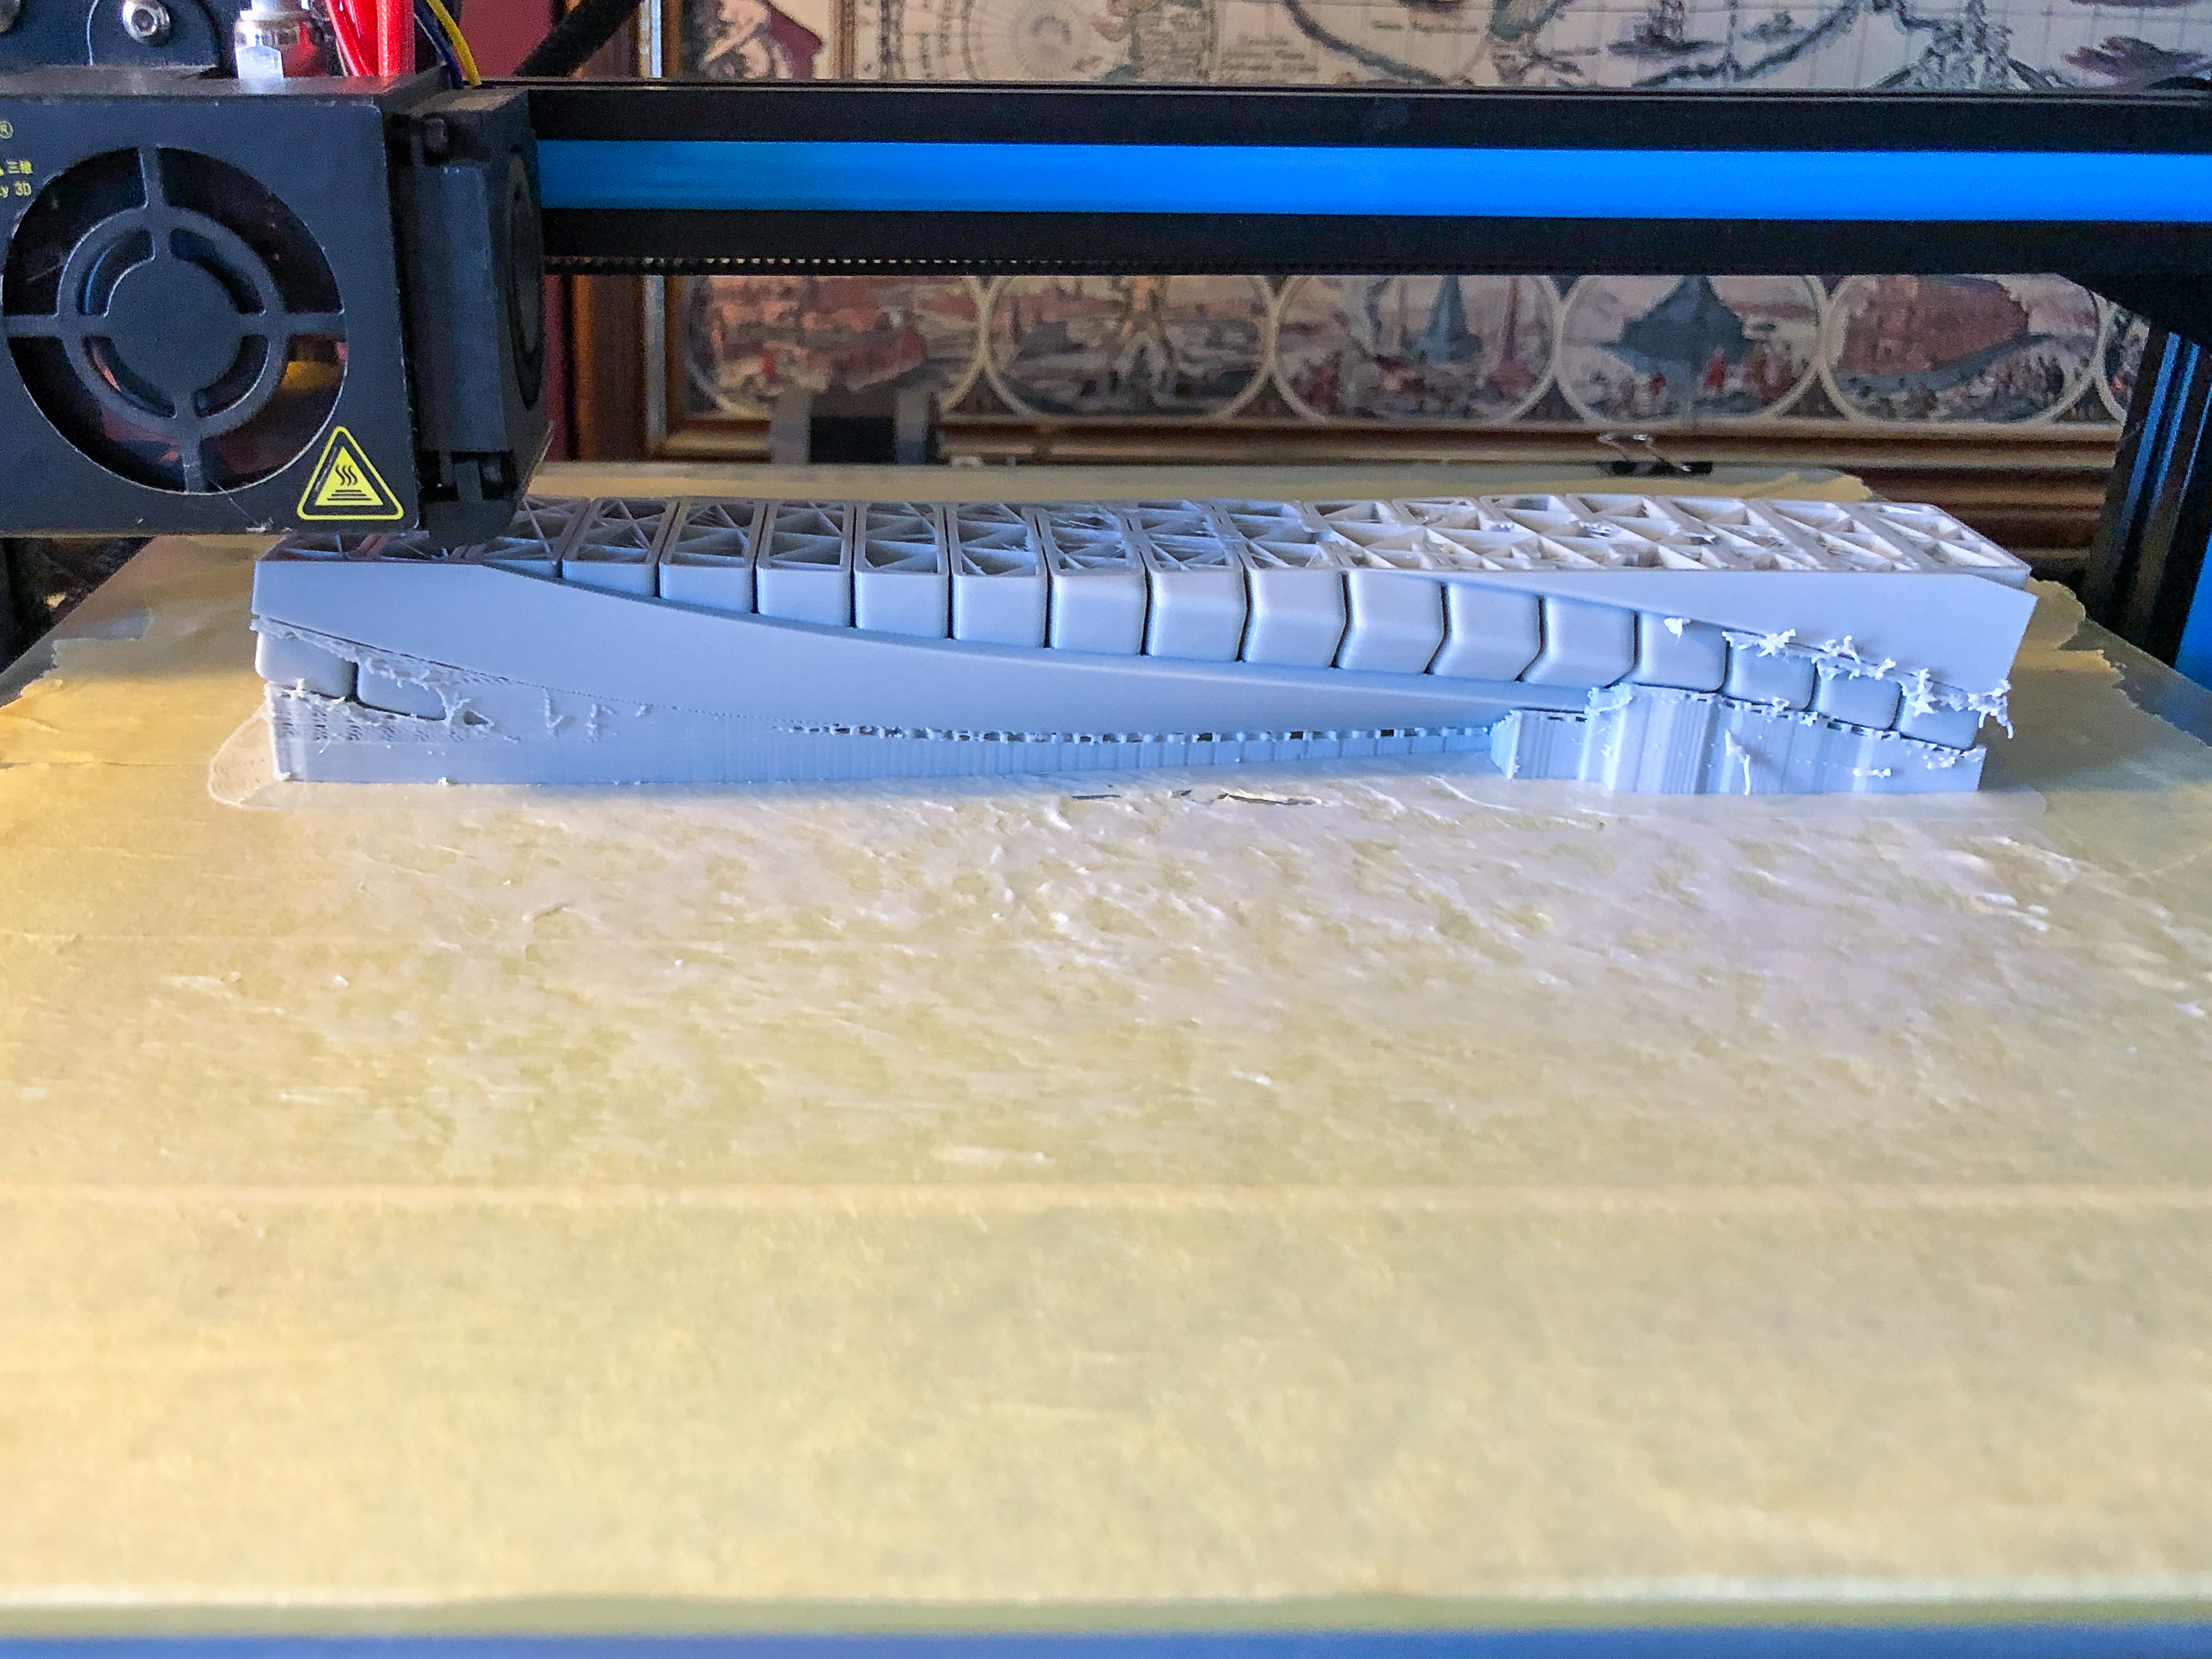
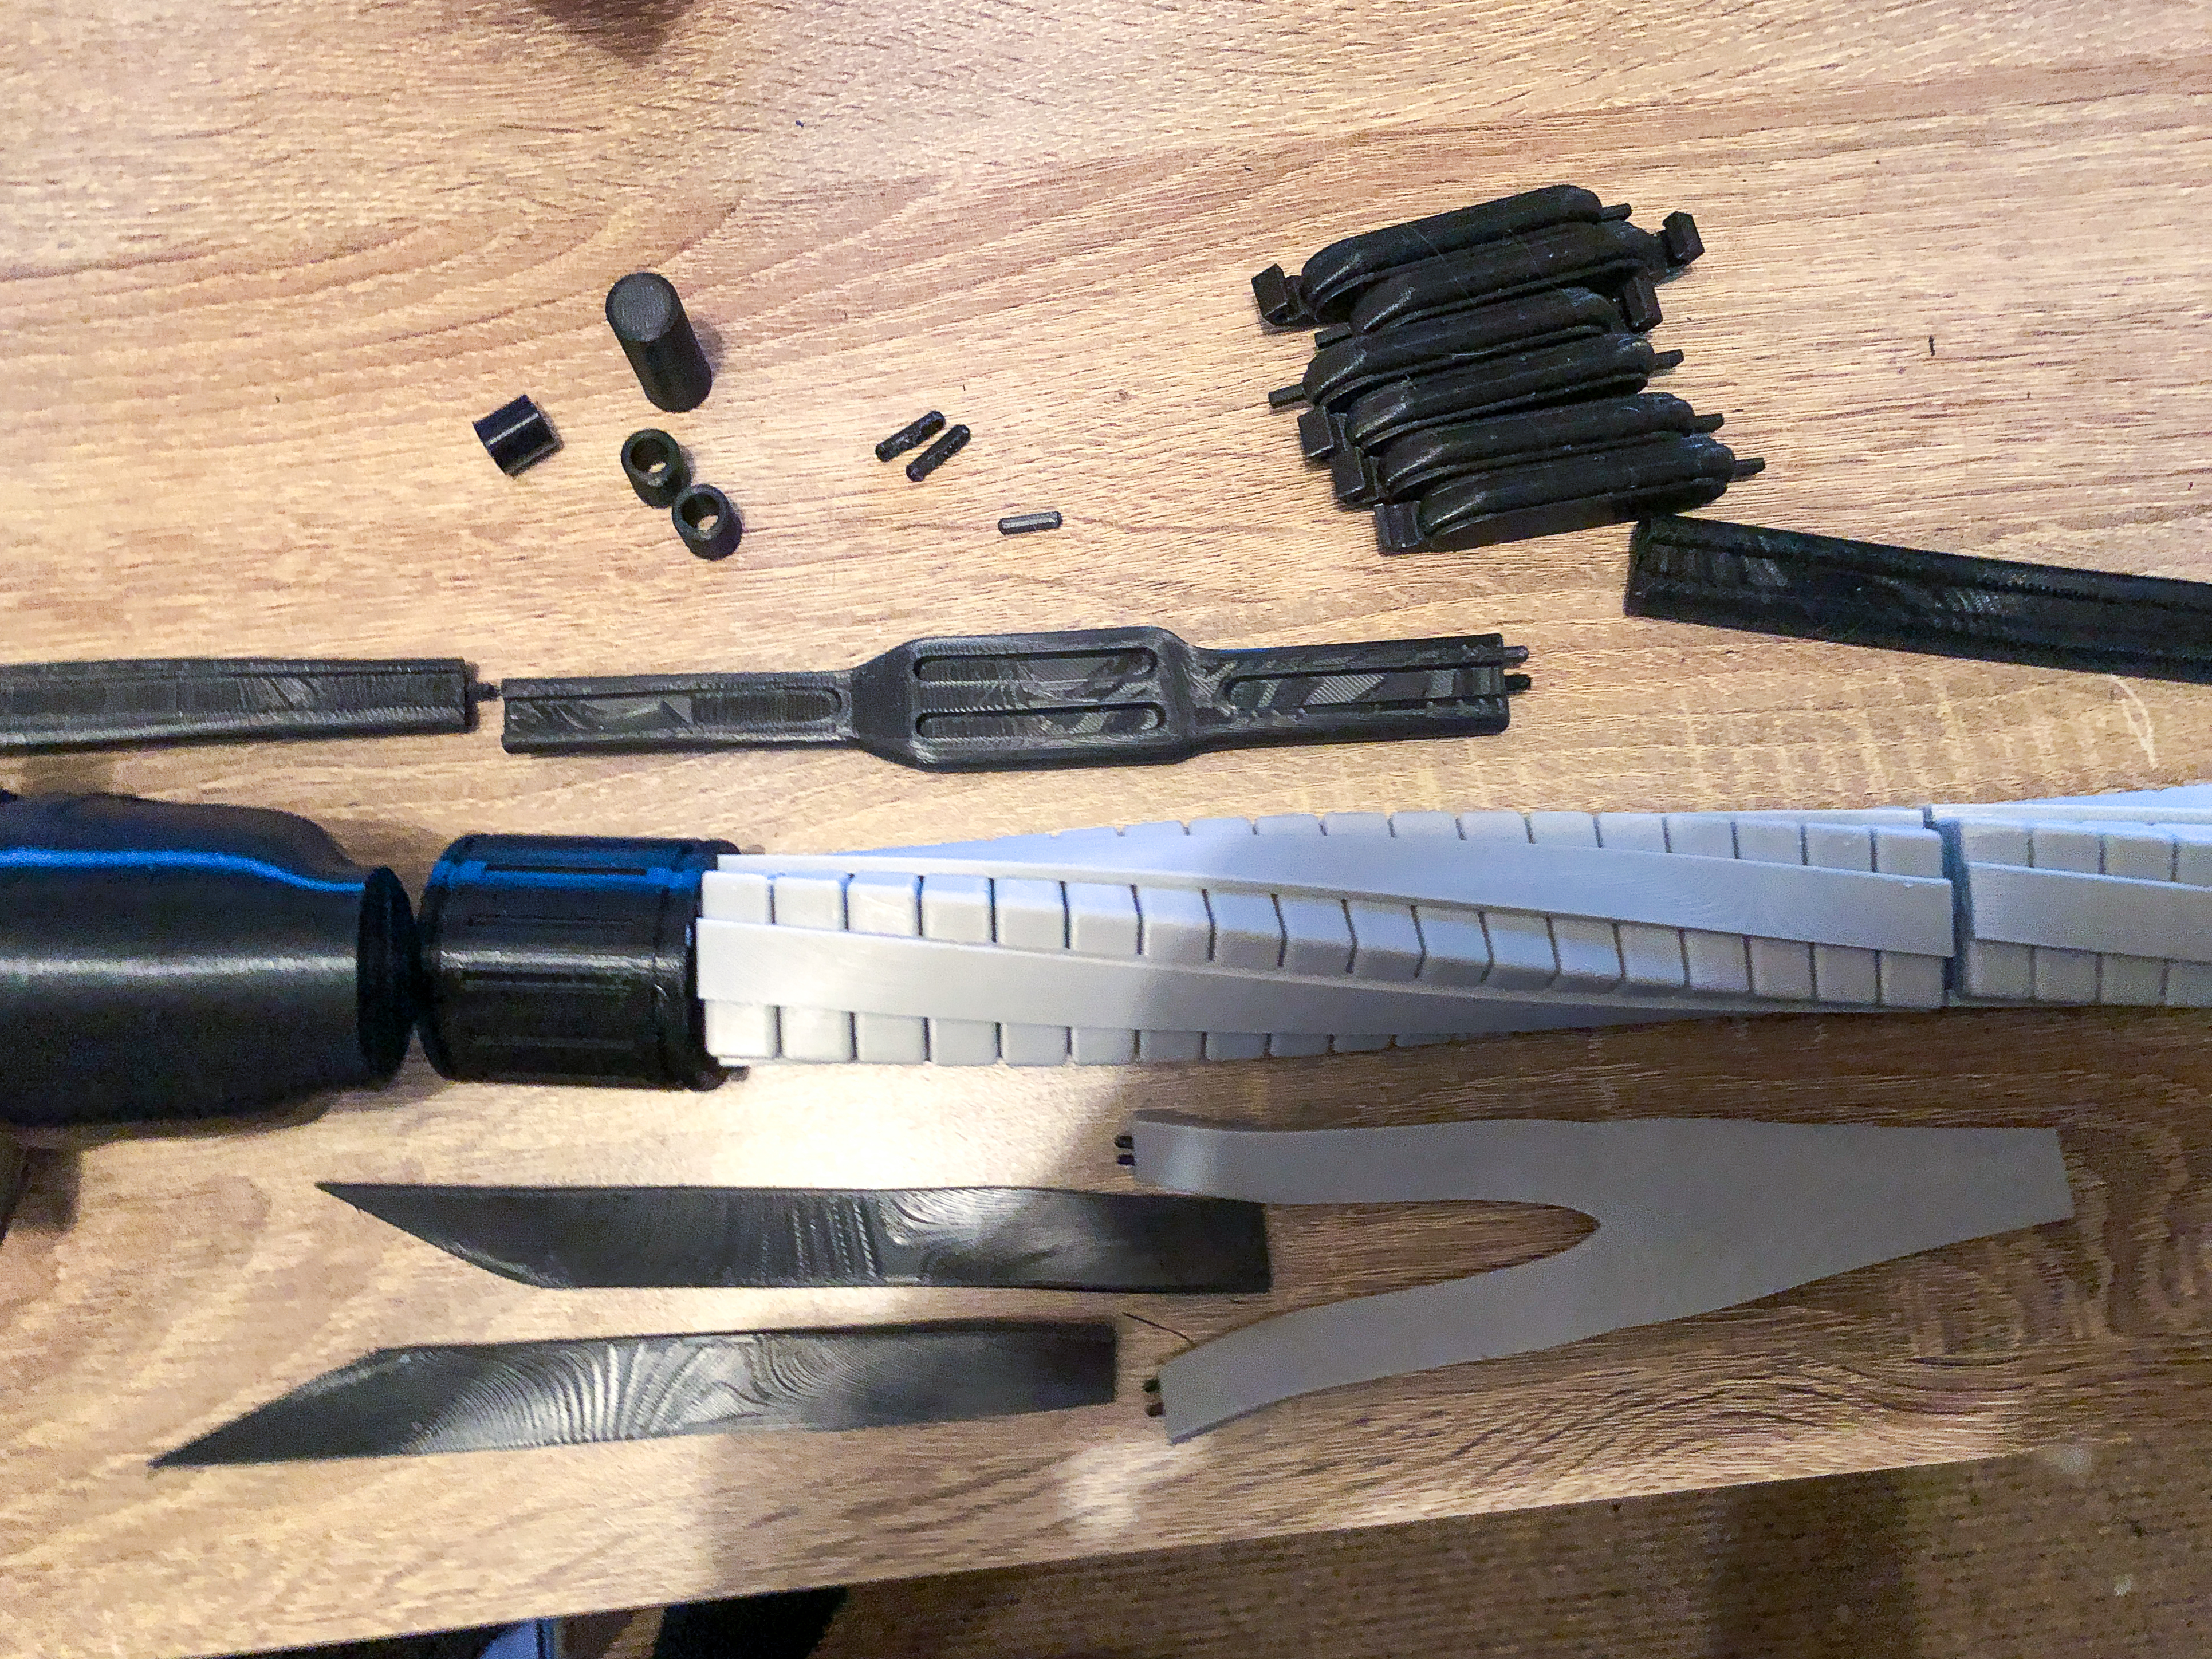
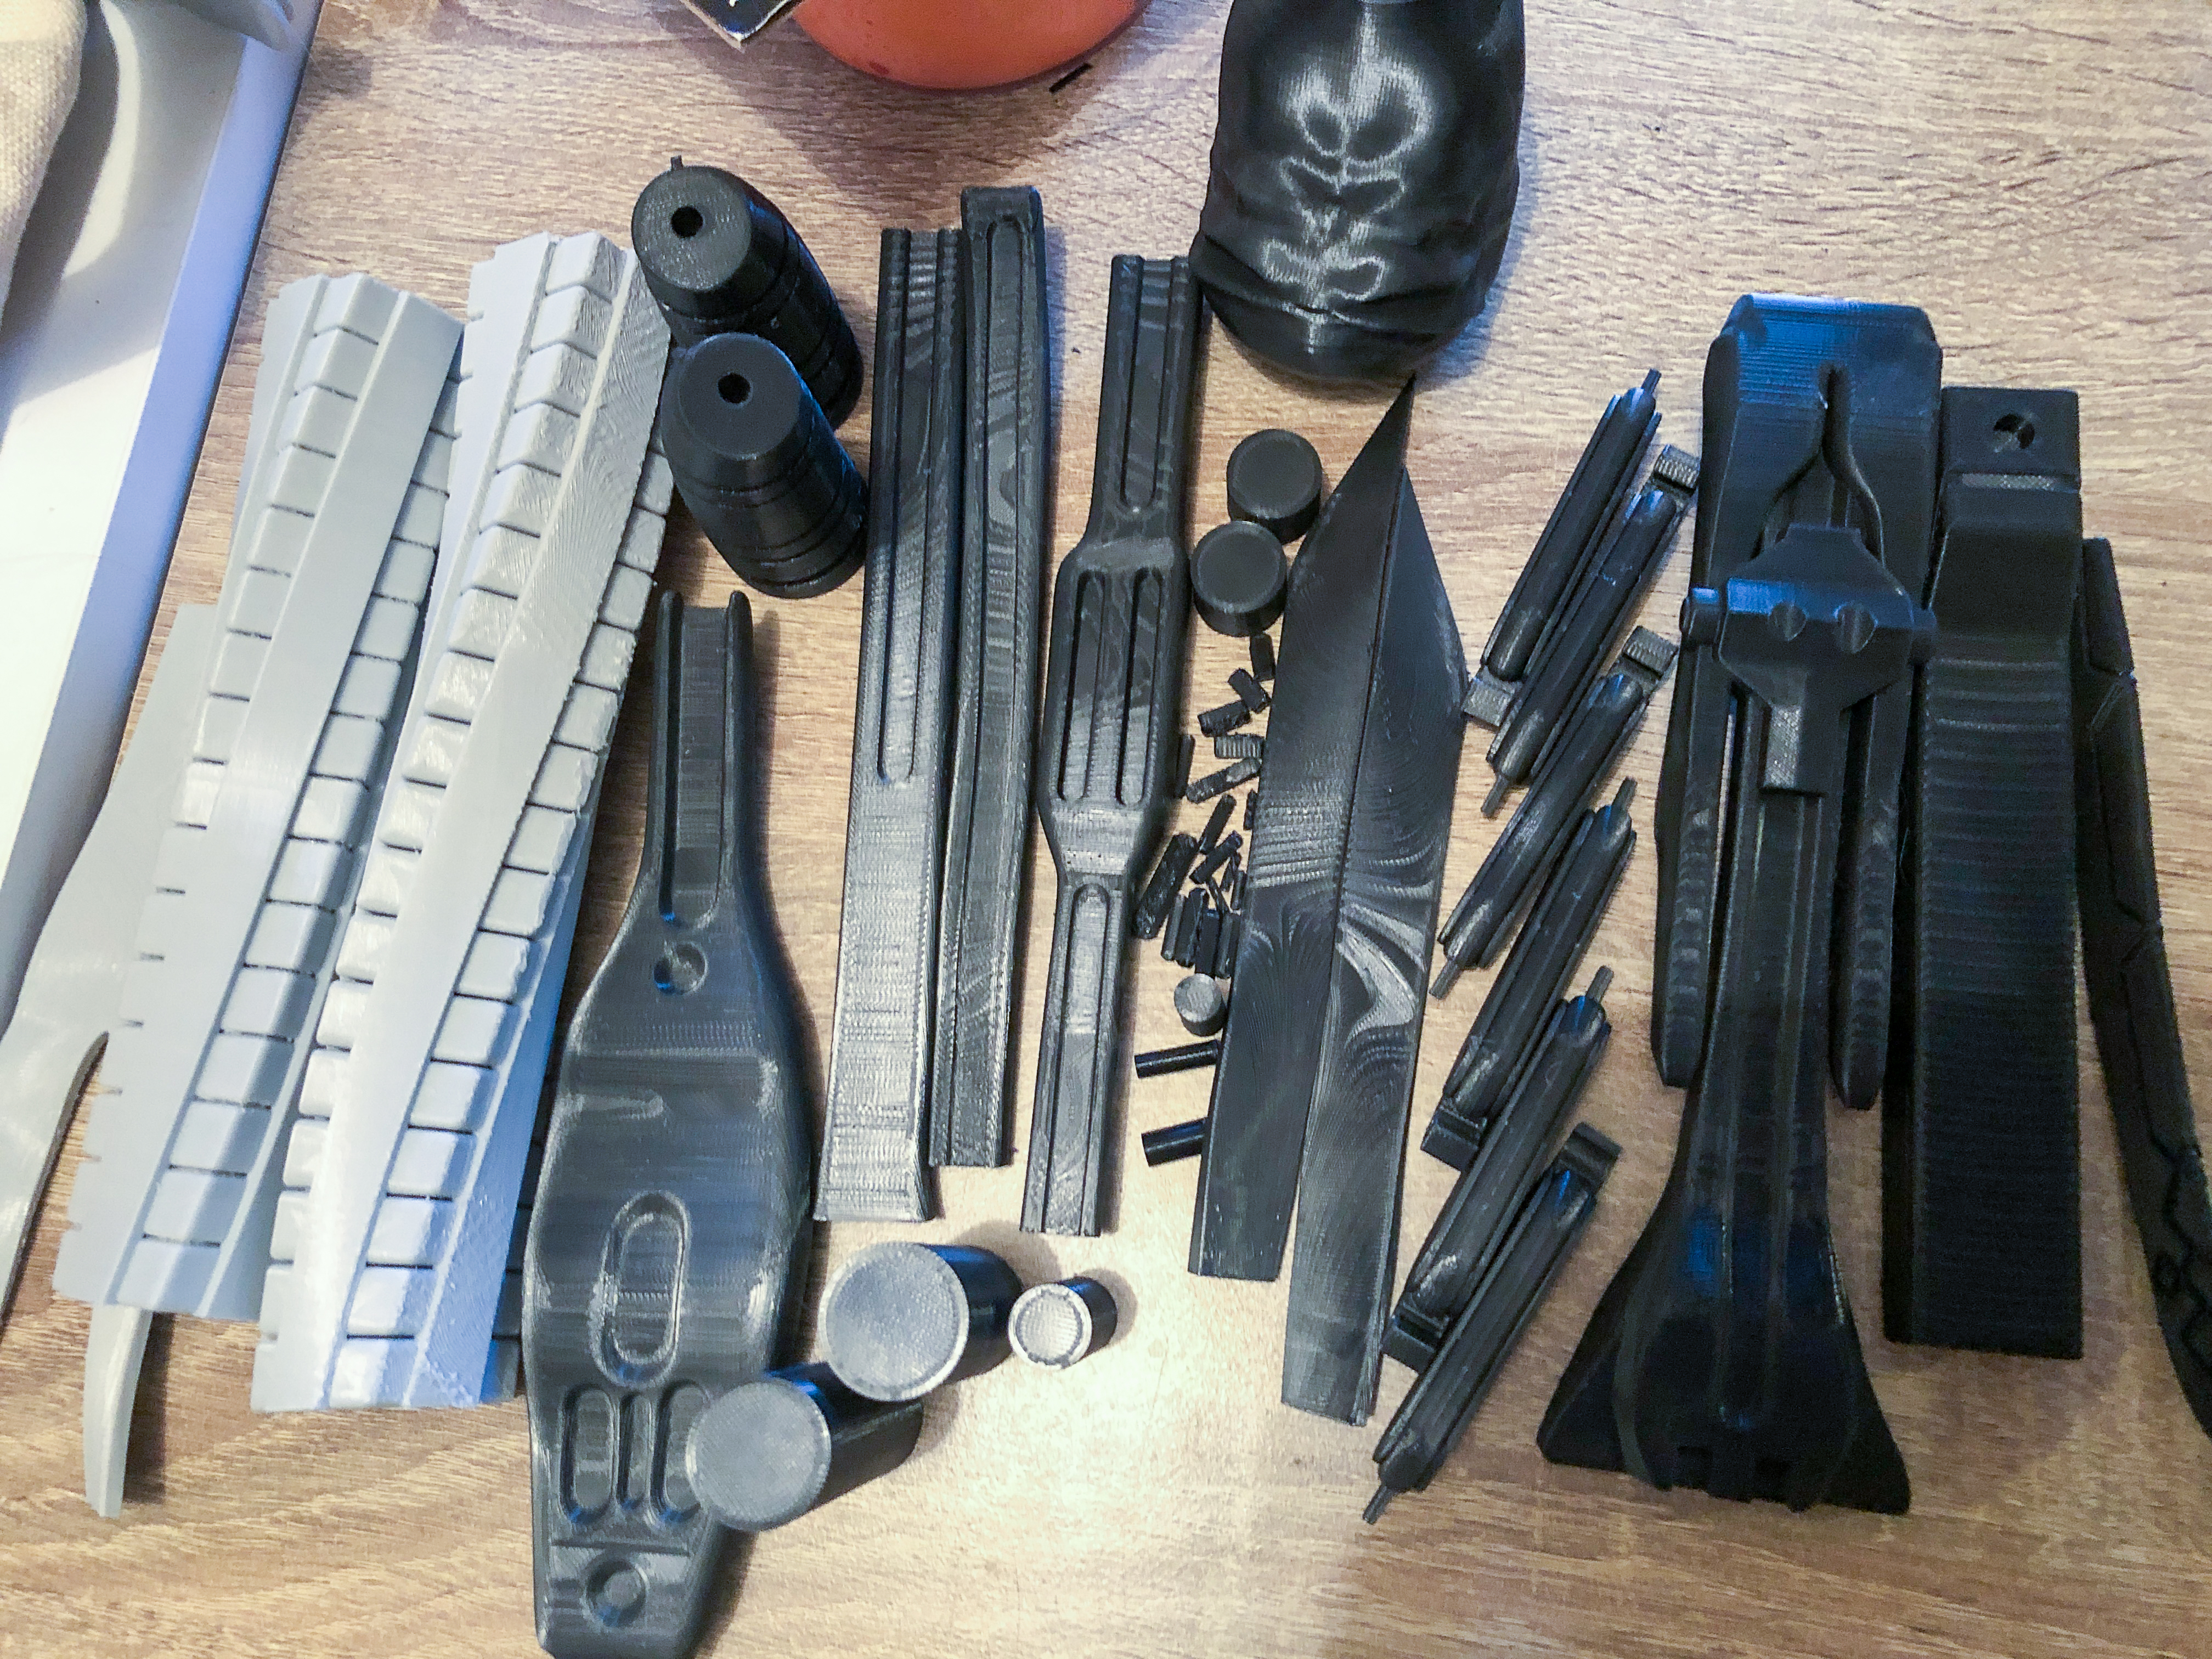
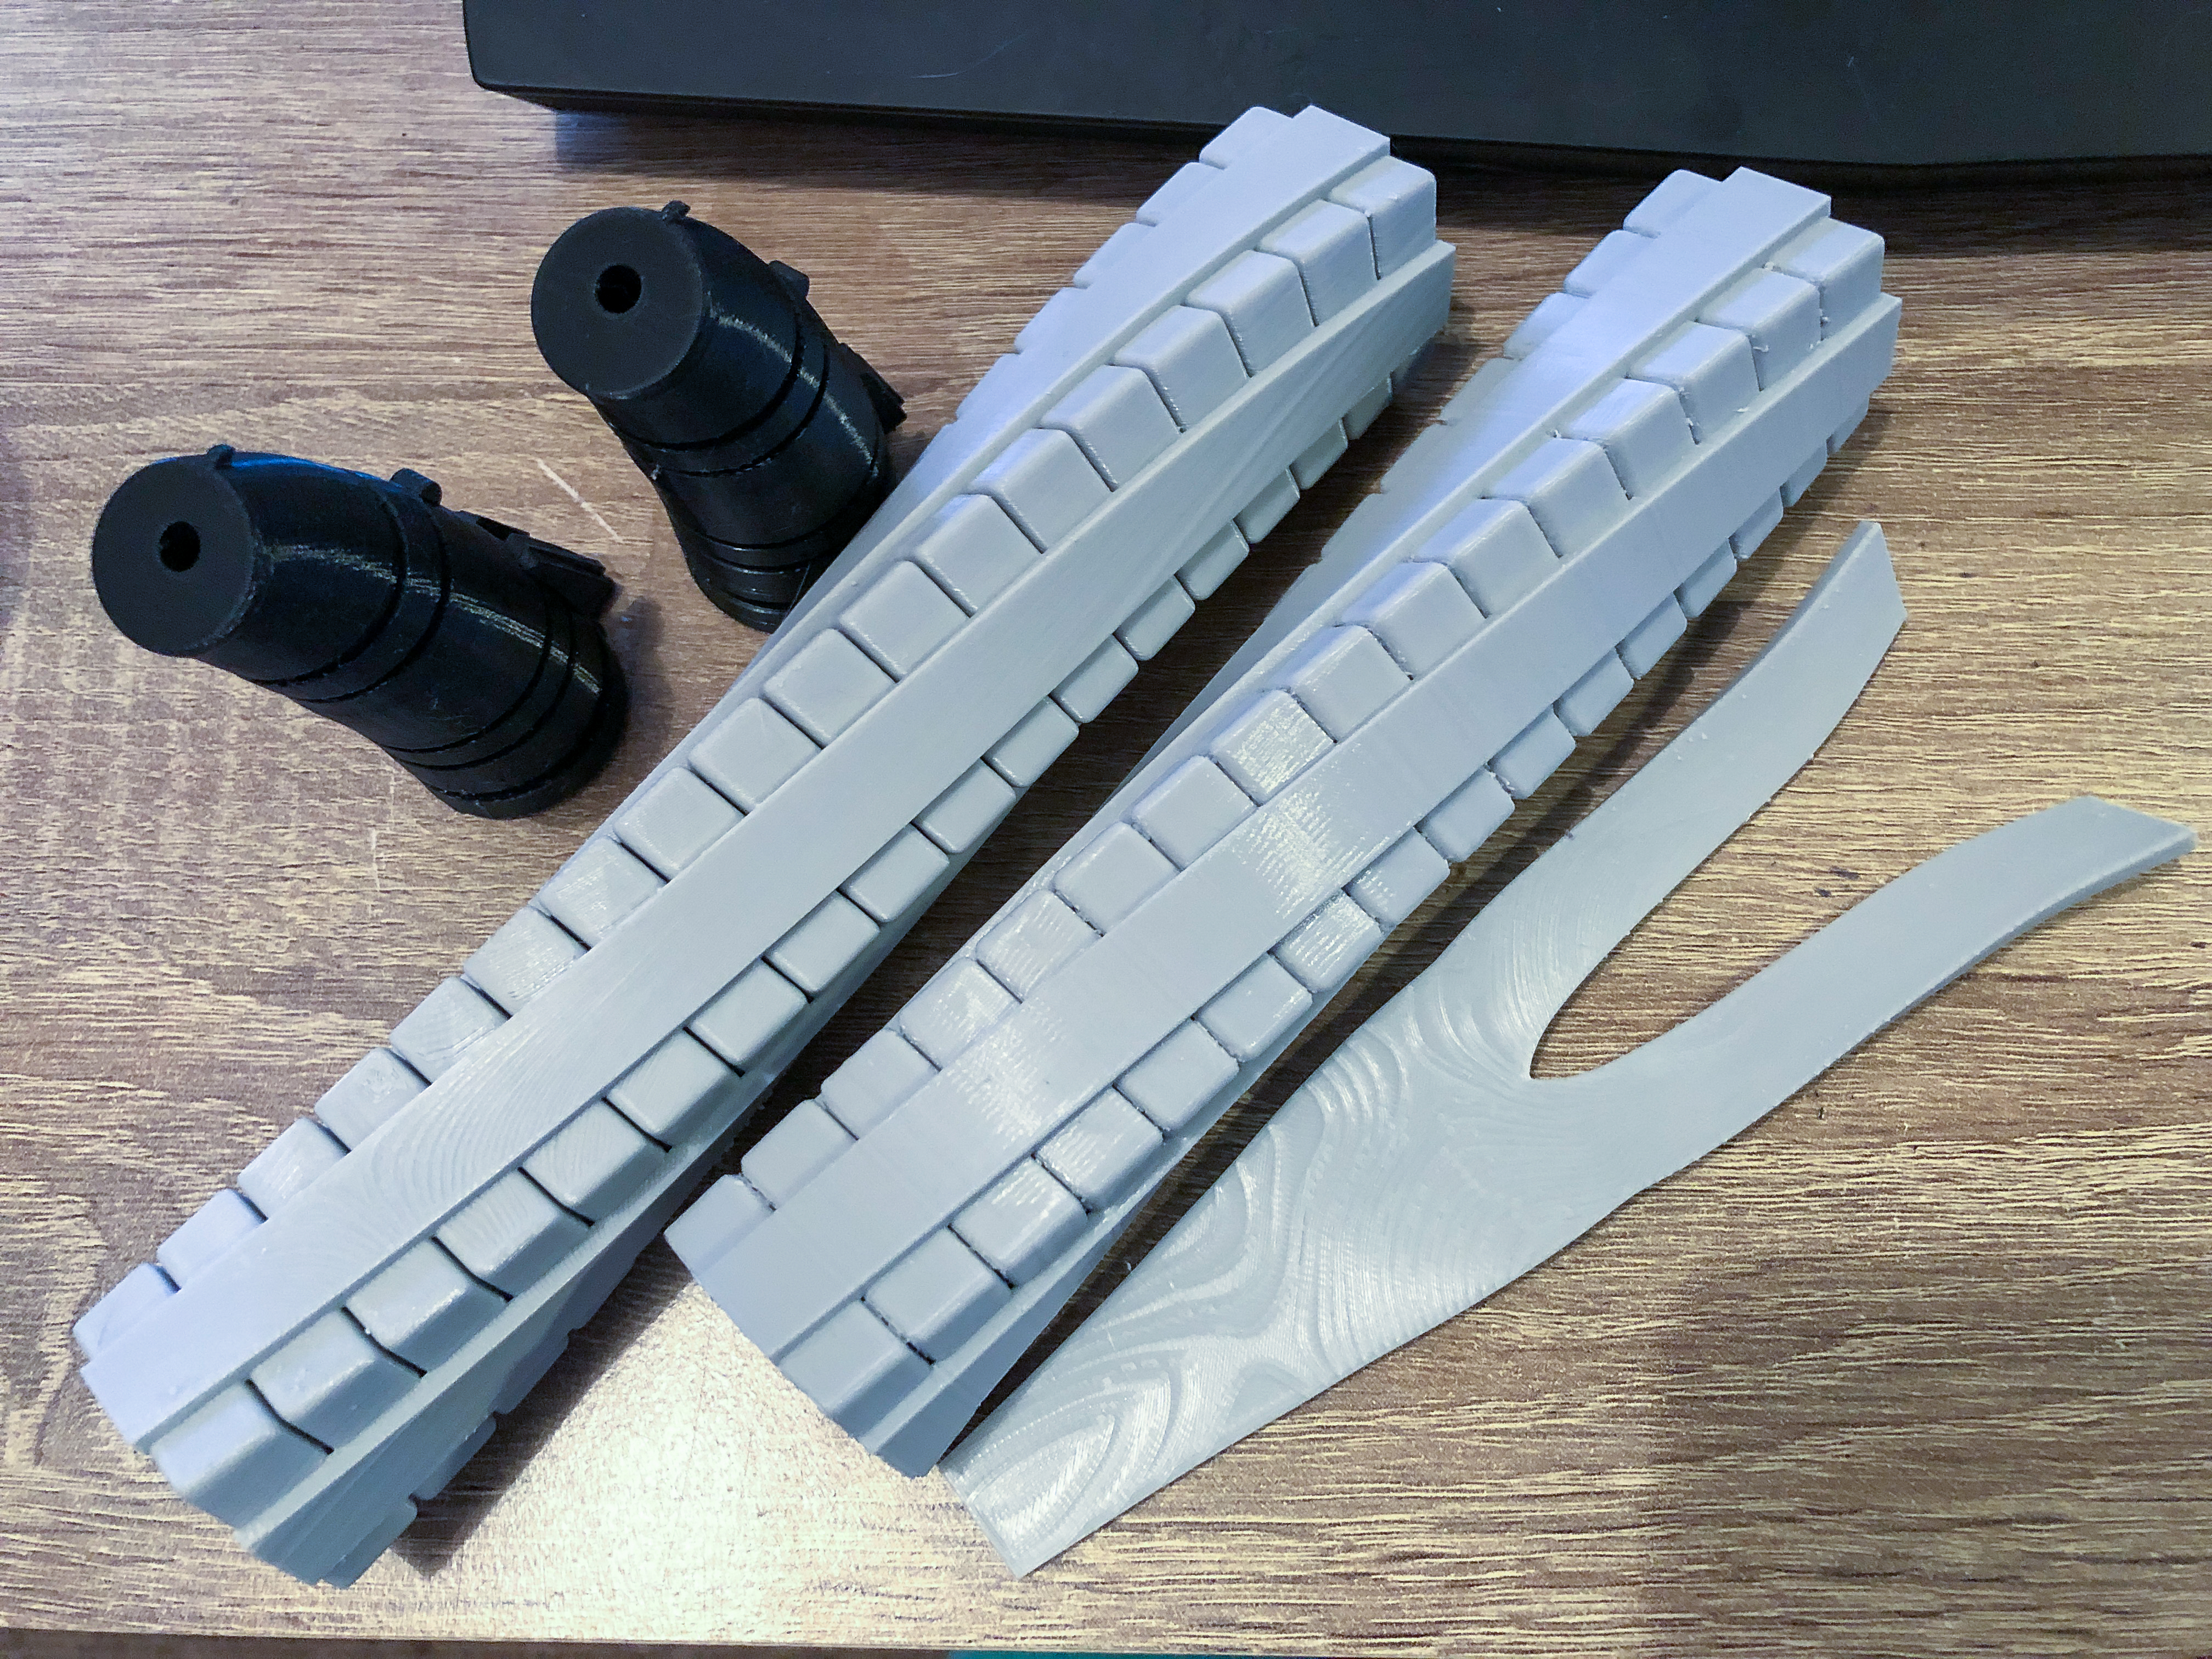
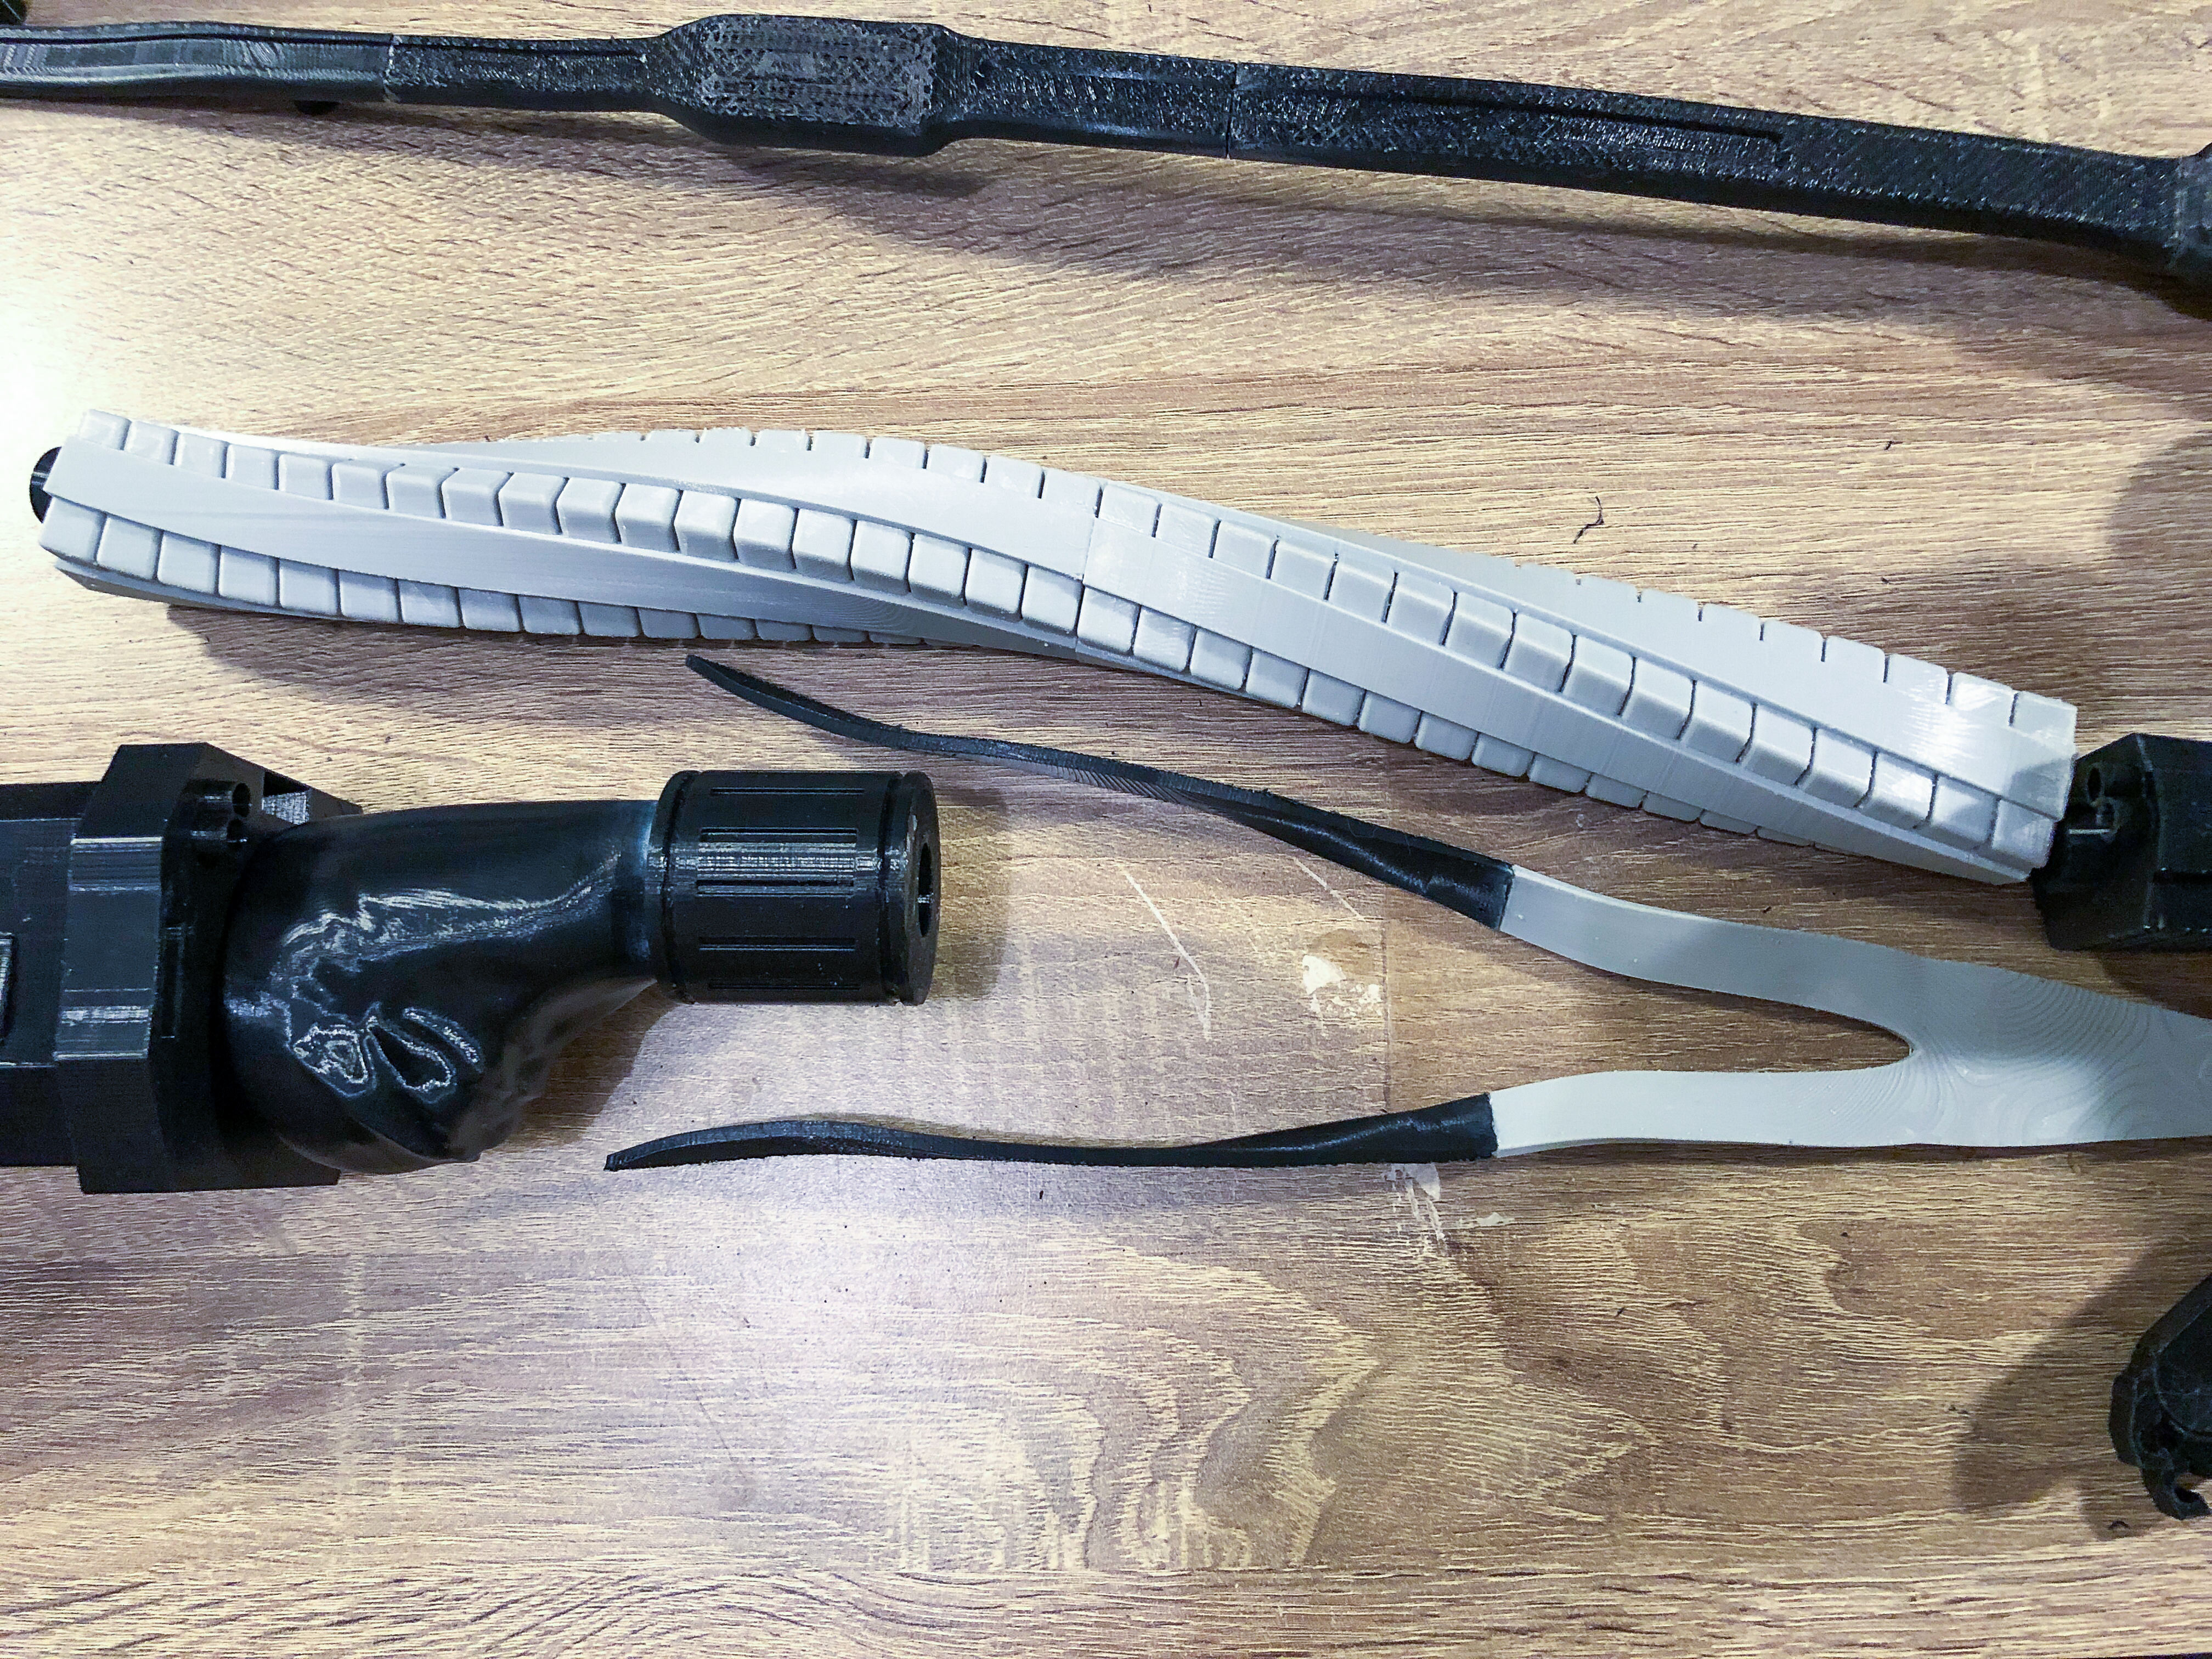
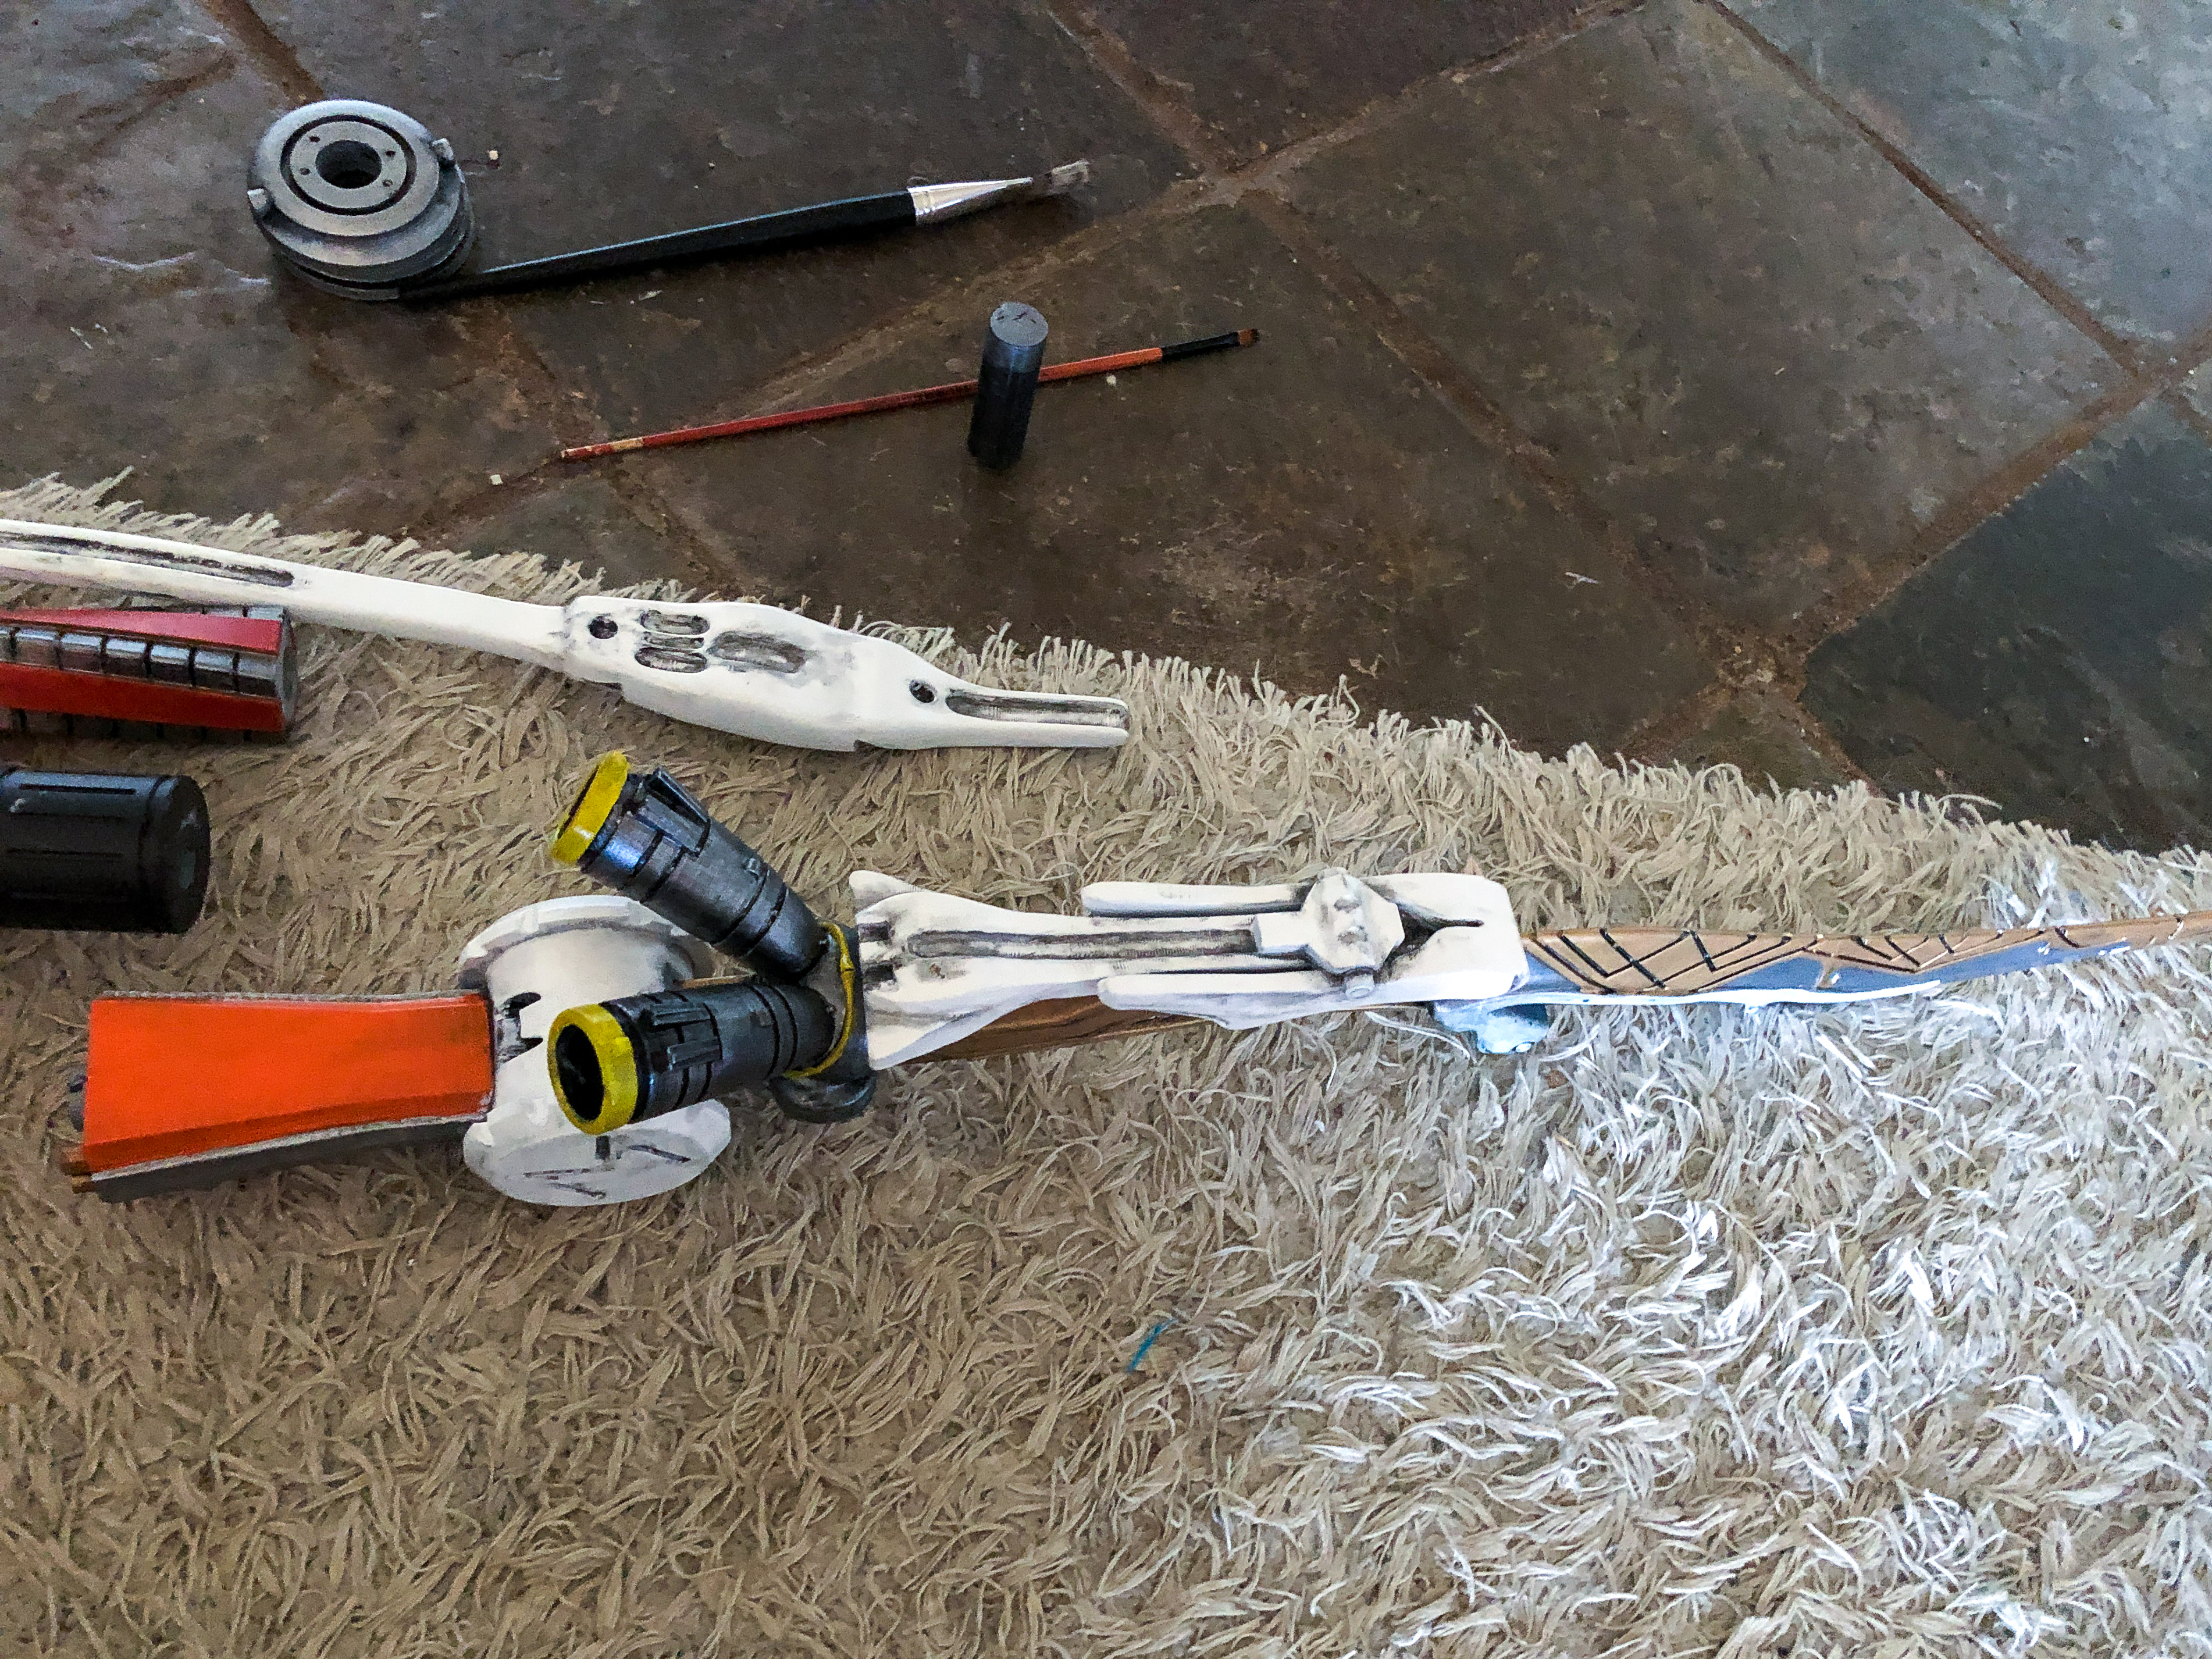
Step 2: Remove Supports and Glue!
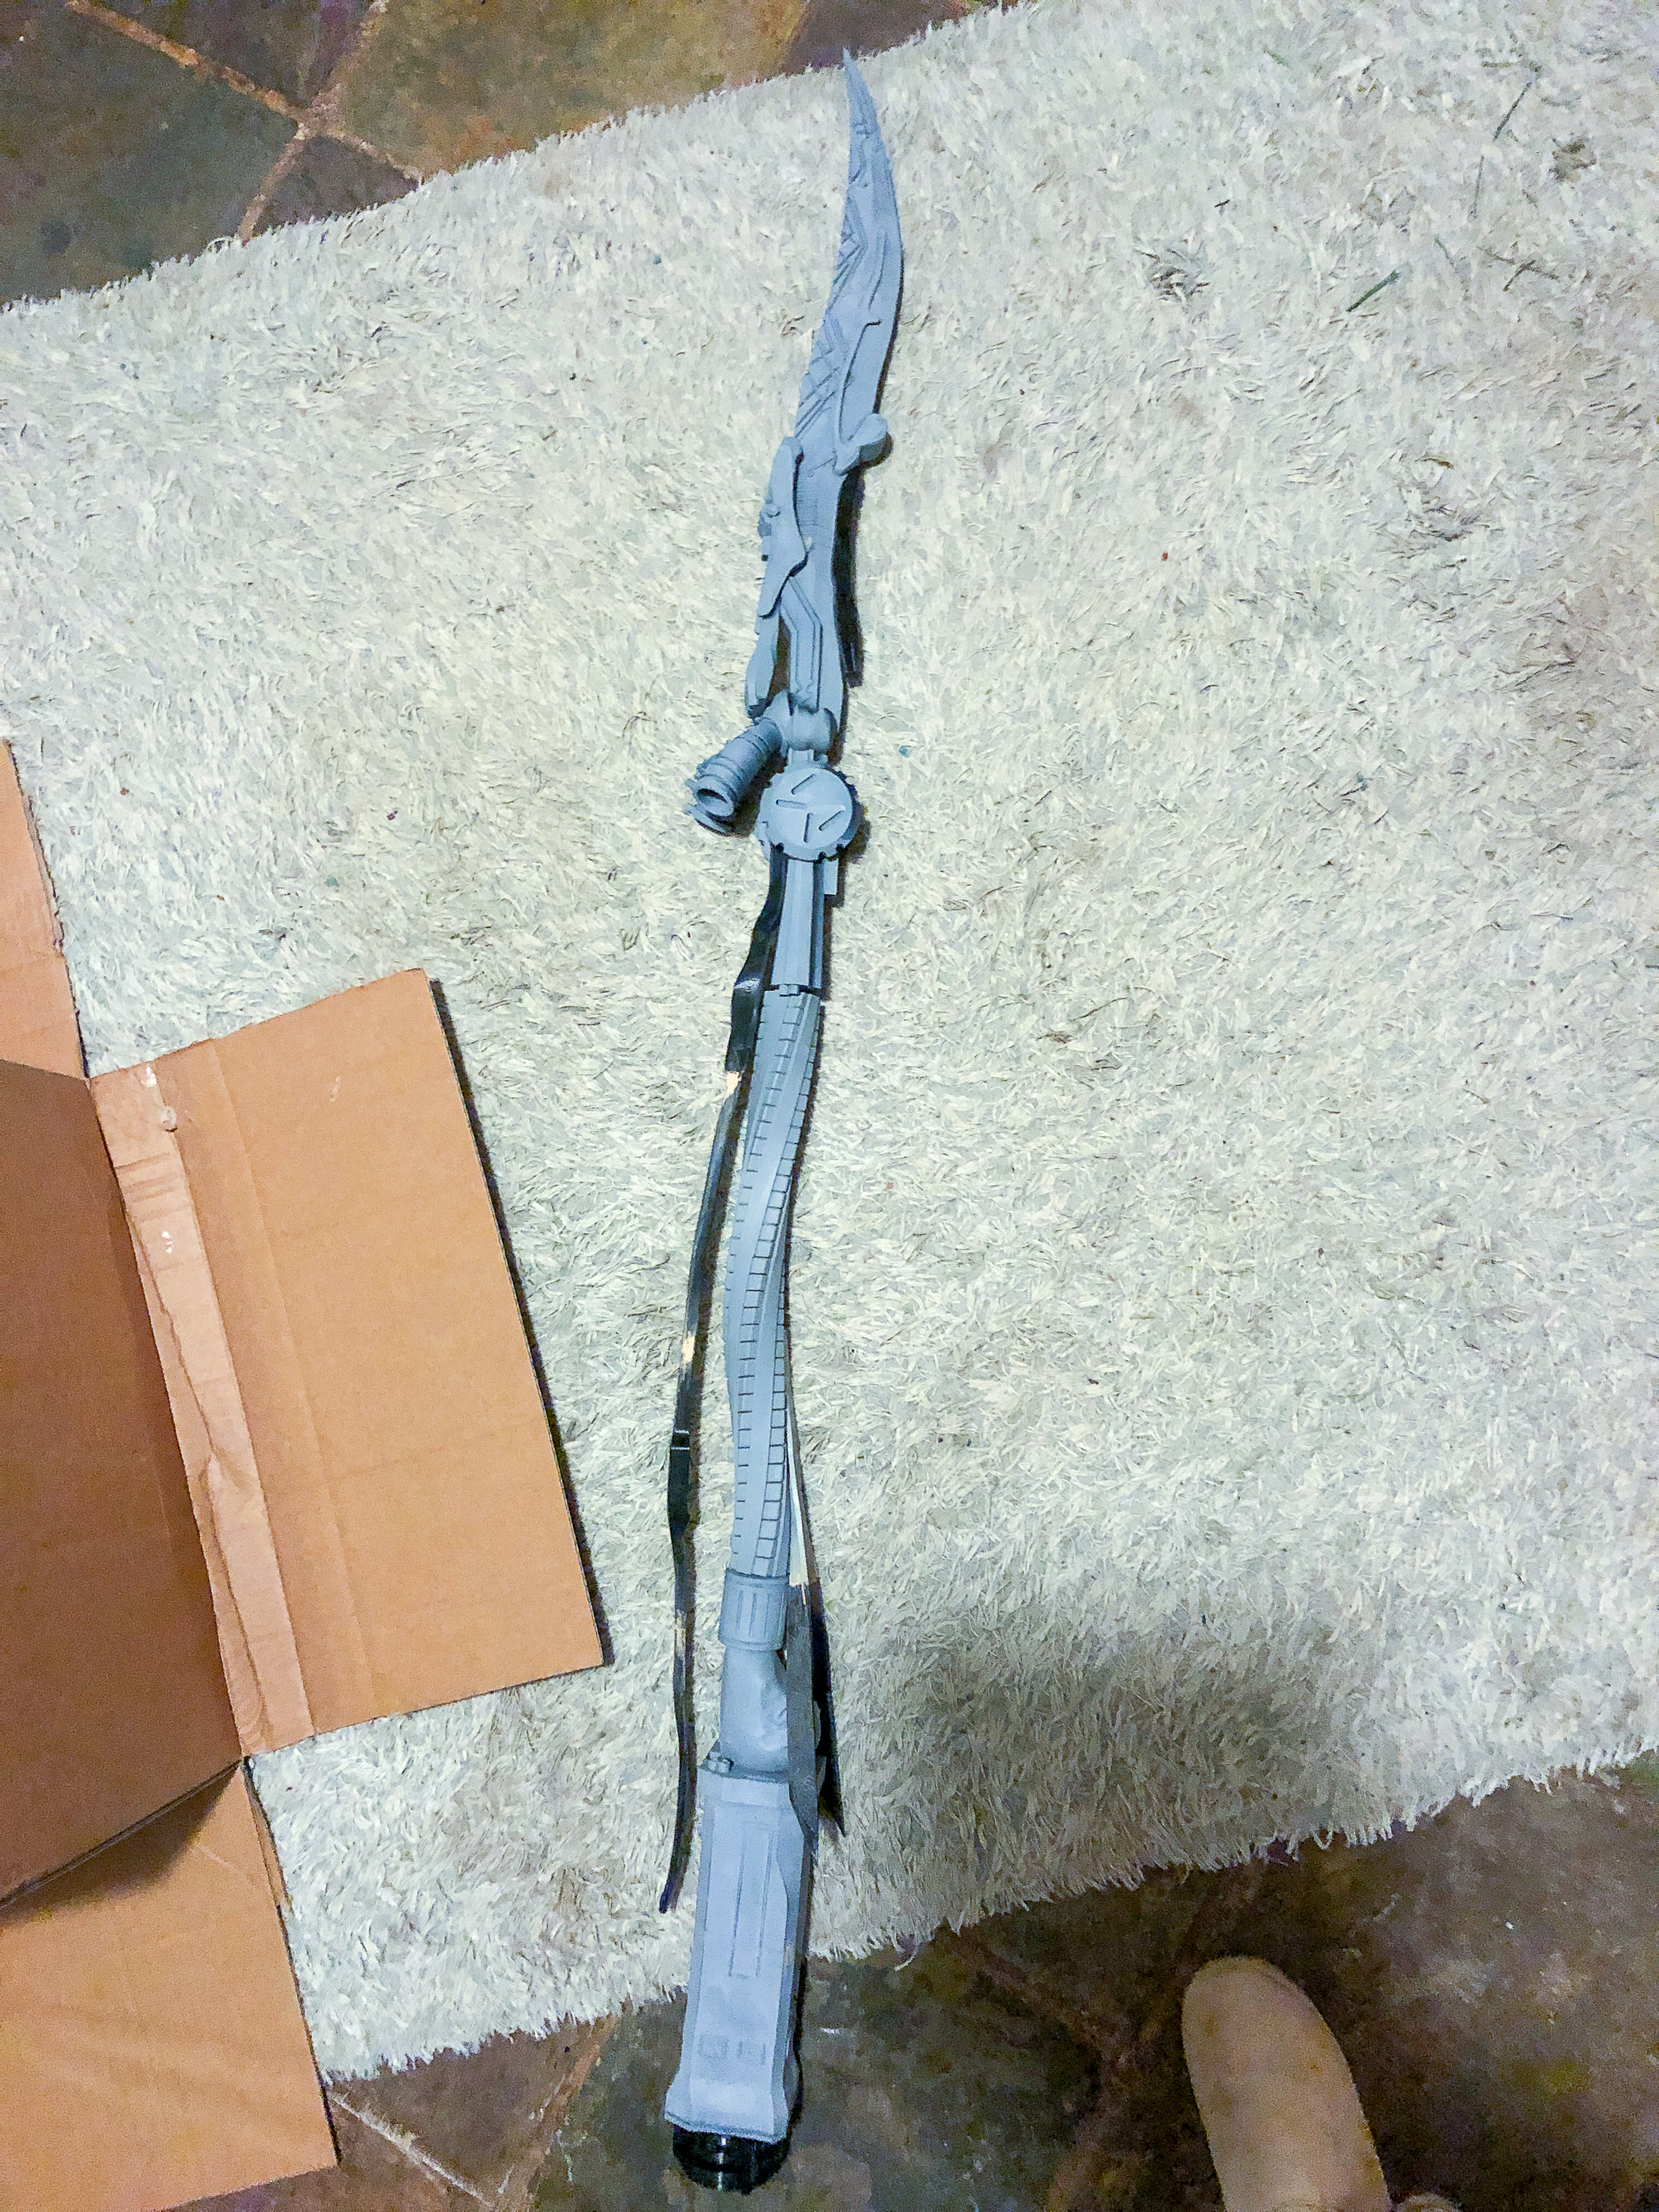
Once all the parts are printed, it's time to assemble the Champion's spear! Remove the supports from the pieces, clean them up using sandpaper and figure out where to place them. Then glue it together using superglue.
You don't want to glue the complete spear in one piece just yet. Think a bit about how you want to paint it and if it isn't easier to assemble only the large pieces. (The spearhead, the main rod...) You'll connect them together later after you paint them with a base color.
The spear pieces have hexagonal holes. Use the hex pegs (among the files) to connect them. The hex pegs both strengthen the connections and also help you with alignment when gluing.

Step 3: Hide the Seams and Smooth Out the Surface
When you glue two pieces together, you can always see a visible seam. To hide it, apply putty using a spatula on the seam, spread it on the surface, and try to get it into the seam. You can use it to hide any 3D printing errors, holes, cracks, and so on.
The putty needs to be 100% dry before you can sand it down.
After you hide the seams, cover the part in a thick layer of spray filler (known as spray putty) and leave overnight to dry. Sand it all down and check the surface it if's smooth enough. If you still don't like the visible layers after 3D printing, repeat the process. I usually apply 3-4 layers. Sand down thoroughly each layer. Use different grid sandpaper. For the smoothest effect, use soft and wet sandpaper. Don't forget to let it rest and dry before applying your primer!
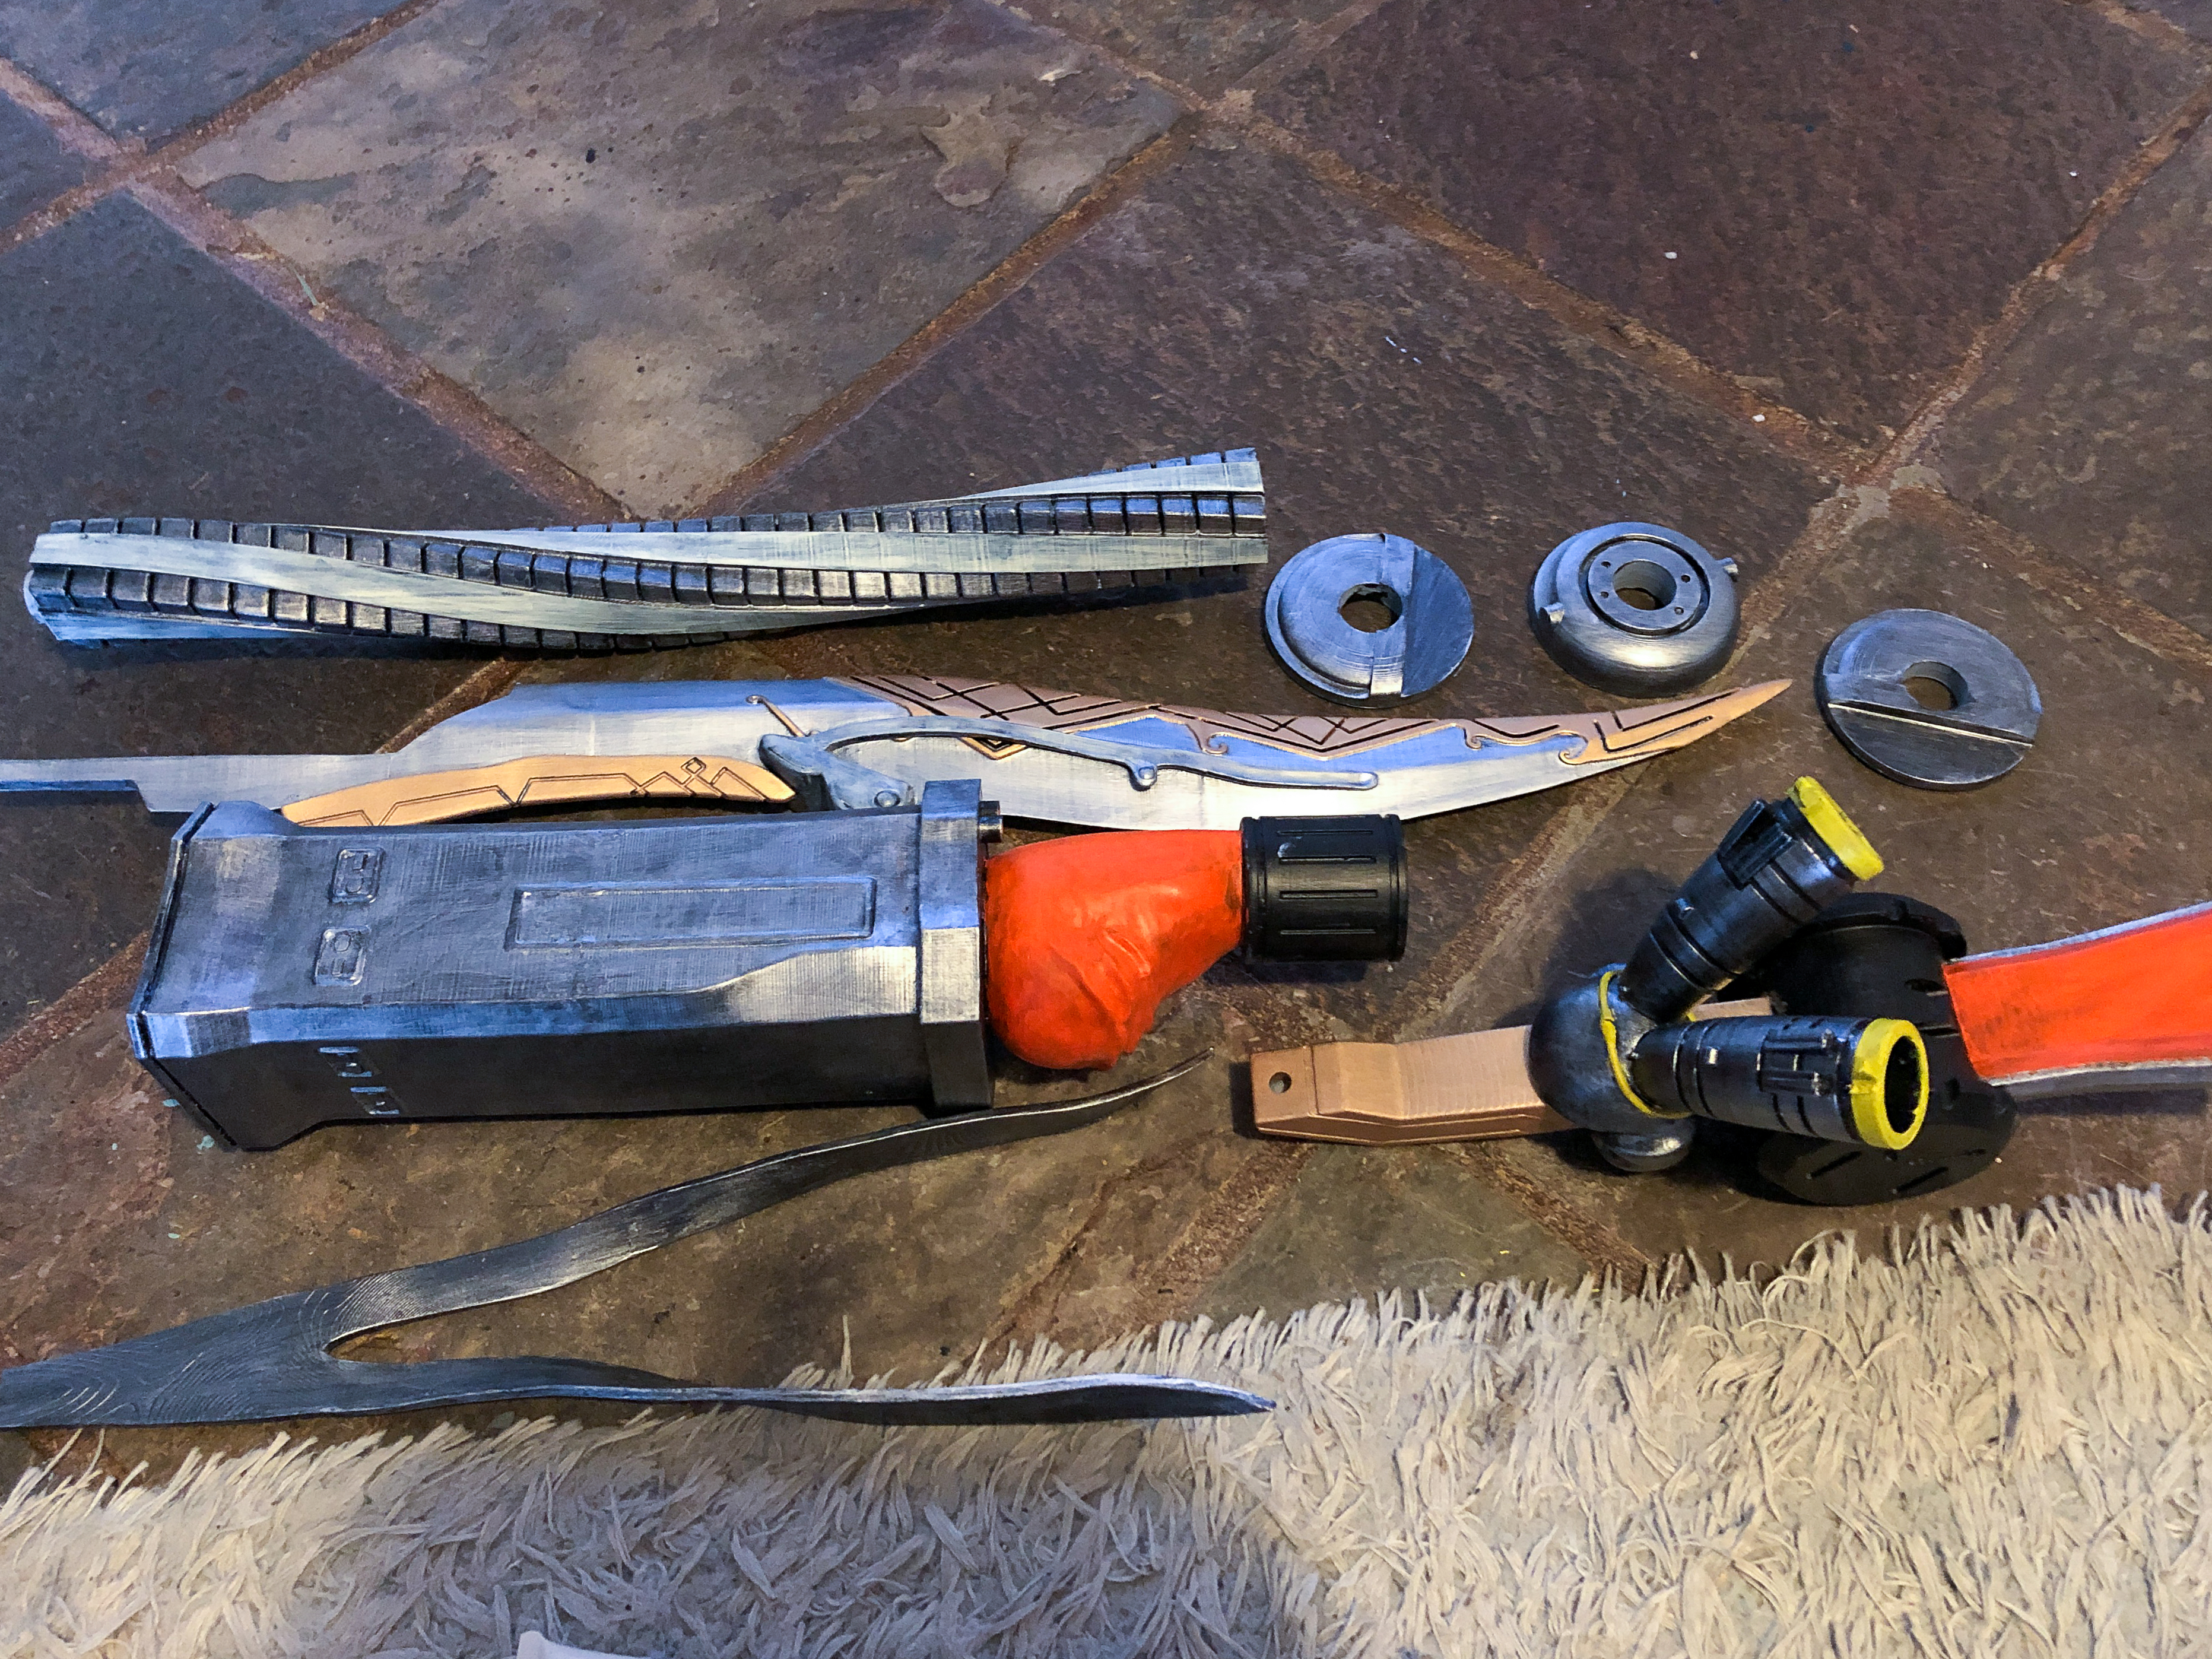
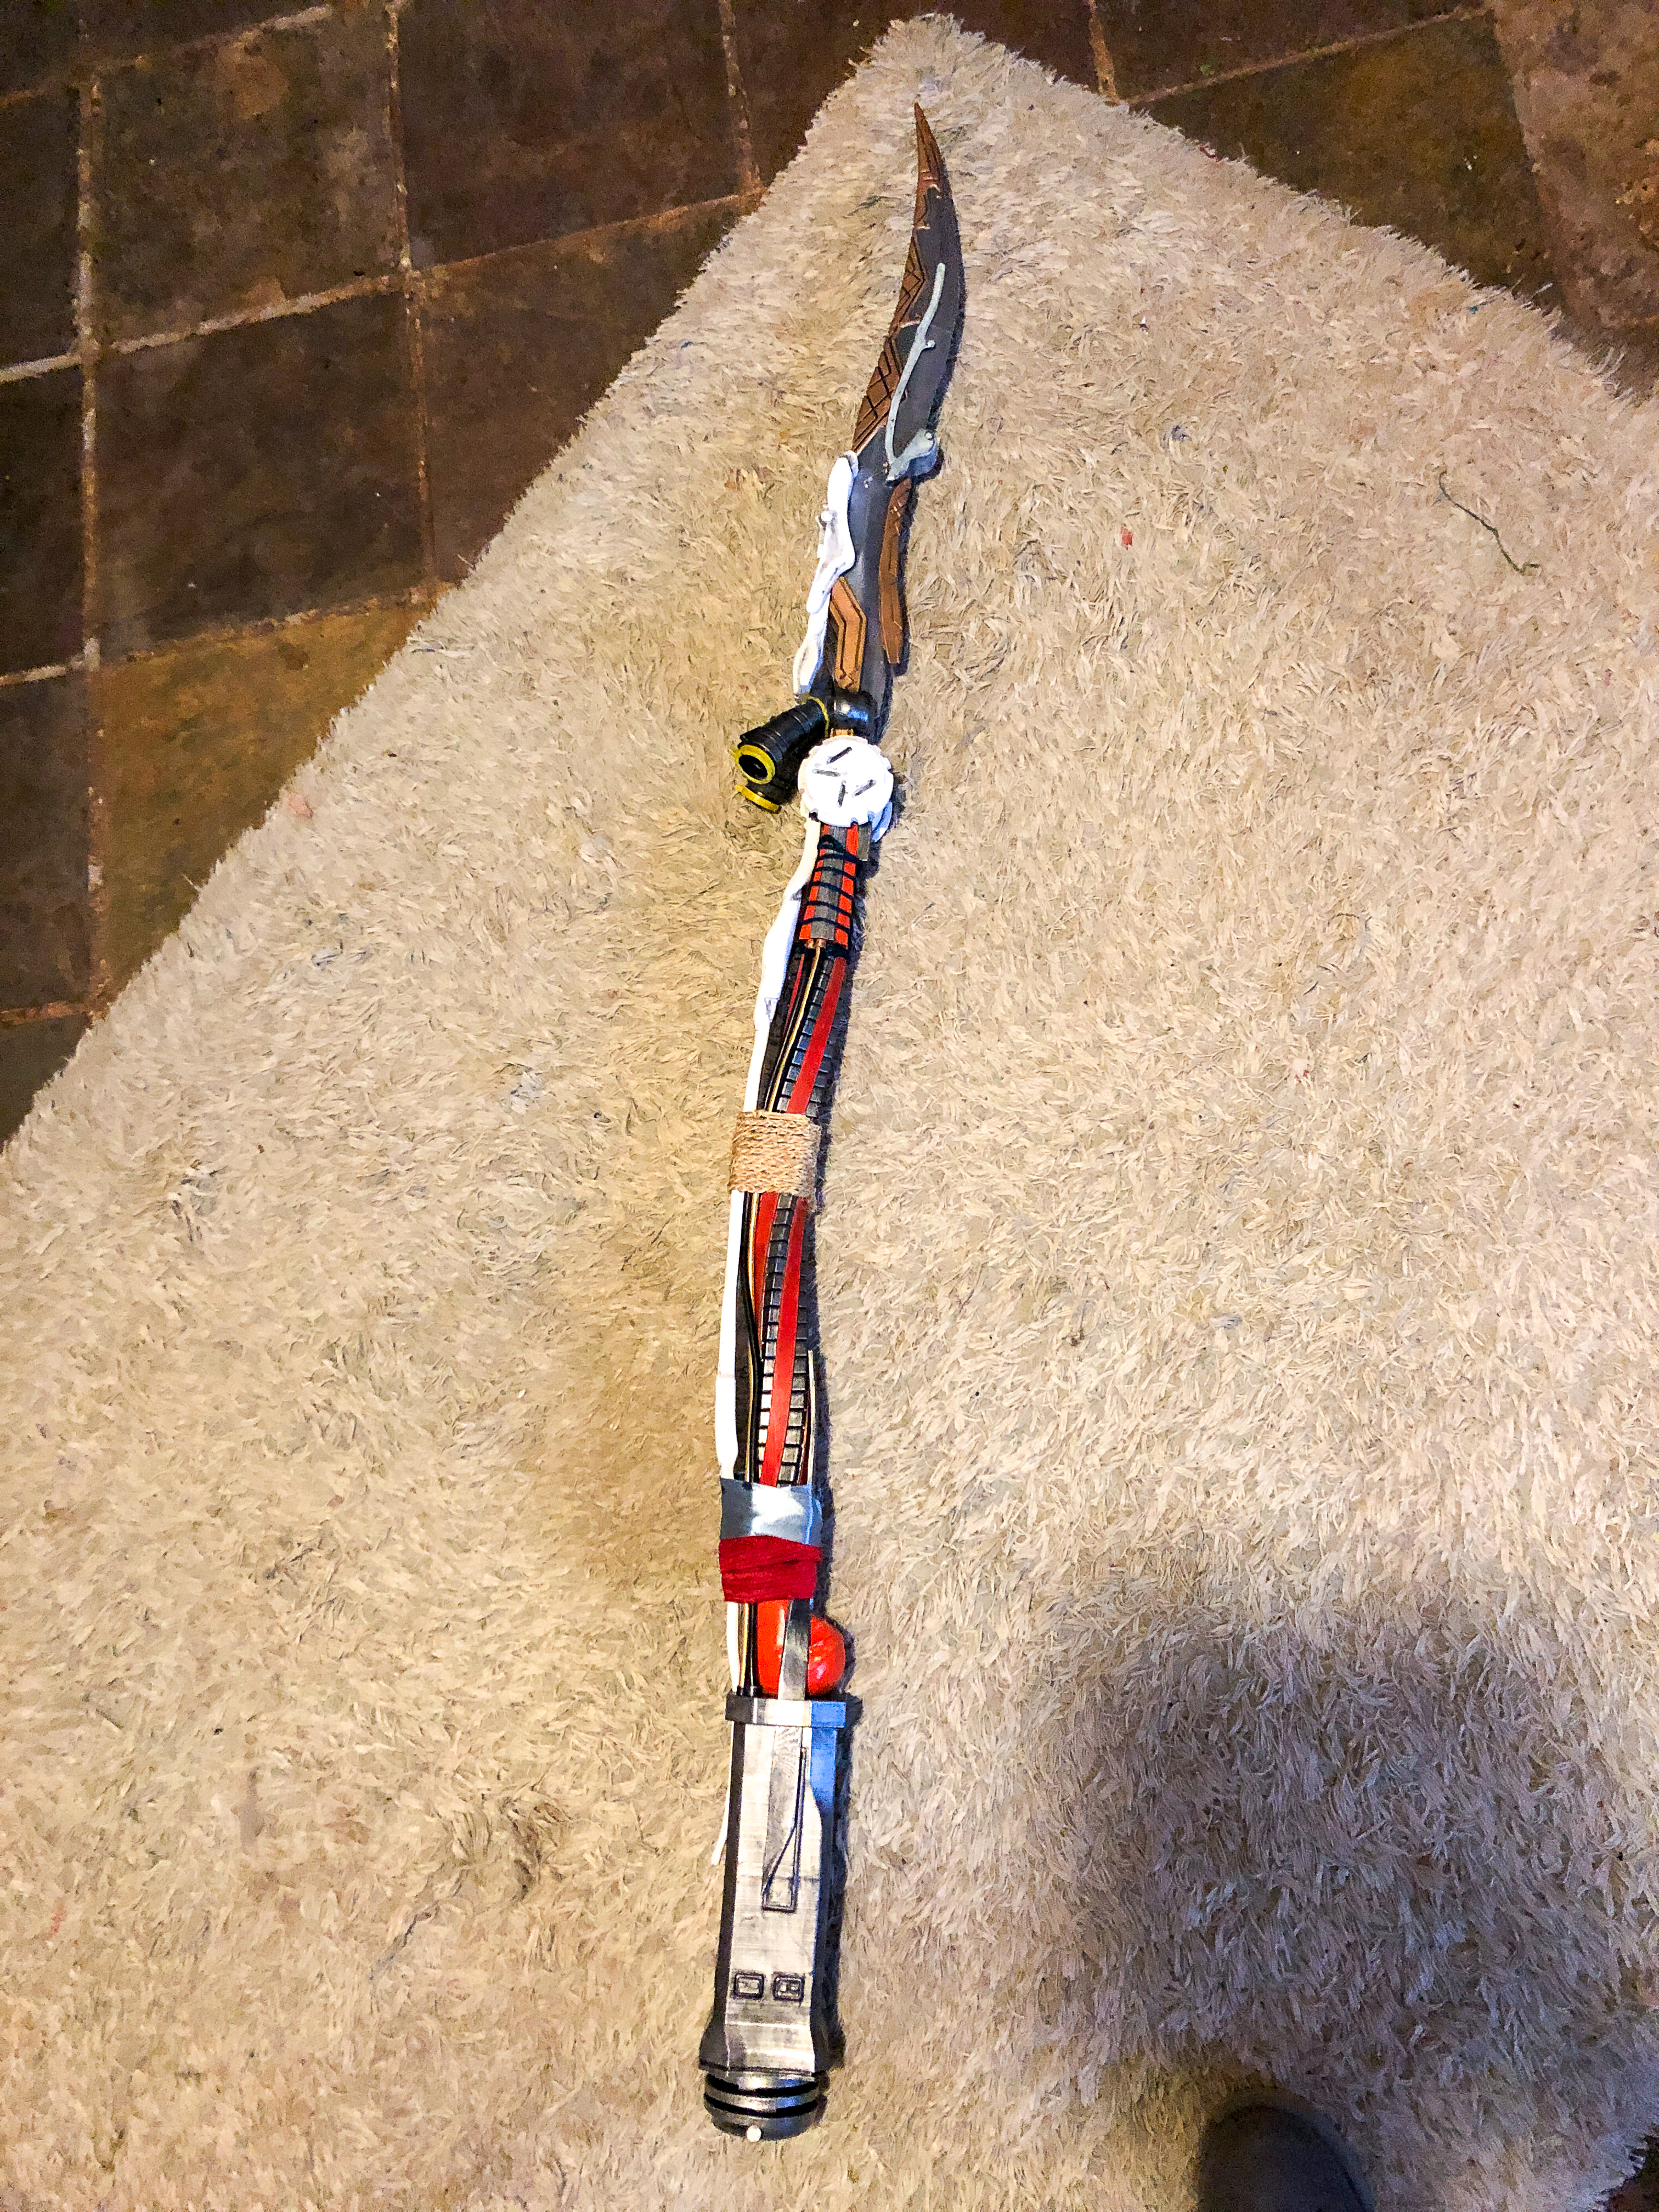
Step 4: Paint the Spear
For this kind of prop, a black primer would be my go-to.
Then use metallic silver spray paint for the machine-like parts. Cover the rest in white spray paint.
Once it's dry, use brushes and quality high-coverage acrylic paint to paint the colorful details. A masking tape can also help you during this process, but it's up to you. 🙂
TIP: the gold details on the tip of the spear look almost copper-like. Try looking for a copper-gold acrylic color in your craft store. Or mix it using copper and gold shades.
Once it's all done, try covering it with diluted black paint and wipe it off using a tissue. This creates a more natural-looking weathered effect on the prop.
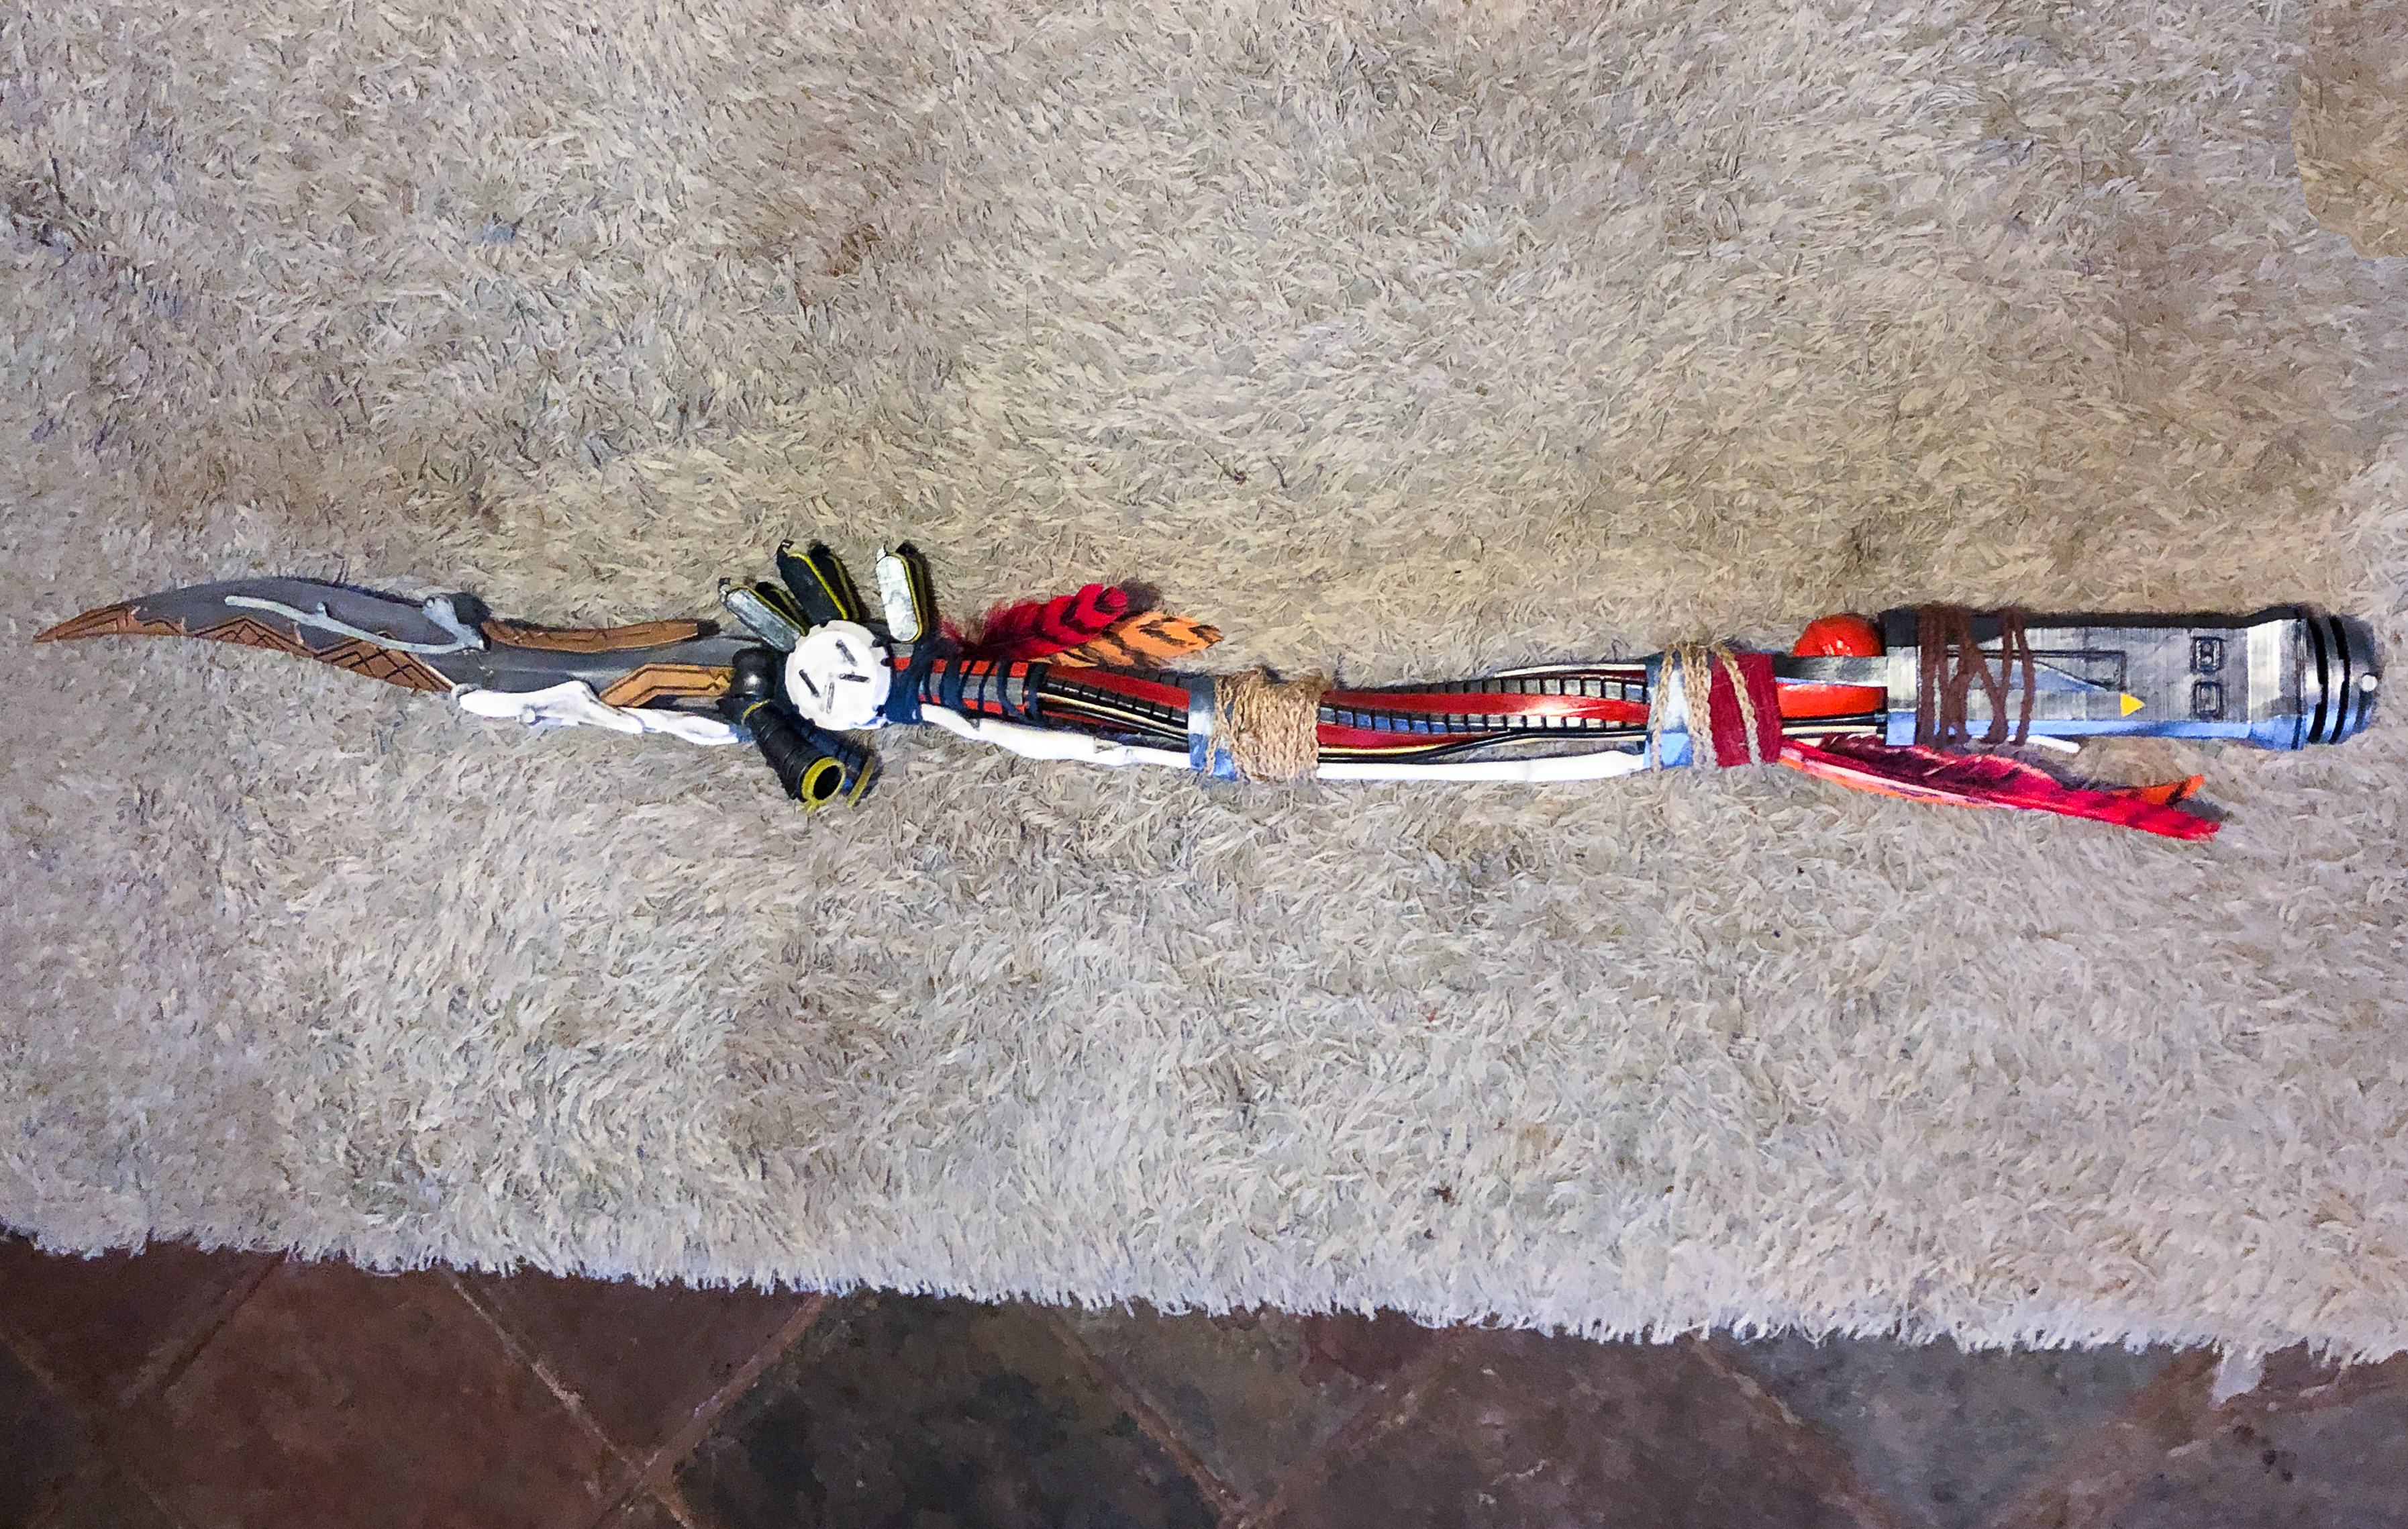
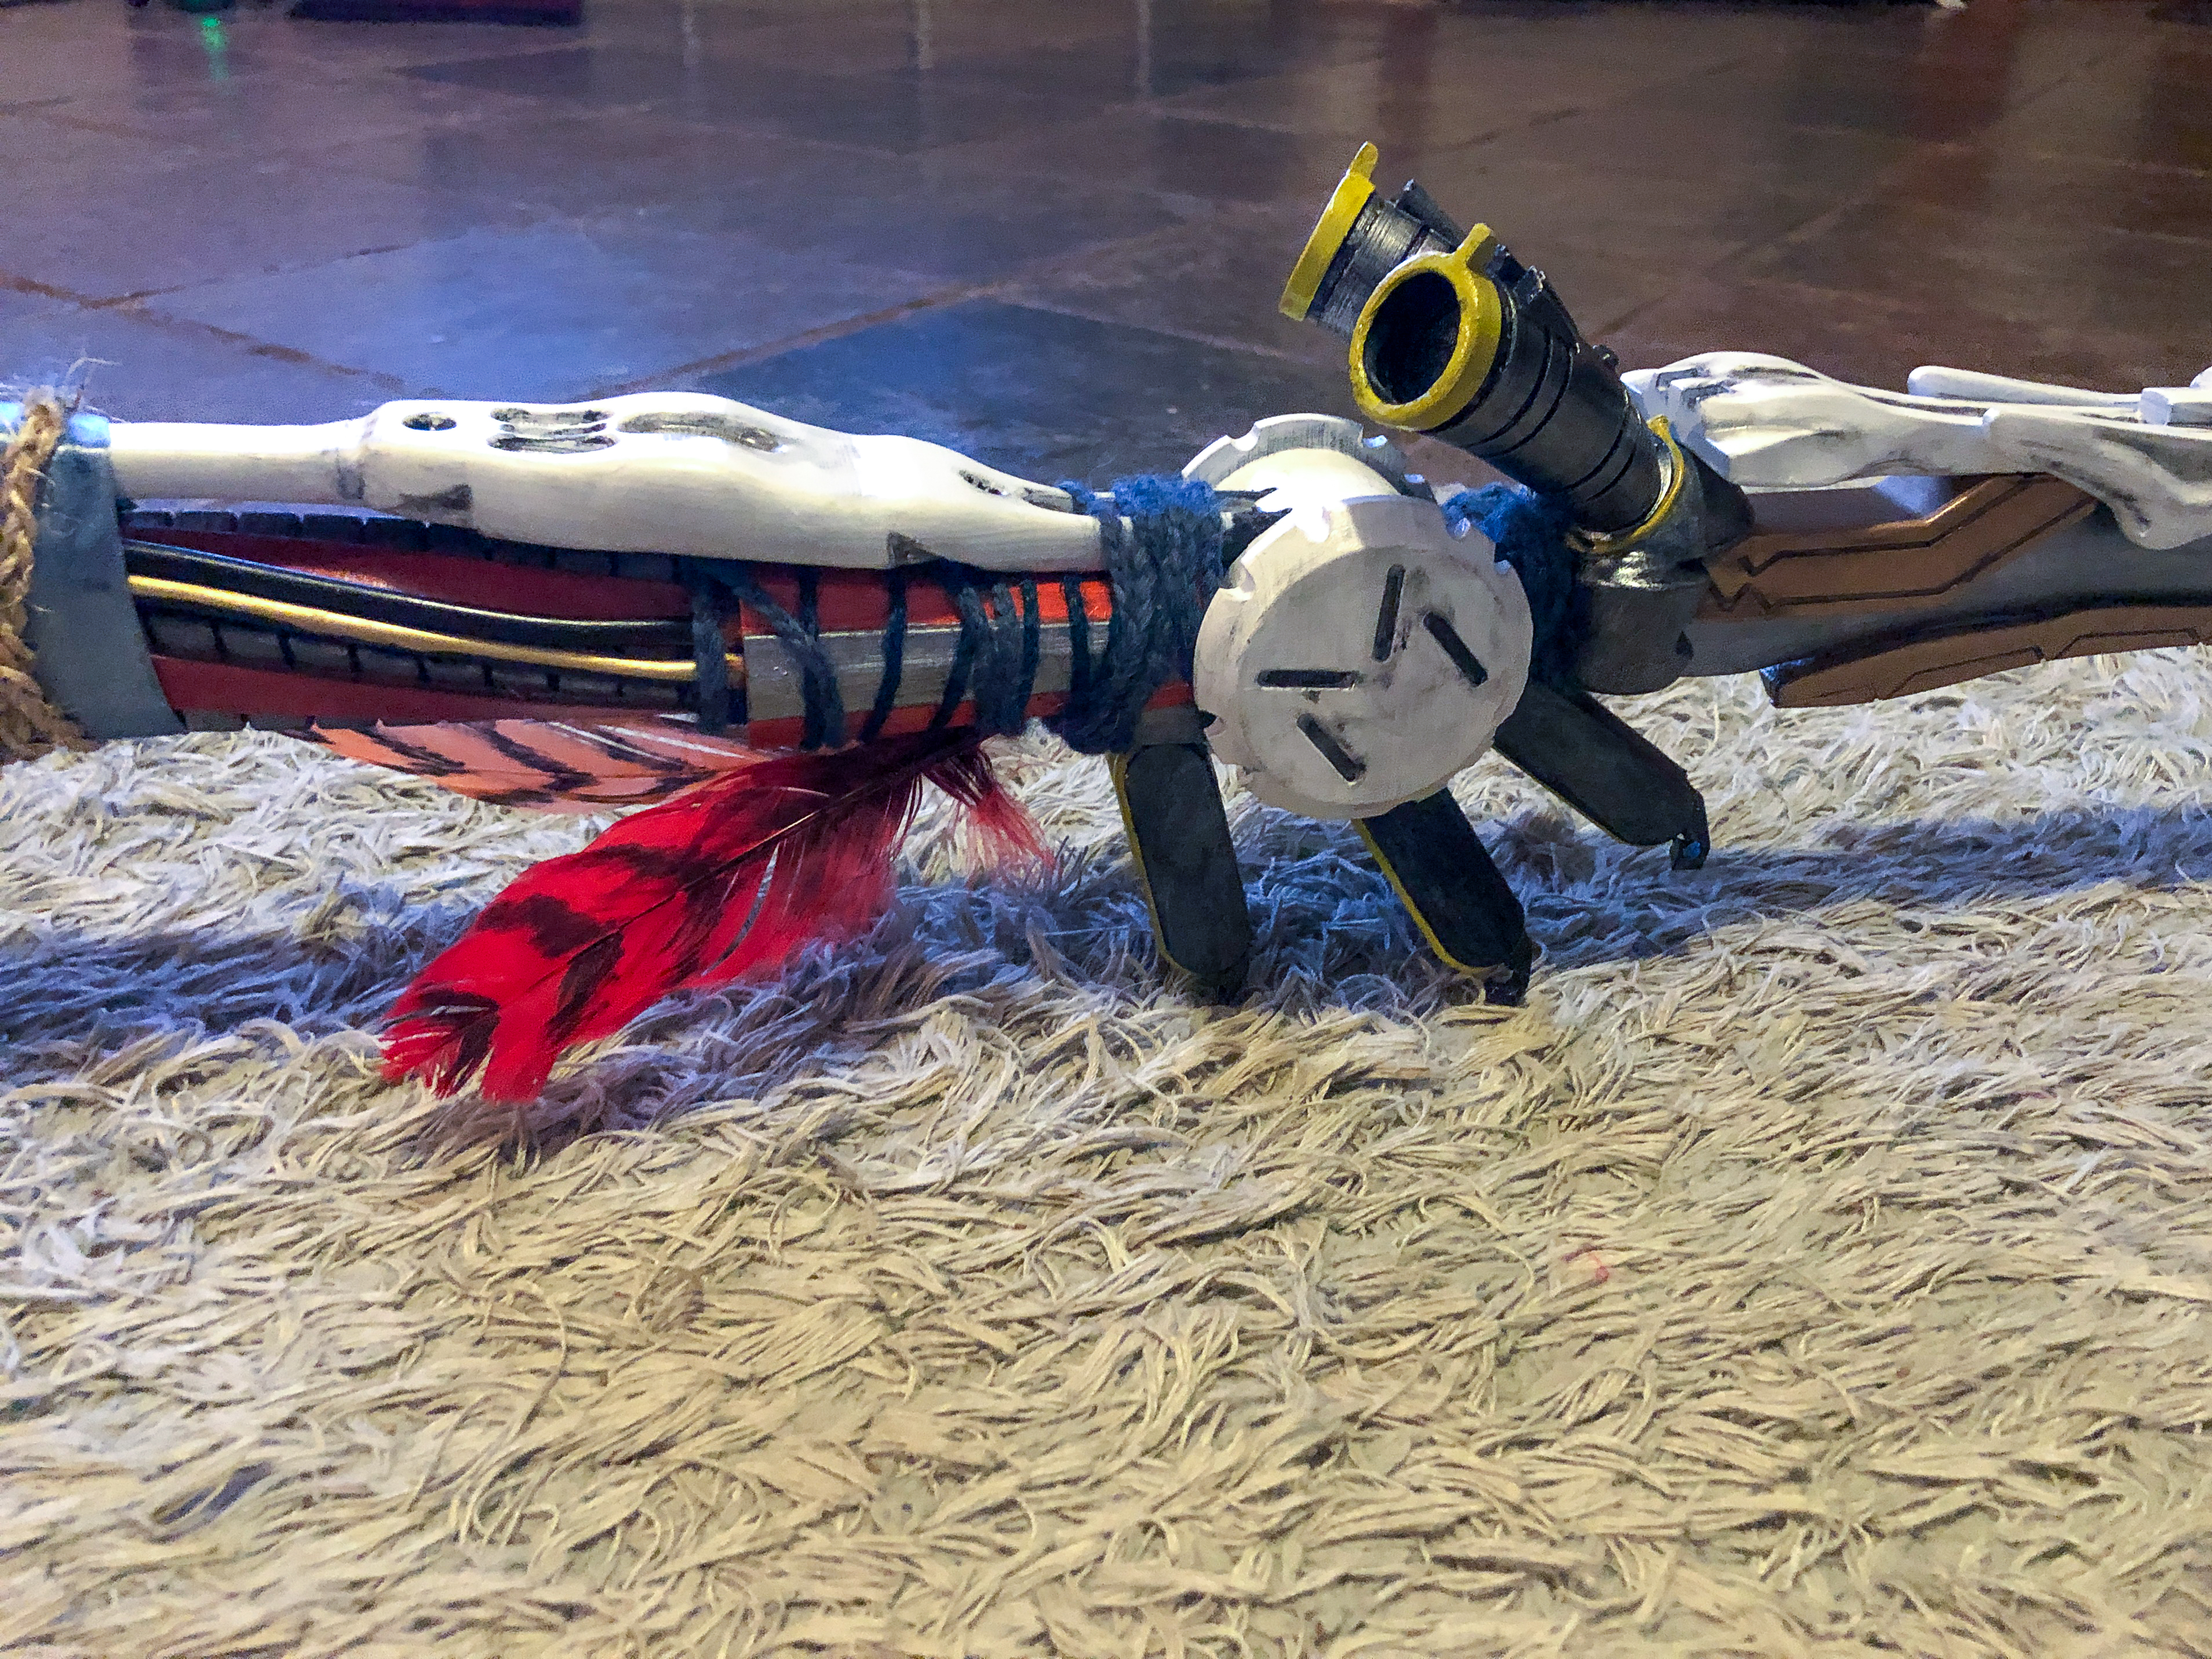
Step 5: Add Feathers and Natural Cords
In the Horizon Forbidden West game, the spear is built of machine parts but decorated with natural resources such as colorful feathers, natural cord, colorful rope, and small pieces of fabric.
If you can't find similar natural feathers, buy white ones and paint them with red, orange, and black markers. 😀
Step 6: Override the Machines!
Finally, you're good to go! Explore the Forbidden West in your complete Aloy cosplay, override the machines, and save the Earth's biosphere once again!
Huge thanks to Tiffany Dean Cosplay for the progress photos! Go check her Aloy cosplay!
Head to our blog for more 3D printing projects!