3D Printed Diorama Building Blocks
I designed these models so that anyone can create a diorama for their favourite figures. I created them in a low poly style with a pattern on the top that reflects light differently depending on the viewing angle
I’ve been working on the project on and off for almost 2 years and it just so happened that Instructables announced a contest for dioramas right around the time it was almost finished 🙂
- 3D Printer (FDM)
- Filament
- 3D models
- Figures
Step 1: Print Terrain Pieces

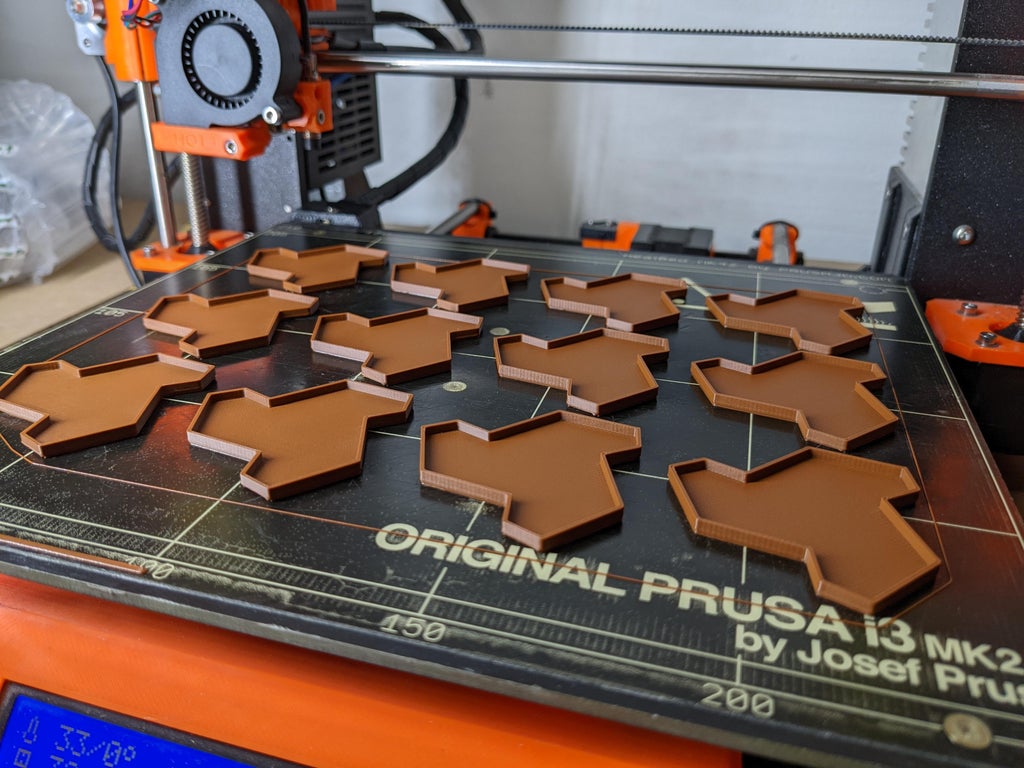


From a 3D printing point of view, this is the most interesting part for me. The pattern on top of the tiles is created by skipping part of the first layer thanks to the shape of the model. The part prints upside down and the first layer gets printed directly on the print bed. The second layer is basically a big bridge that is a bit in contact with the print bed. The first layer has a glossy finish and the second has some shadows because of the shape of the extrusion so it appears darker.
To make it look nicer than the default slicer settings you should set the width of extrusion of bridges to the same value as solid infill. In PrusaSlicer you do this by setting the bridge flow ratio to 1.
If you have a Prusa 3D printer then all you have to do is download the 3MF files instead of just STL and those will set all the settings for you.
To achieve this look you just have to have a well-calibrated first layer.
These are all the important settings:
Layer Height 0.2 mm
No Supports
- Perimeters (minimum): 1
- Switch to Advanced Mode
- Extrusion Width Changes:
- For lava and hills on some printers: First Layer: 0.5
- Perimeters: 0.48 mm
- External Perimeters: 0.48 mm
Bridge Flow Ration: 1
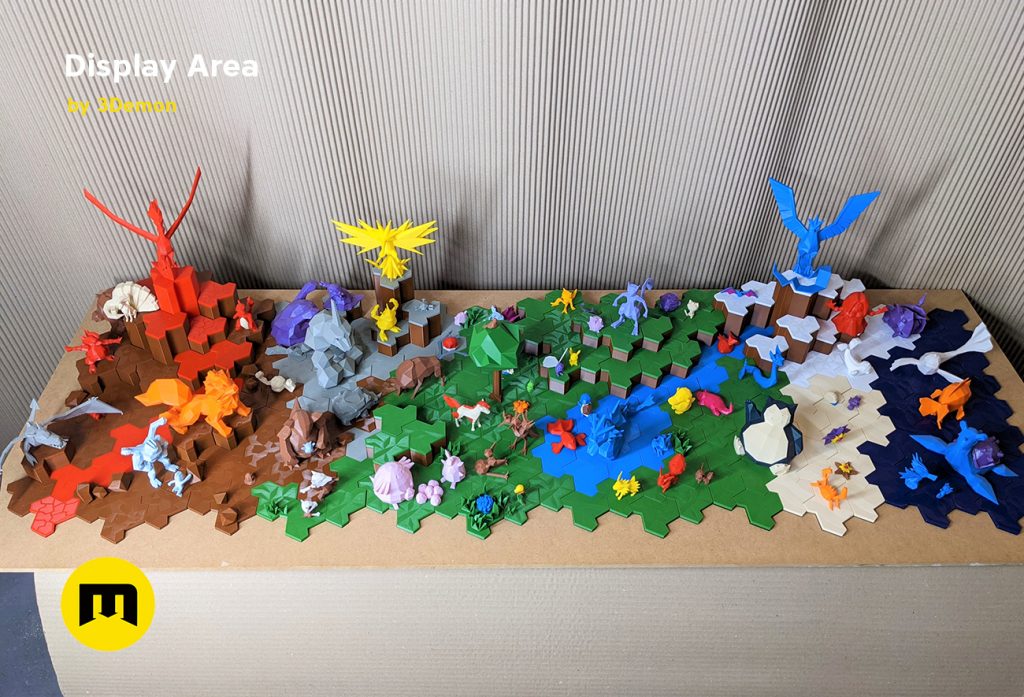
Step 2: Colours

You can use whichever colours you like. Just keep in mind what kind of a diorama you want to create. You don’t have to print all the terrain tile types. Just the ones you think you’ll use.
Filaments I used (PLA):
- Grass – Green Grass – Fillamentum
- Water – Cobalt Blue (for the seawater) – Fillamentum
- Lava – Signal Red – Fillamentum
- Rocky – Brown – Devil Design
- City – Concrete Grey – Fillamentum
- Desert – Light Ivory – Fillamentum
- Blank – Sky Blue (for the freshwater) – Fillamentum
Step 3: Print the Grid


This is very simple just use basic settings with a 0.2 mm layer height. Not much to think about here.
Step 4: Print Hills

Here it’s nice to just speed up the print a bit by setting the extrusion width of the perimeters to 0.48 mm so that your printer doesn’t make a thin infill between two perimeters.
My hills were brow because that’s the pokemon look of hills but you can go crazy with the colours. If you print blue hills you can create waterfalls. Want to create a bubblegum waterfall? Go for it! 😀
Step 5: Print Rocks, Grass and Trees


Pretty simple again. Just 0.2 mm layer height, 15% infill. I had a bit of trouble with retractions as you can see on the grass, but nothing a quick fix a lighter won’t solve.
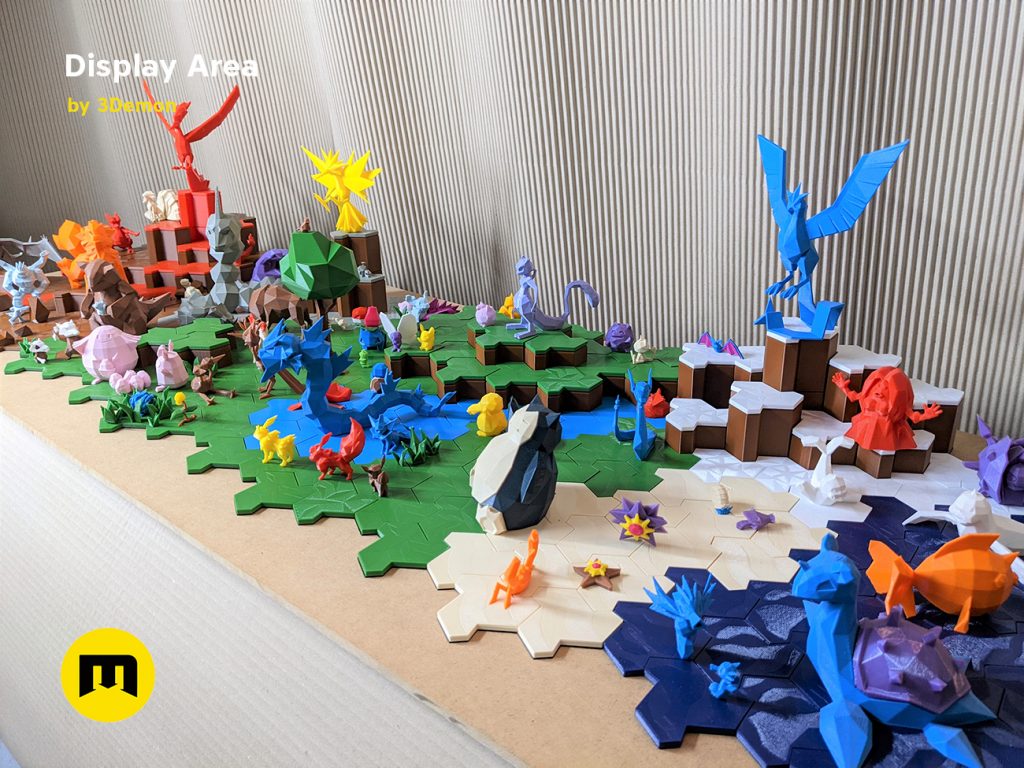
Step 6: Assemble the Tiles


This is the fun part 🙂
Just place the tiles on the grid in a way you think looks nice. Play around with different versions. If you don’t like where you’ve put a tile just pick it up and switch it with another. There’s no glue involved so just set your imagination free and enjoy.
The only thing to look out for is that the sand tiles come in two versions A and B and they should be placed in an ABAB pattern so the “dunes” line up with each other and continue through the individual tiles.
Step 7: Place Figures and Other Items
This is the even more fun part 🙂
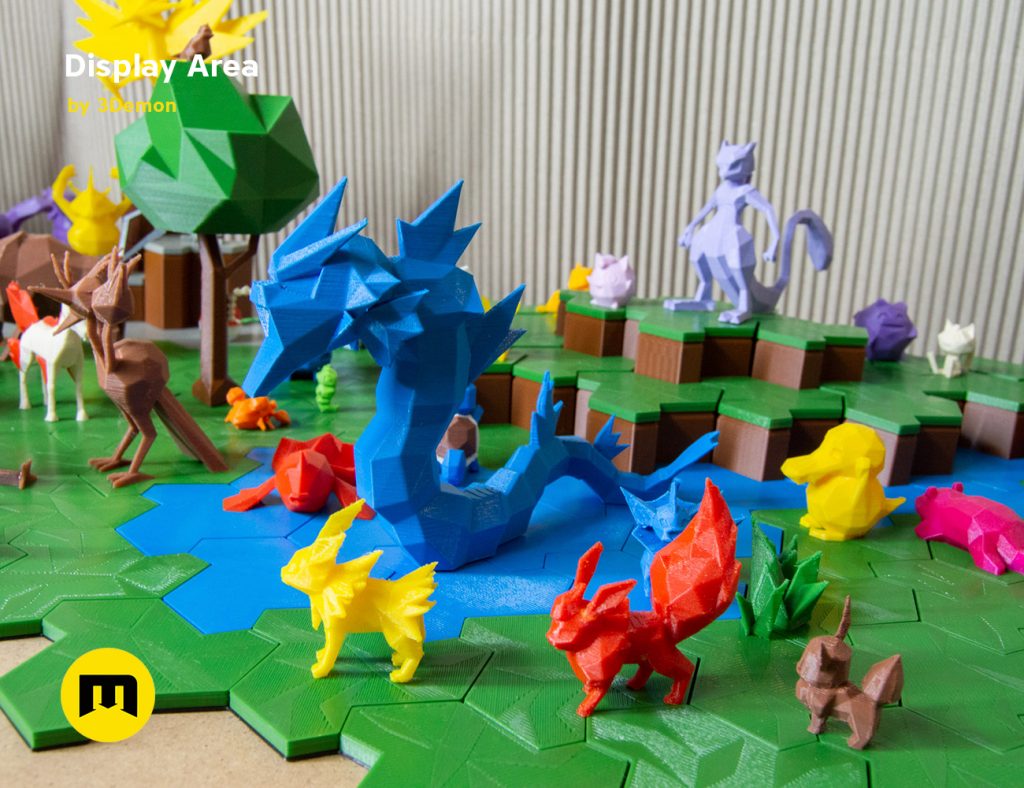
Place some toys or figures on the terrain. I used these 3D printed pokemon, that I also created, but you can use whatever you like.
If you have a bigger area to cover try making some smaller scenes within it. Like momma Marowak teaching Cubone how to throw a boomerang. Or Eeveelutions chasing each other running around the lake. Use the grass, trees and rocks to separate the area into smaller sections and give it some variation.
If you want to secure a figure or any other element you can use blue tack to hold them in their place.
And you’re done’ I hope you enjoyed 3D printing our Building Blocks! 🙂
Leave a Comment