Magical Spell Props for Cosplay (Fireball, Icebolt, Lightning)

Quick and easy instructions of how to
put together some special effects to your cosplay.
I’ve prepared for you 3 different kinds of spells. You can change the colors to your liking so you have even more options.
This instructable will show you on one example how to do it.
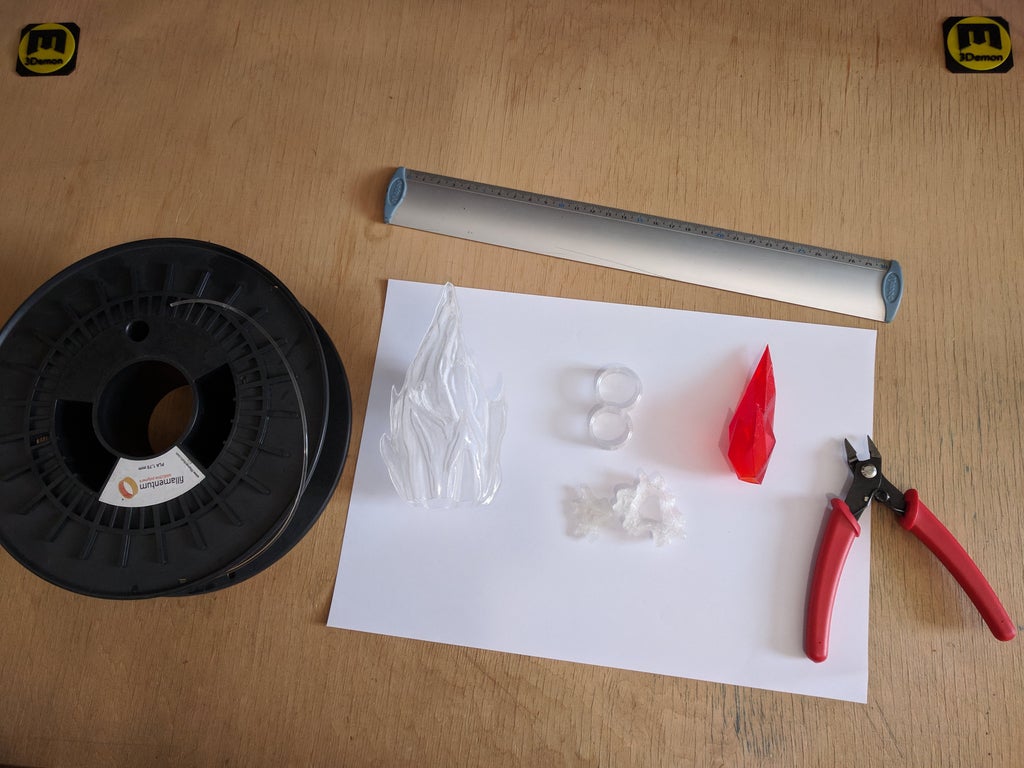
Supplies
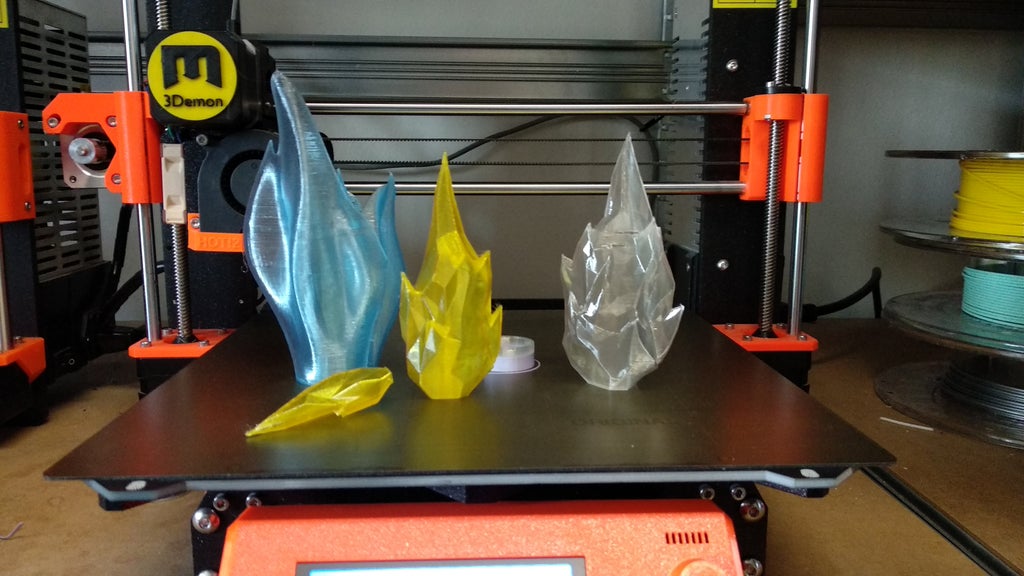
- 3D model by 3Demon – here
- filament – ideally transparent. I used Fillamentum CPE Red Hood, CPE Lemonade a PLA Iceland Blue
- wire
- thin, so it isn’t easily visible (you can take apart a networking cable if you have one laying around, that has thin cables)
- the cables have to be isolated so leave on the rubber covering
- how long the cables should be depends on where you’re going to have the battery on your body (in your sleeve, on the back of your hand, etc.)
- 3D printer
- LED diode or LED strip
- battery 7V (optionally with a battery connector strap)
- optionally a switch (or just switch it off by disconcerting the battery)
- hot glue gun or superglue
- scissors, pliers
- soldering iron and solder (or use some other wire joining techniques)
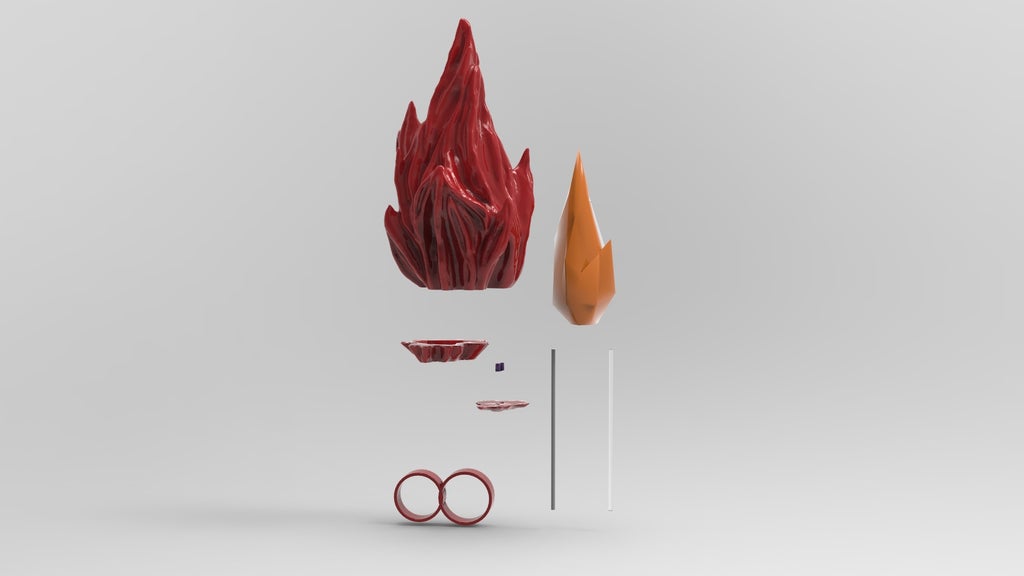
Step 1: 3D Printing
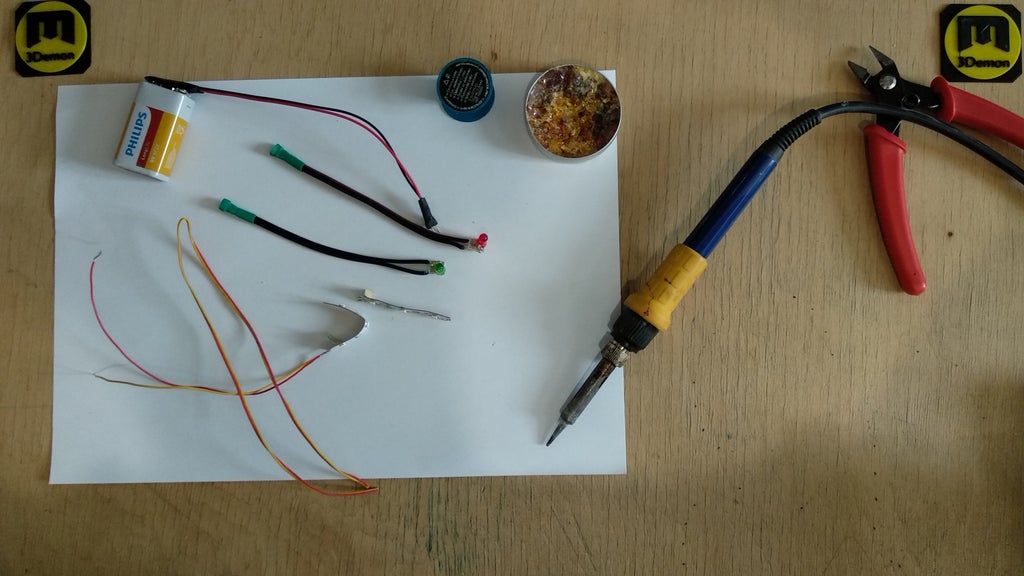
Step 2: Soldering the Electronics
- Pull two wires through one of the holes in the bottom of the spell and the twin rings (the other hole is for a piece of filament that will hold the spell upright). The length of the cable depends on where you’re going to have the battery and 4-6 cm are for the distance between the flame and your hand.
- Test which way you’re supposed to solder the LED by connecting it to the battery. If it’s not glowing try the other way.
- Solder on the LED.
- Solder on the optional switch
- Solder on the battery (or attach with the connector)
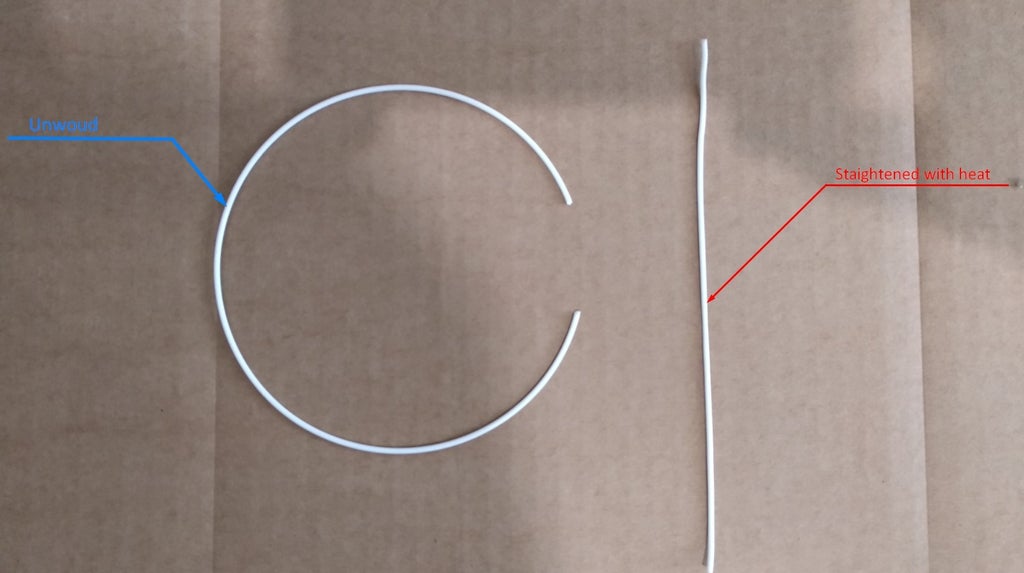
Step 3: Straightening Filament
To attach the spell to the double ring use a piece of 1.75 mm filament, 4 – 6 cm long, however you like it.
When you unwind it from the spool it will be bent. An easy way to straighten it out is submerge it into boiling water and then hold it straight until it cools down.
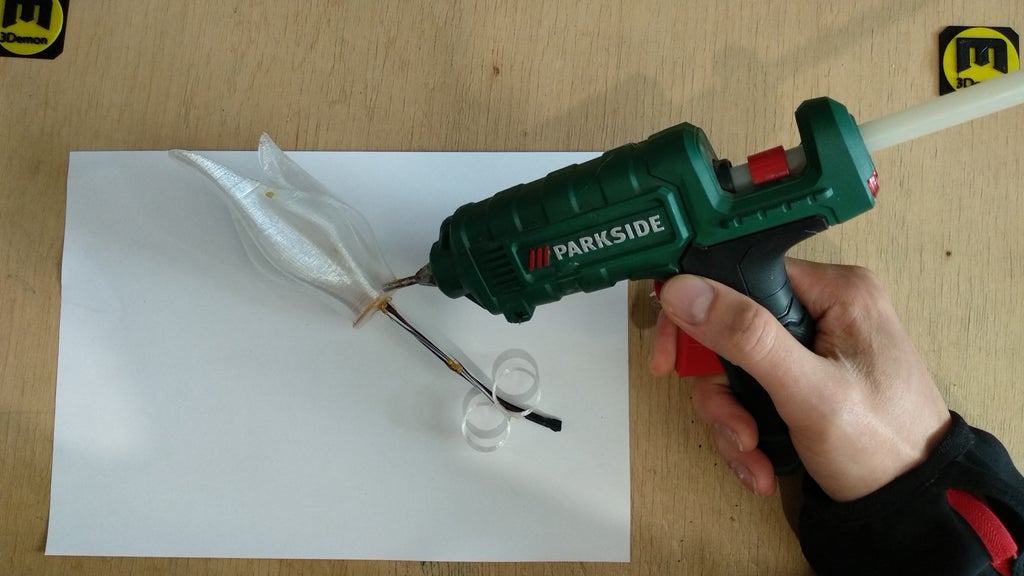
Step 4: Assembly
- Use the hot glue gun or superglue to assemble the pieces.
- Put the piece of filament through the other hole in the spell bottom and twin ring
- check that the LED works properly and glue it and the filament in place
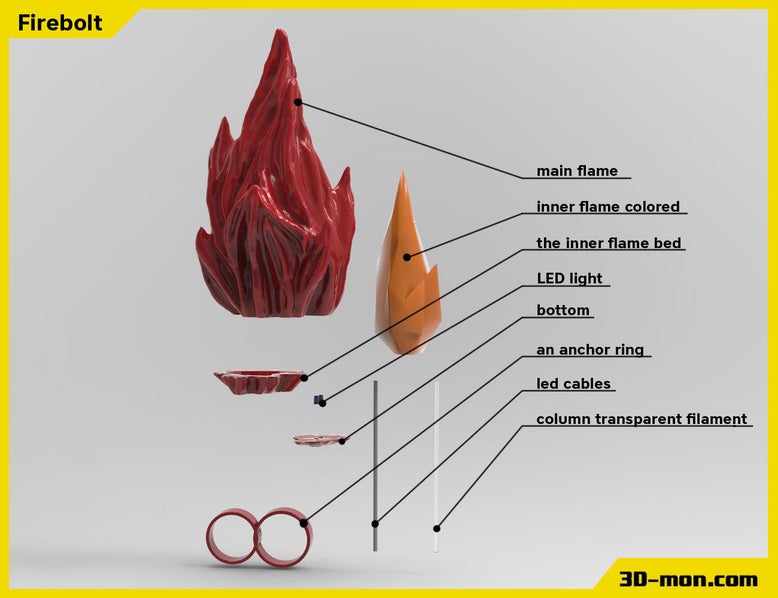
- place the inner flame bed over the bottom with the led and put the inner flame in it.
- Then cover everything with the big outer flame
You can see these steps in this video
- Use the hot glue gun or superglue to assemble the pieces.
- Put the piece of filament through the other hole in the spell bottom and twin ring
- check that the LED works properly and glue it and the filament in place
- place the inner flame bed over the bottom with the led and put the inner flame in it.
- Then cover everything with the big outer flame
Step 5: Now Everything Is Ready for You to Take Some Nice Photos


Model: Konata Du Vallon
Photographer: Juriet
Leave a Comment