

How to 3D Print and Paint Lucy’s Power Fist from Fallout


The Power Fist has always been one of those unmistakably Fallout weapons. It is bulky, mechanical, slightly ridiculous, and powerful enough to make you feel ready to take on the wasteland. Fans may recognise different versions from the Fallout games, while Lucy brings the weapon to life in the Fallout TV series.
As a Fallout fan, I knew I had to make my own version. In this post, I will show you how I 3D printed Lucy’s Power Fist and created the chipped yellow paint and rusty wasteland finish. So grab a Nuka-Cola and let’s get started! 👍
Supplies
-
3D printer
-
3D model of Power fist by 3Demon
-
Filament of choice (I used PLA)
-
PrusaSlicer (or any other slicer software)
-
Sandpaper
-
Super glue + optional glue activator spray
-
Spray filler
-
Sandable 2-part polyester filler
-
Primer
-
Yellow spray paint
-
Silver spray paint
-
Acrylic paints (brown, red, white, black)
-
Brushes
-
Paper tape / masking tape
Process steps in order:
1. Preparing the Files in PrusaSlicer
2. 3D Printing the Power Fist Parts
3. Sanding the PLA Parts
4. Applying Spray Filler and Primer
5. Gluing the Main Sections
6. Filling and Sanding the Seams
7. Giving it all colour and creating the chipped colour effect!
8. Final Power Fist Assembly
9. Rust and Wasteland Weathering
10. Tada!
Step 1: Preparing the Files in PrusaSlicer
I started by downloading all the STL files. You can download the Fallout Lucy Power Fist STL files here.
Then, as usual, I imported them all into PrusaSlicer and placed them on printing beds.
Because this is a large cosplay prop, the model is split into several pieces. This makes it easier to print on a regular FDM printer and also gives you more control over the print orientation.
I recommend placing similarly sized parts on the same print bed; that way you will avoid pieces being knocked out by the extruder.
I went with a 0.15 mm layer height to make sanding a bit easier.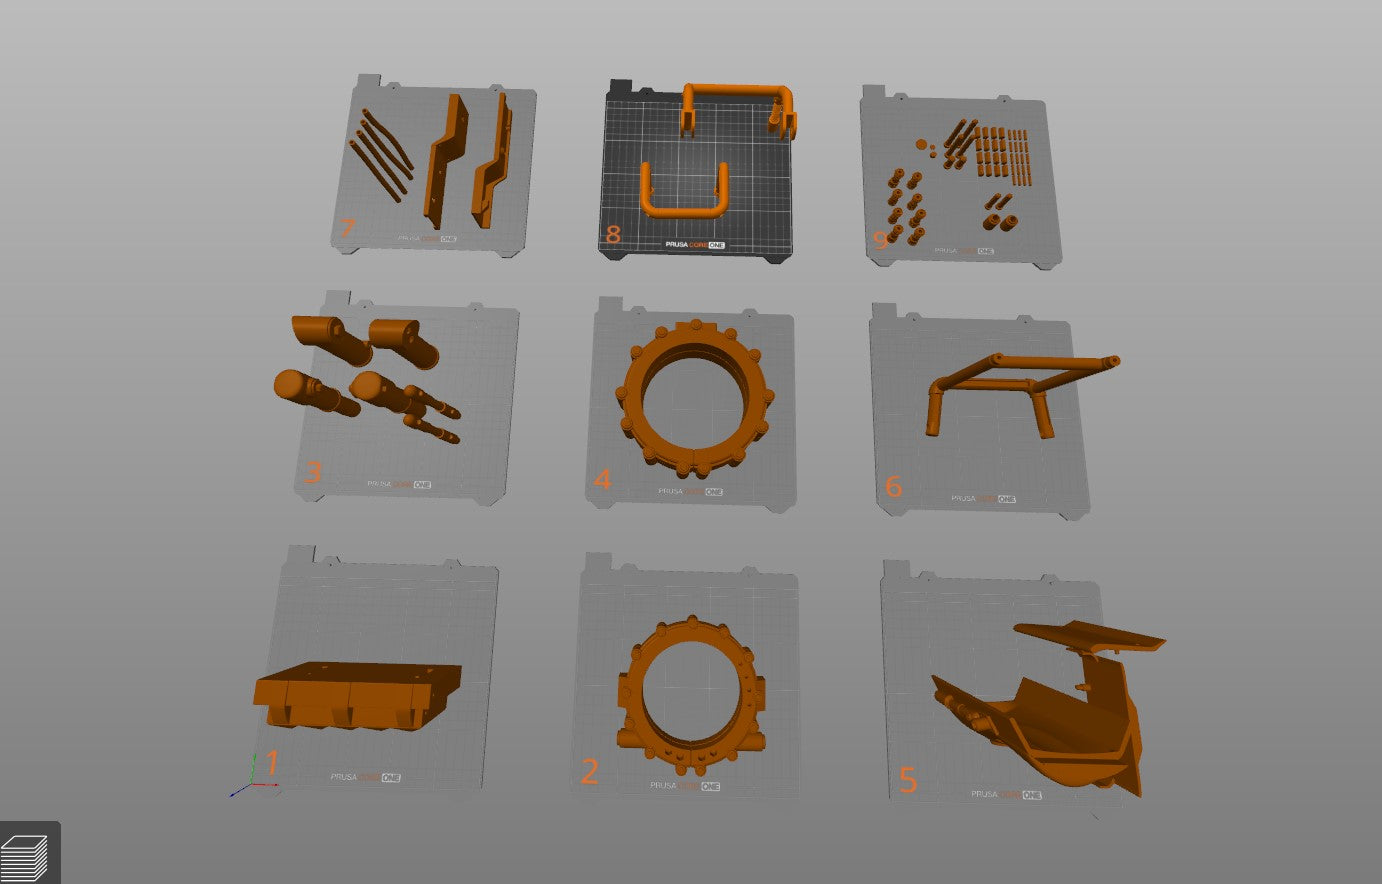
Step 2: 3D Printing the Power Fist Parts
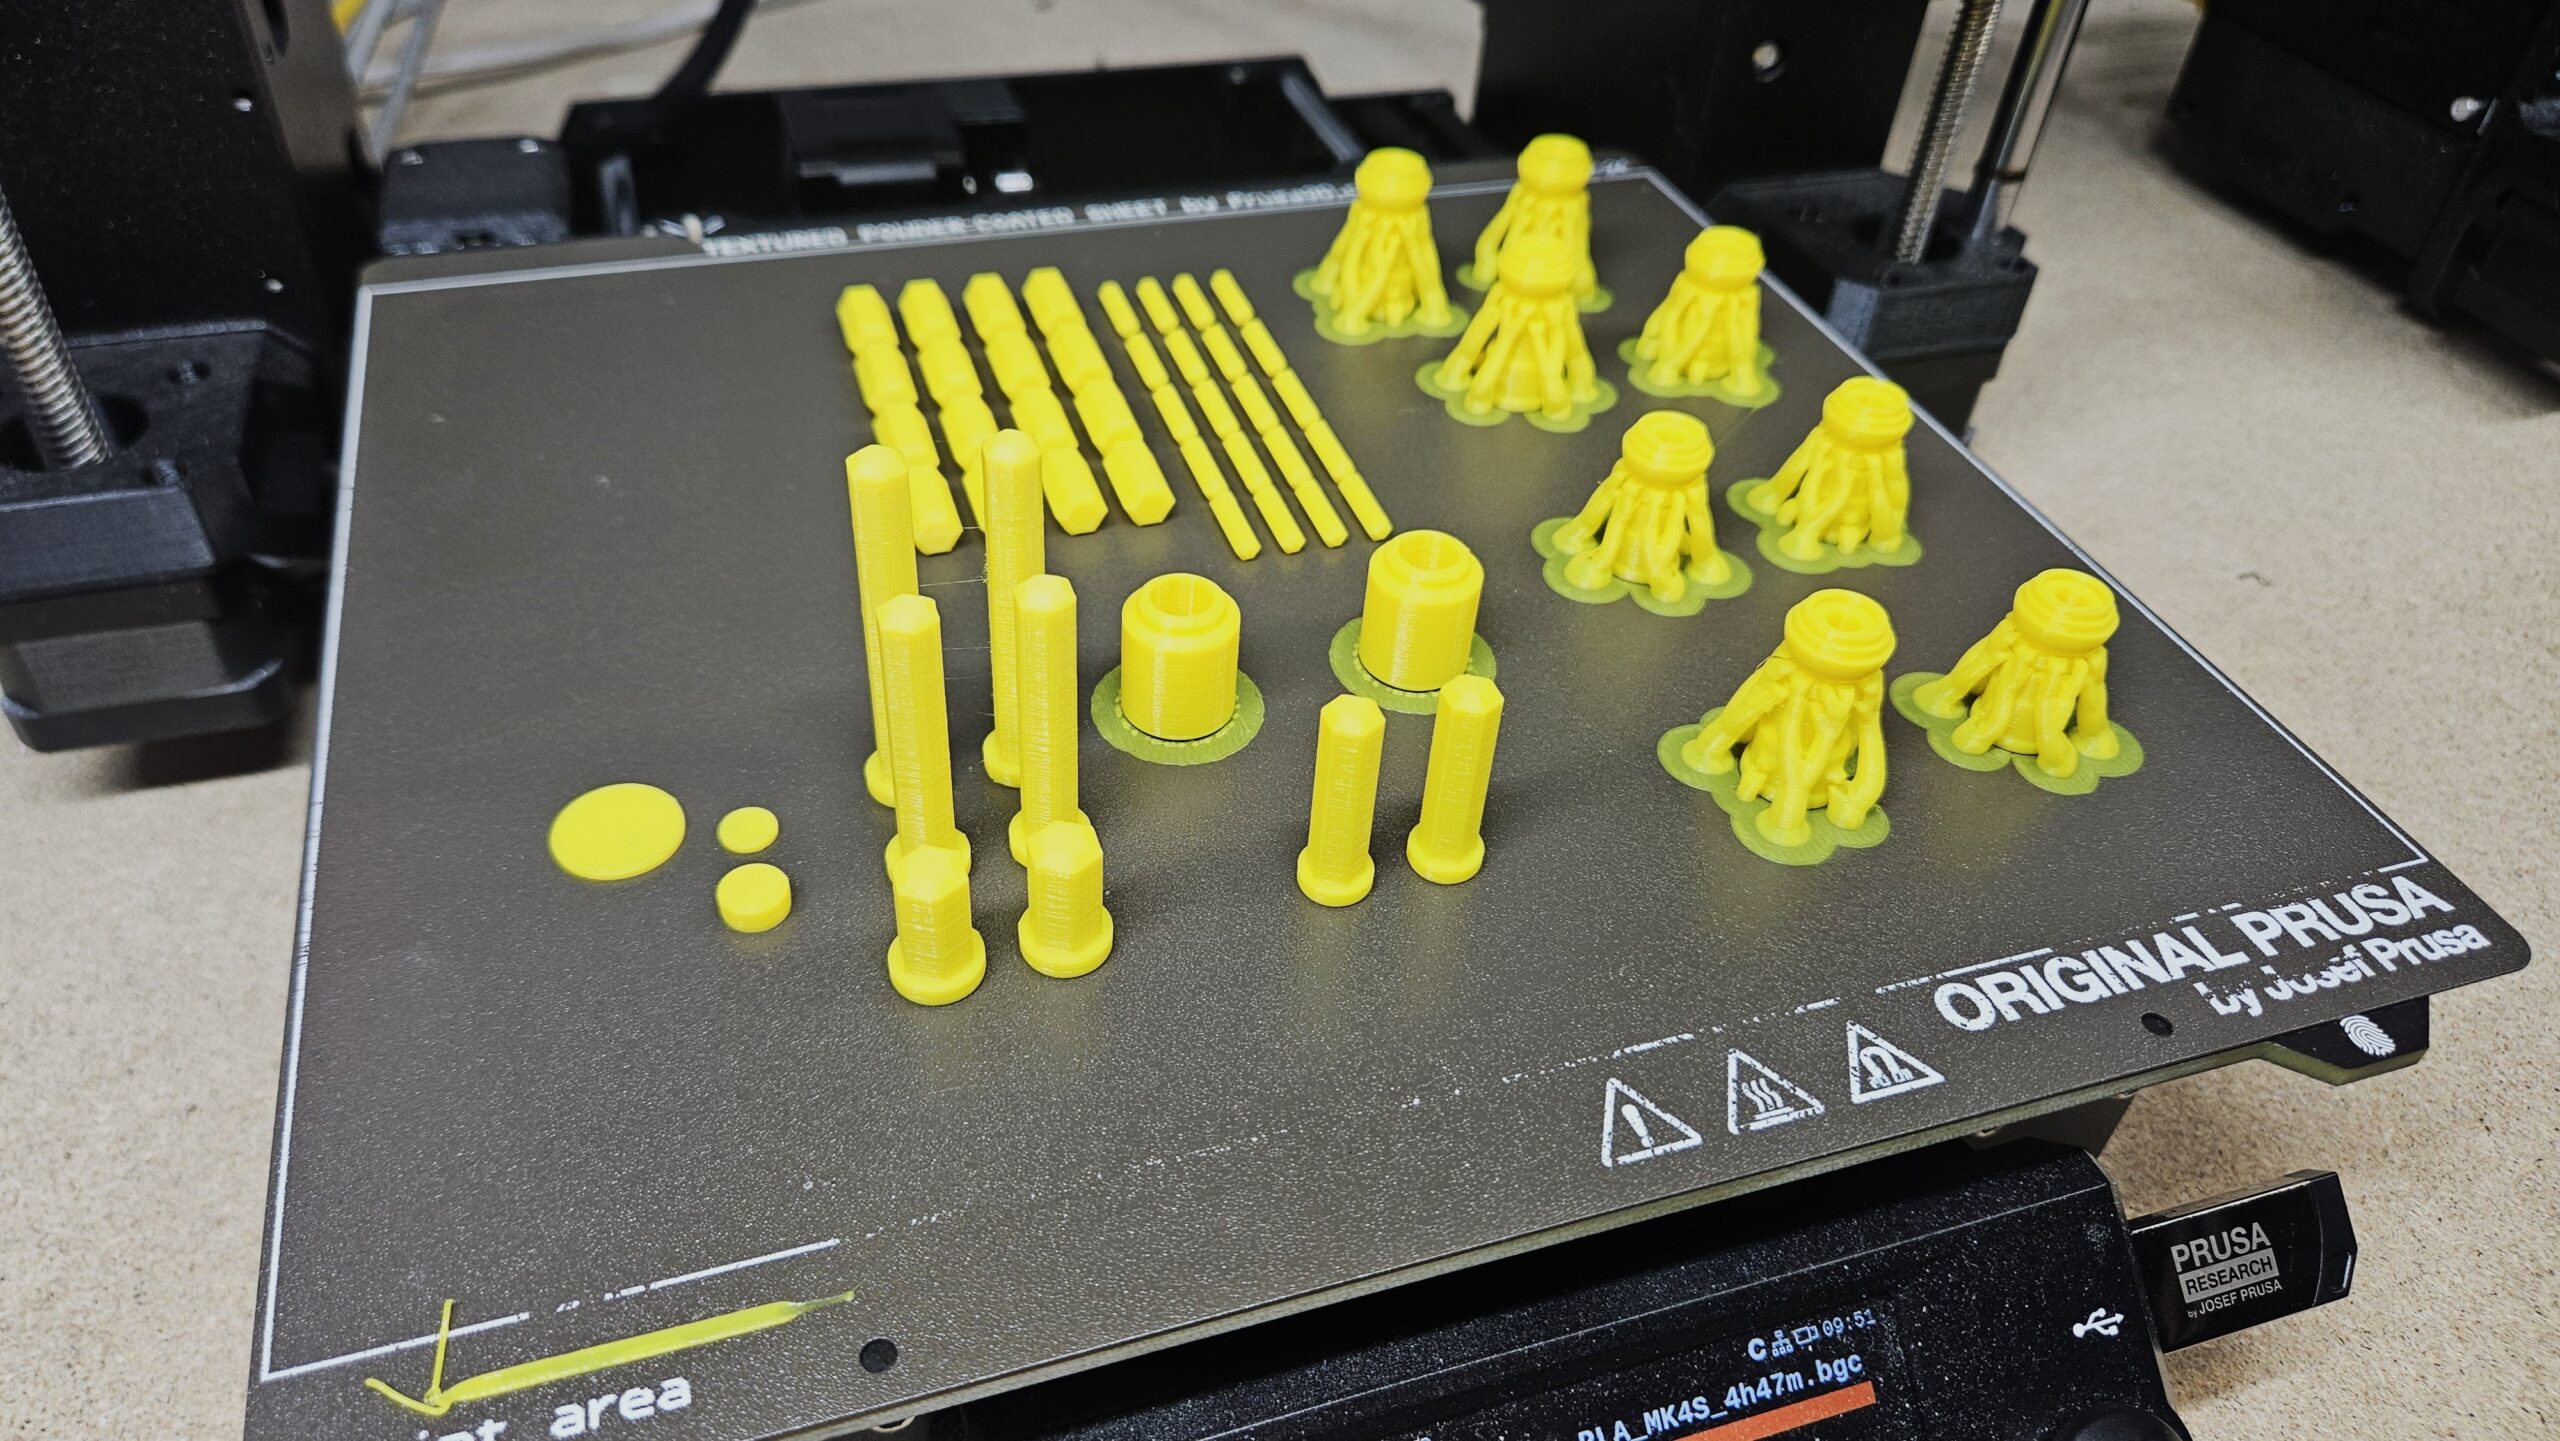

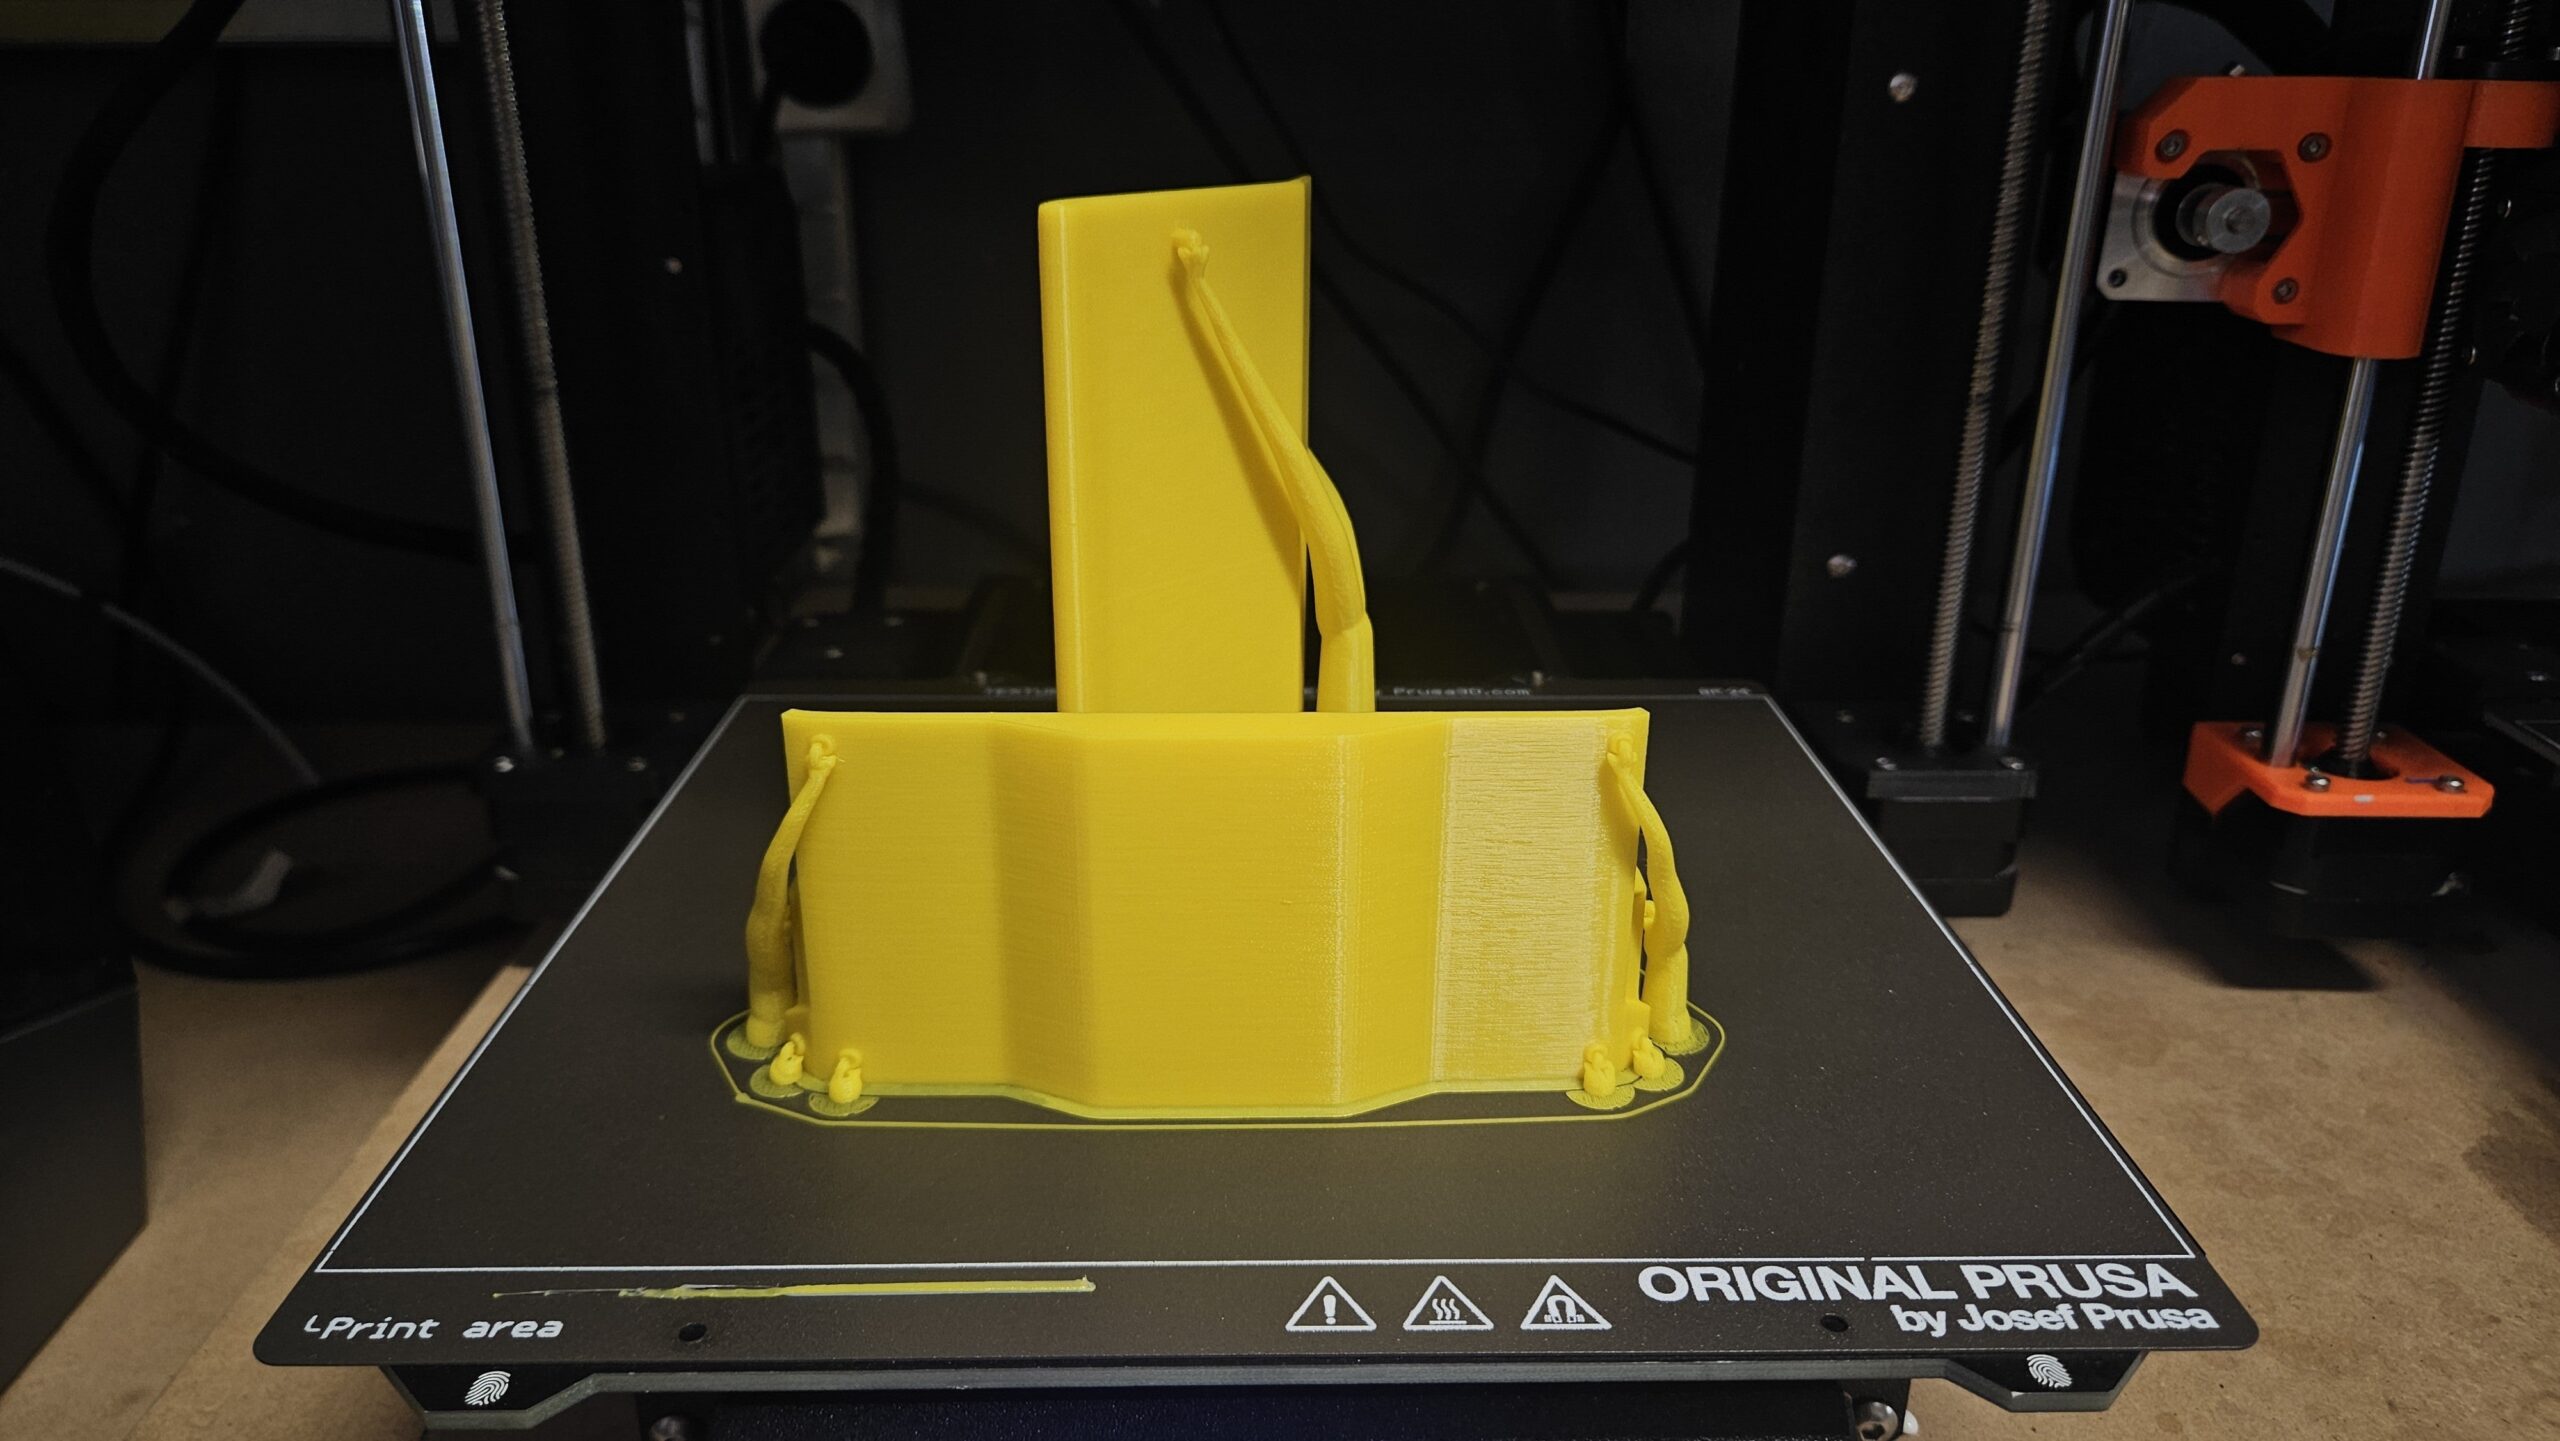
I printed all the parts in PLA because I figured that even if some fine layer lines were visible, they would suit this project just fine.
Of course, you can use any filament you prefer, though. For example, ABS is a great choice if you plan to sand the parts to a super-smooth finish.
After printing, remove any supports and clean up the parts before assembly.
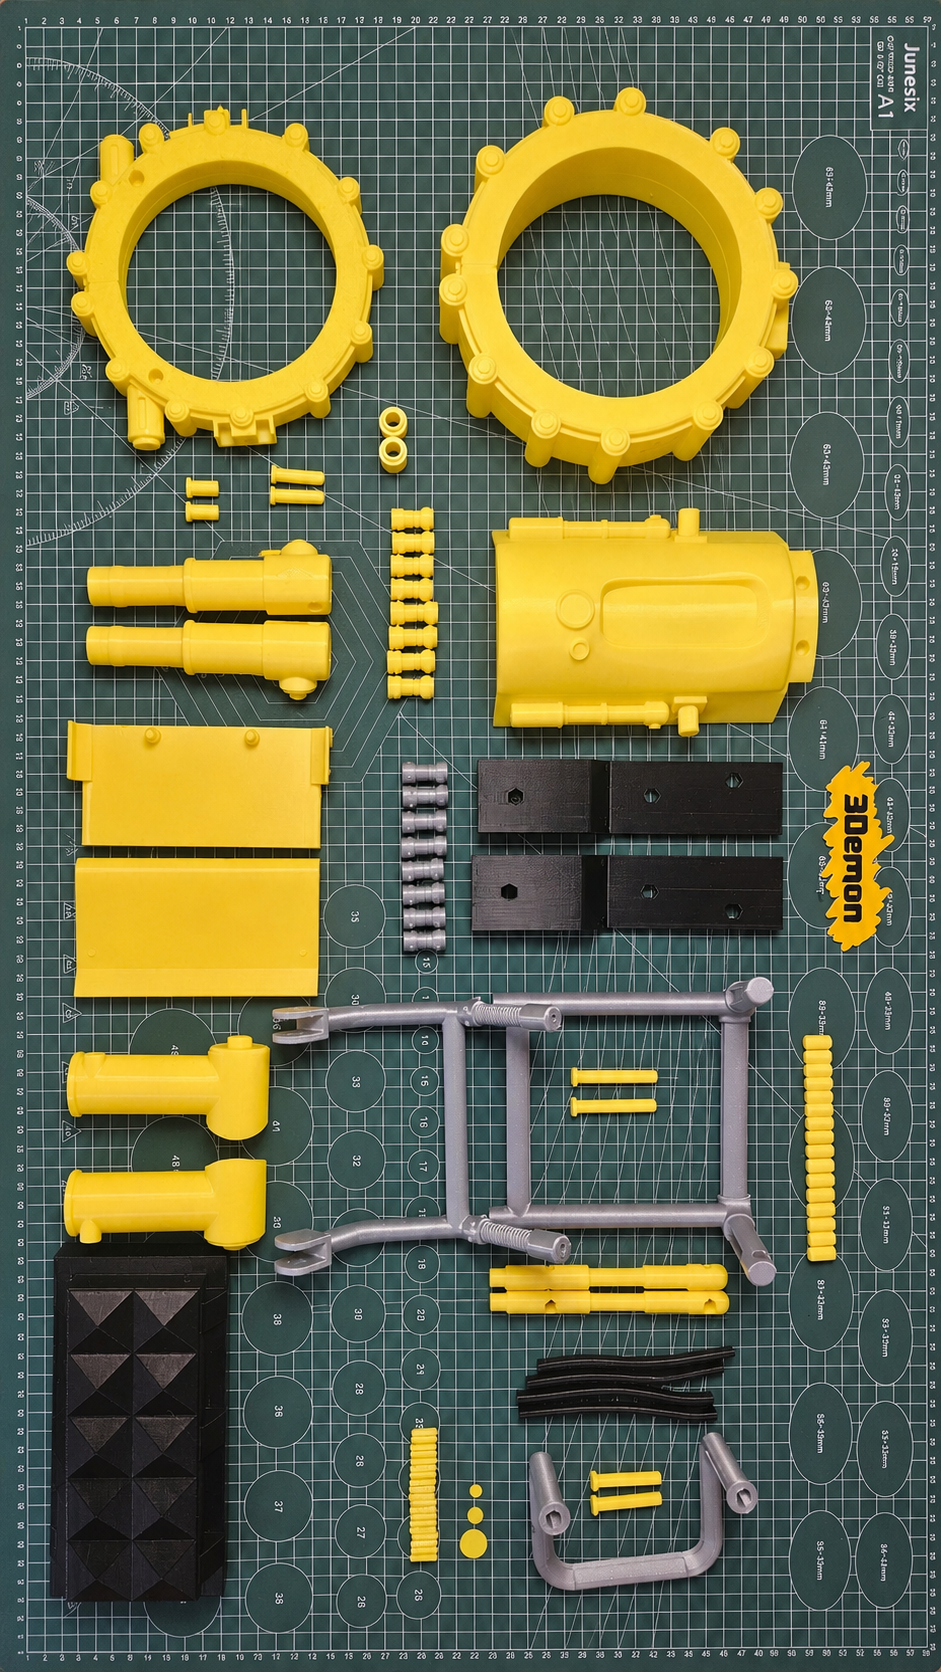
Print time: 94 hrs 10 mins (might look like a lot of time but if you can, divide objects between multiple printers)
Filament used: PLA
Nozzle: HF0.4
Printer: Prusa mk4s, Prusa Core One
Step 3: Sanding the PLA Parts
Before glueing the parts together, I gave the printed pieces a first round of sanding.
This step helps remove the most visible layer lines and rough spots. It also prepares the surface for filler, which works better when the part is already cleaned up a little.
You do not need to make everything perfect yet. This is just the first pass. 🙂
When you finish the first pass, take your time and sand all pieces again with gradually finer sandpaper. Remember that you always go from lower numbers of grit to higher. Let’s say you use 180 grit paper and build your way with each pass to 800 or even 1000.
It’s really up to you what level of smoothness you will be happy with. As I said, I didn’t mind the prop being a bit rough, so I didn’t go past 400 grit.
Step 4: Applying Spray Filler and Primer
Having finished sanding, I applied a coat of spray filler.
Spray filler helps smooth the surface. Nevertheless, don’t forget that it is better to build the surface gradually instead of trying to fix everything with one heavy coat.
Once the first coat dried, I sanded the parts again until the surface looked cleaner and more even and then sprayed again.
Filler Coat and Primer
Once I was happy with how all parts looked surface-wise, I sprayed the whole prop with a primer.
Primer gives the paint something to grip onto and also helps reveal any remaining imperfections. If something looks bad in primer, it will probably still look bad in the final paint.
Step 5: Gluing the Main Sections
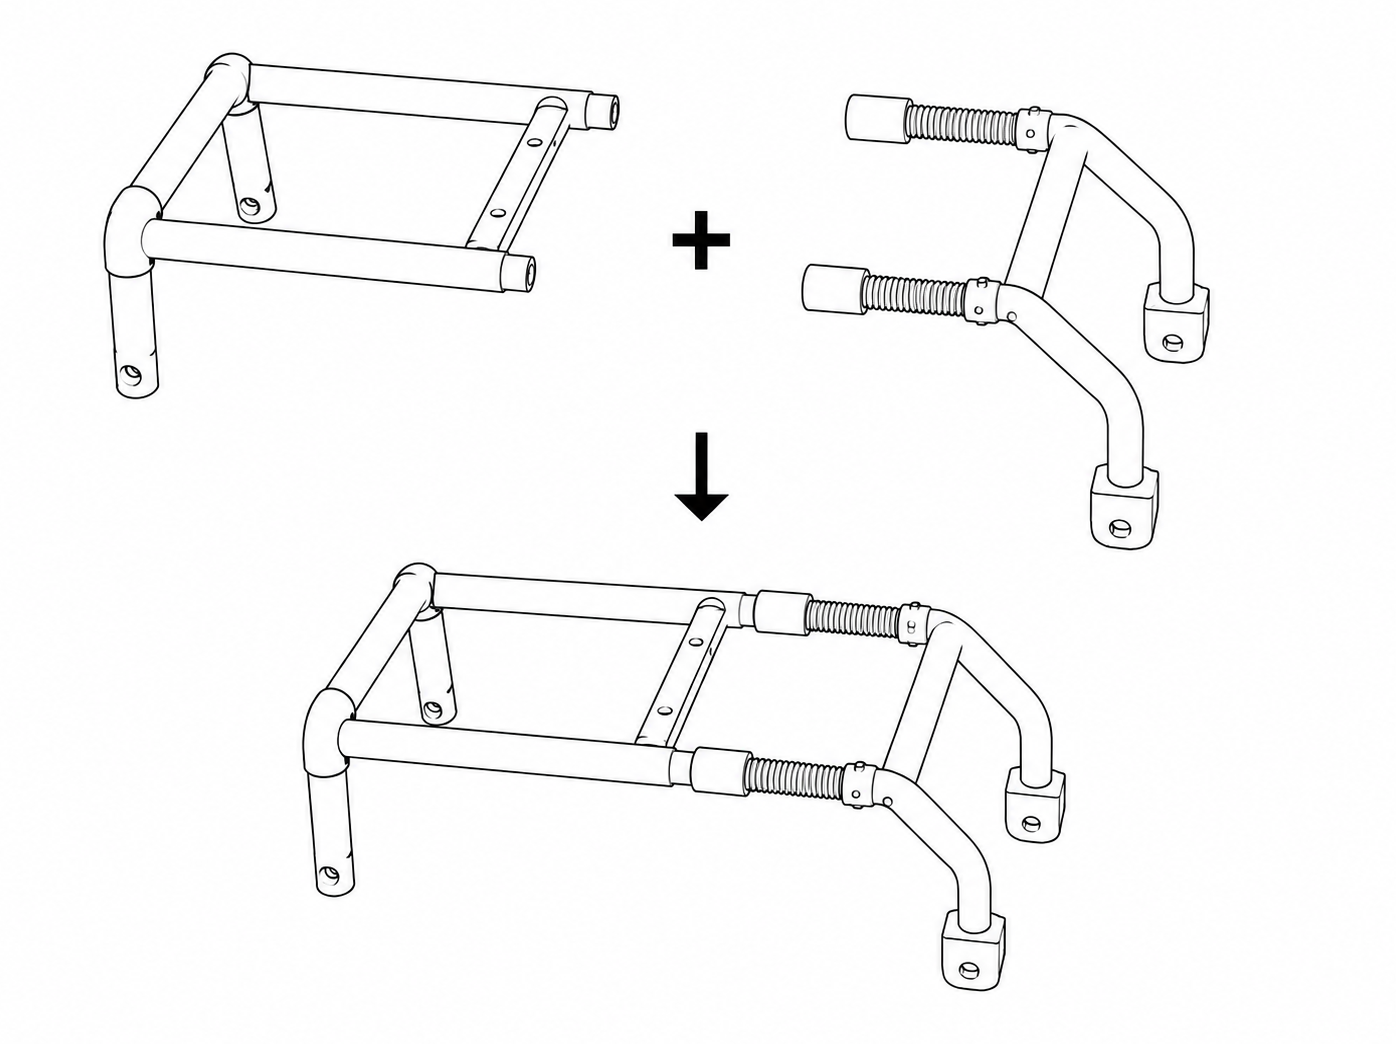
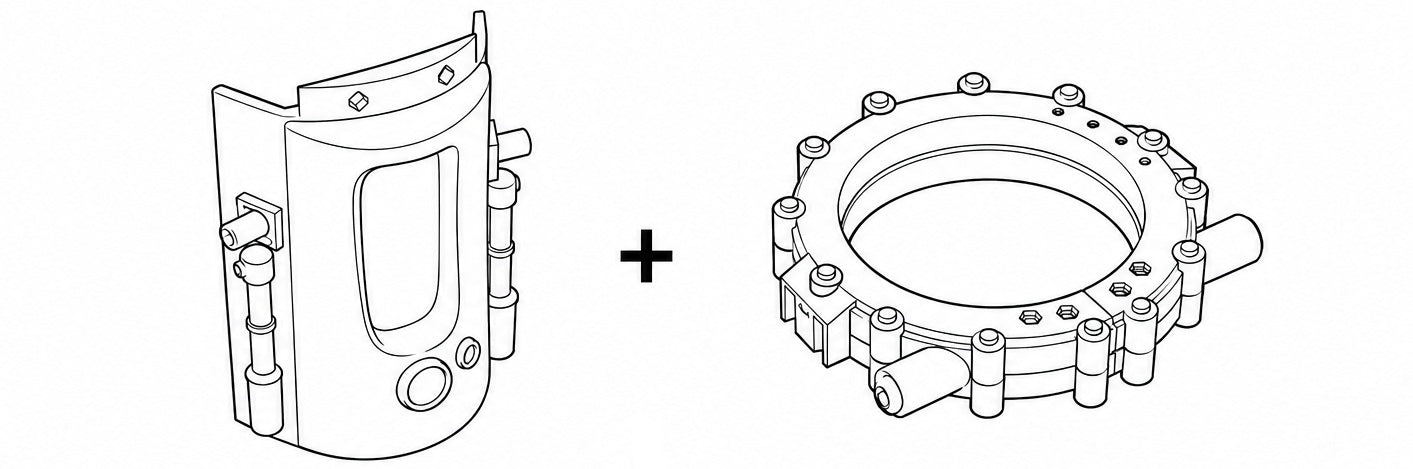
Finished sanding means we are technically ready for gluing. However, I do not recommend gluing all together just yet. Have a look at your pieces first and decide how you will paint them.
Navigate your decision by dividing parts by future individual colours. That way you know that you can glue, for instance, these parts together as they are both yellow.
This is what I glued in this very stage.

Step 6: Filling and Sanding the Seams
In terms of filling, this prop doesn’t require much.
Nevertheless, if you find some rough areas that need to be smoothed, use sandable 2-part polyester filler. (You can use any sandable filler. However, I would avoid traditional wood filler because it can crack, particularly when exposed to low temperatures.)
Step 7: Giving it all colour and creating the chipped paint effect!
Making the damaged paint look is super simple – check out this YouTube Short to see how it’s done!

Starting off with black and silver pieces that won’t have the chipped paint effect.
Black spray for the top part with spikes and cables.

Silver spray the tube-like parts of the construction. (see the photos if you are unsure which parts they are)
Creating the chipped paint effect!
To make the worn-out look of the Power Fist, we need to take a few steps for the yellow parts.
- Spray paint with silver/ chrome
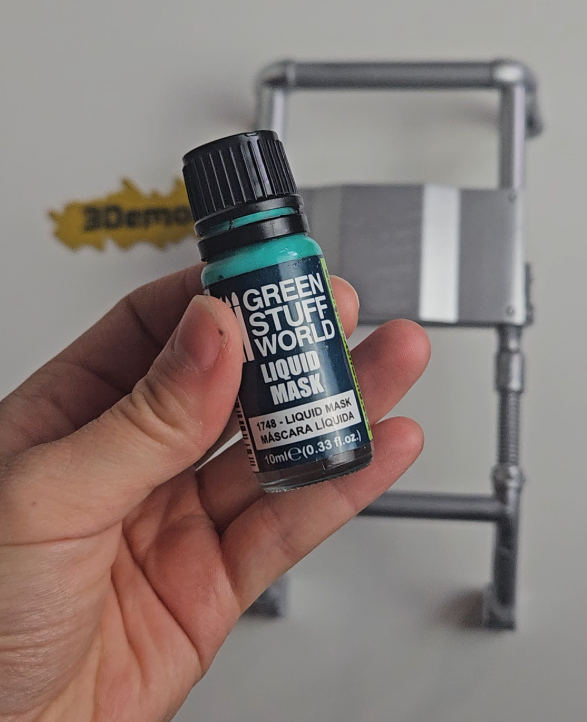
- Paint worn areas with a liquid mask
- Spray paint with yellow
- Rub off the liquid mask
1. Chrome coloured spray
For the base colour, I used a chrome spray. This choice will make more sense later, but I will explain it right now. I wanted to create this chipped paint effect that would reveal a metal-like surface underneath. To create this effect, you first need to spray your piece with chrome or silver, then apply liquid mask (it’s like a freehand masking tape), and then you spray with a spray of your choice for the top coat.

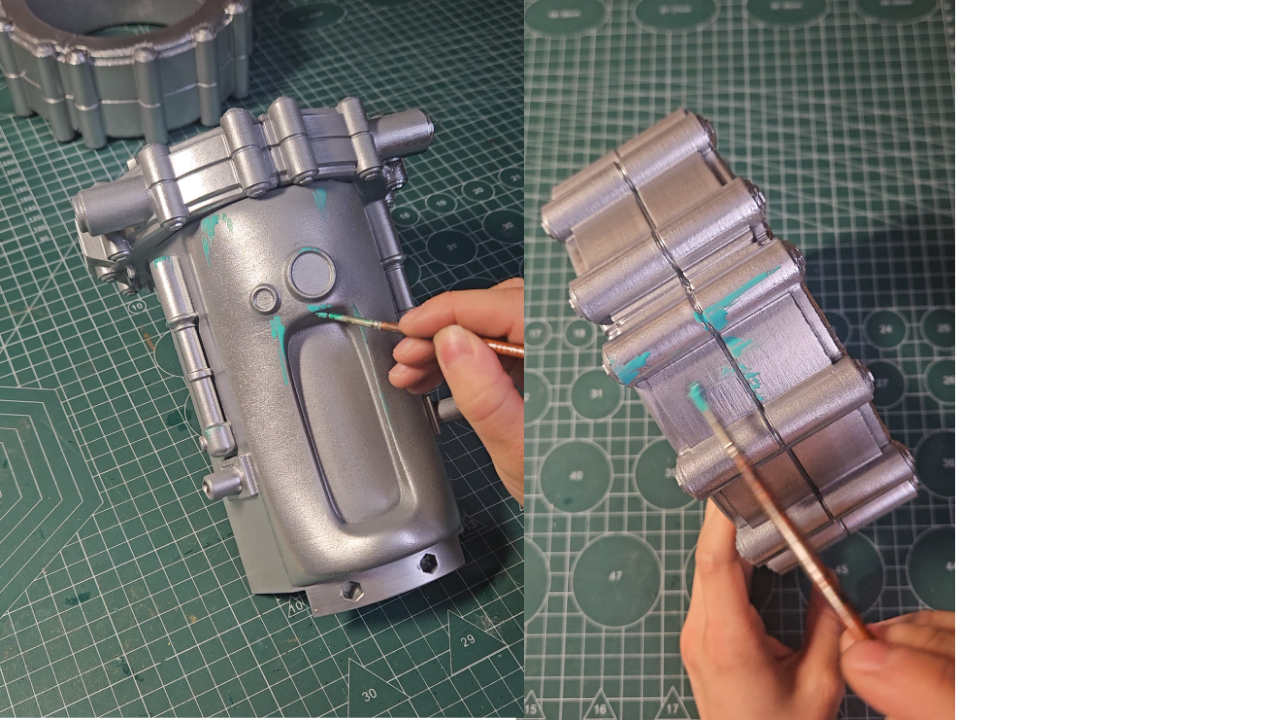
2. Masking
After the chrome base dried, I used a liquid mask.
I applied it using a brush to the areas where natural wear and damage would appear, especially around the edges and raised details. I also used my creativity and applied it tonot-so-logical places for the random, life-like wear effect.
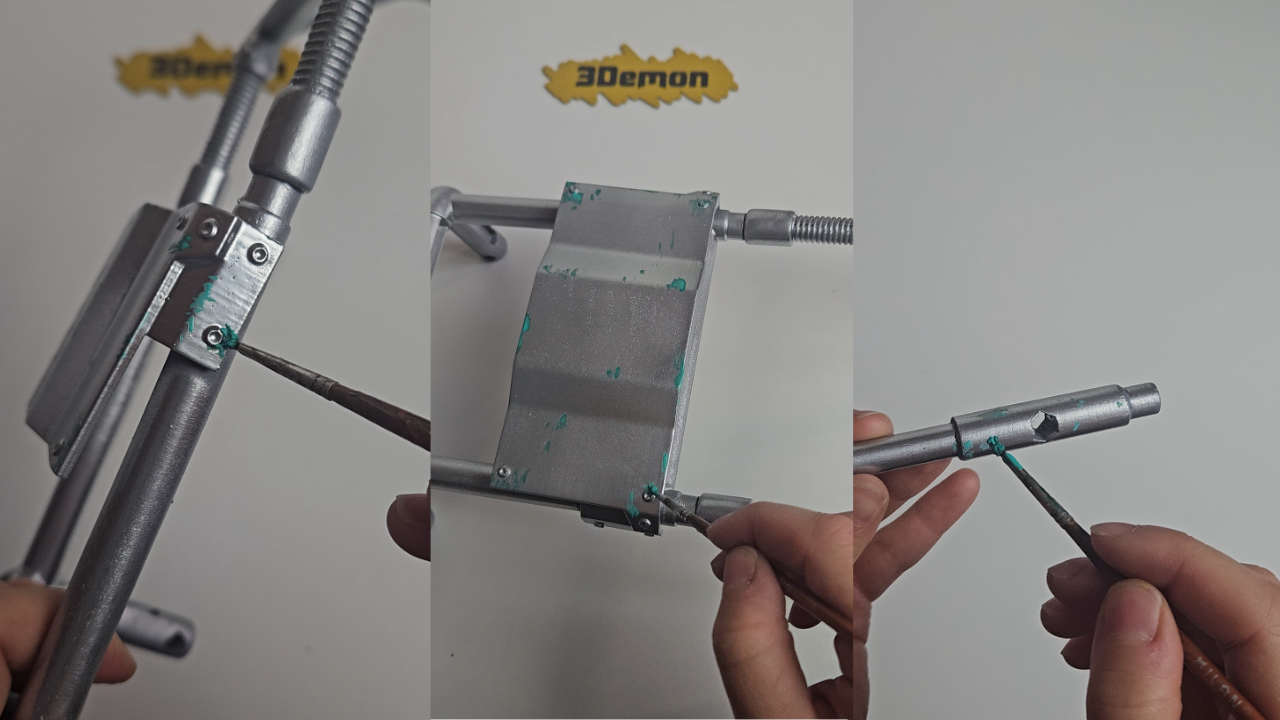
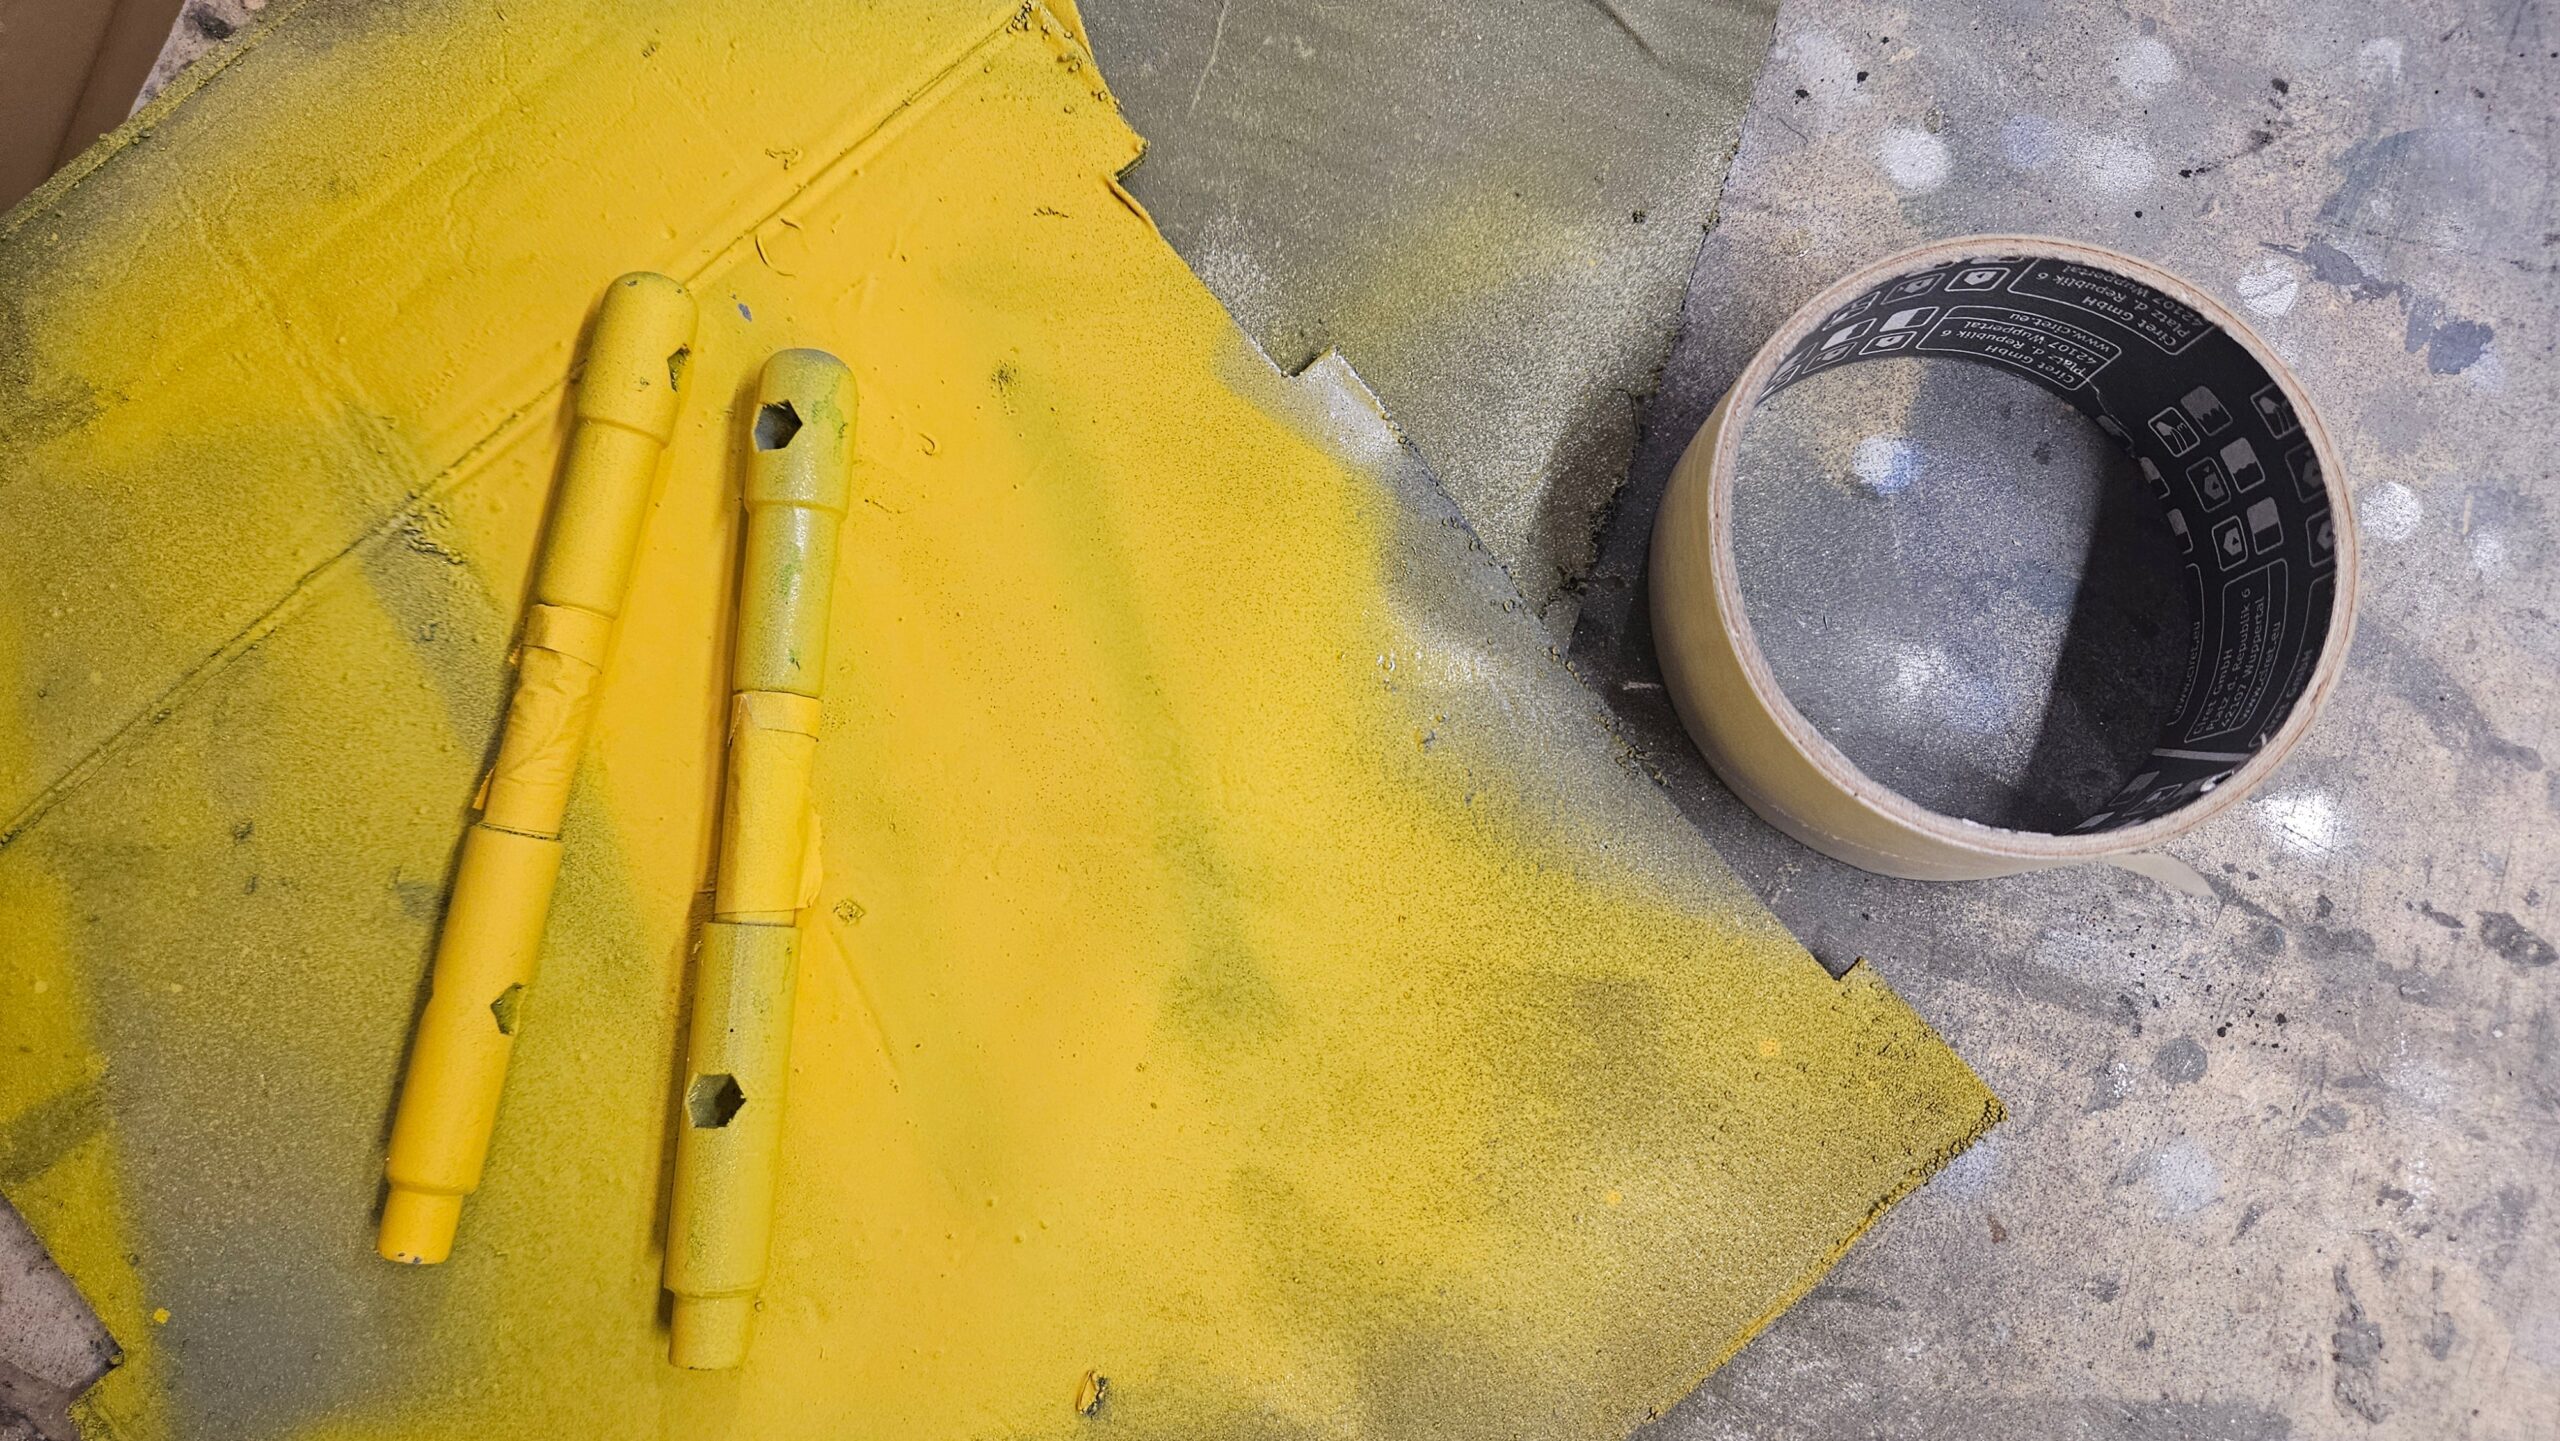
The second type of masking I am sure you all are familiar with is using paper tape. Use it to cover parts that should remain silver, such as these.
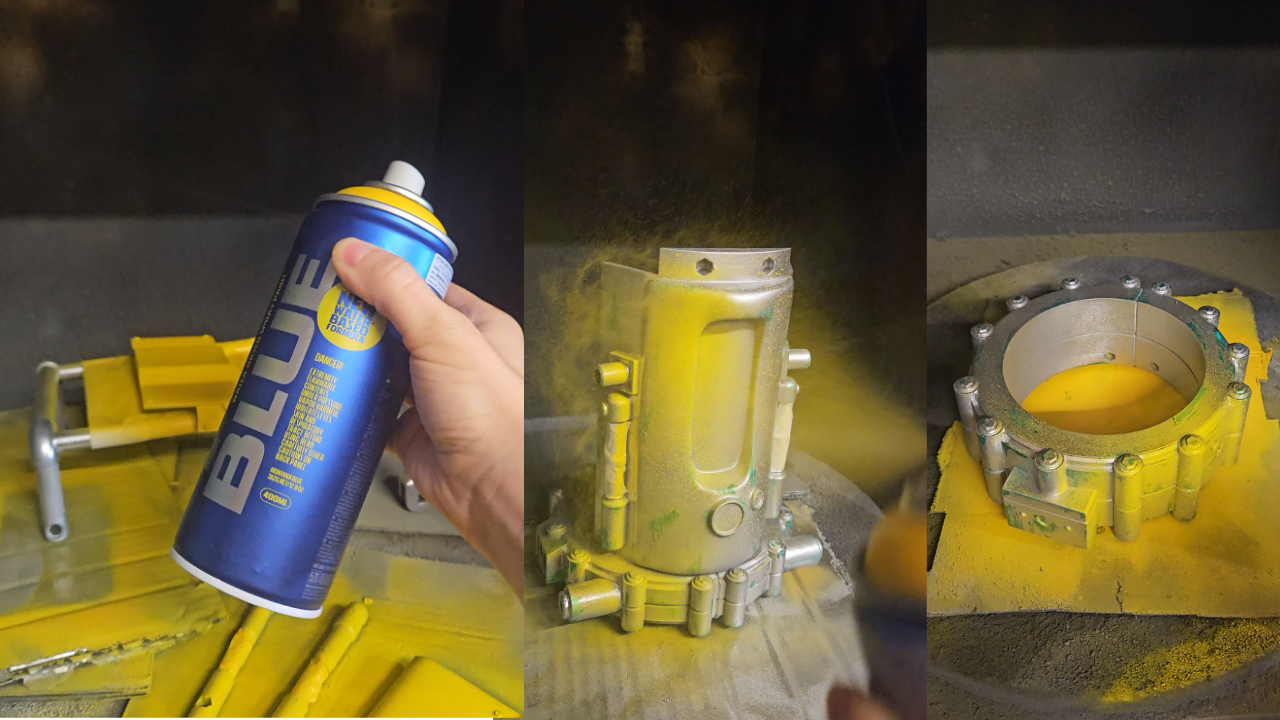
3. Yellow spray paint
When you have your liquid mask areas dry (You can check this by touching them lightly and feeling a rubber, goo-like texture that is slightly sticky but nothing crazy) take your yellow spray paint and spray all parts that need to be yellow.
4. Removing the liquid mask
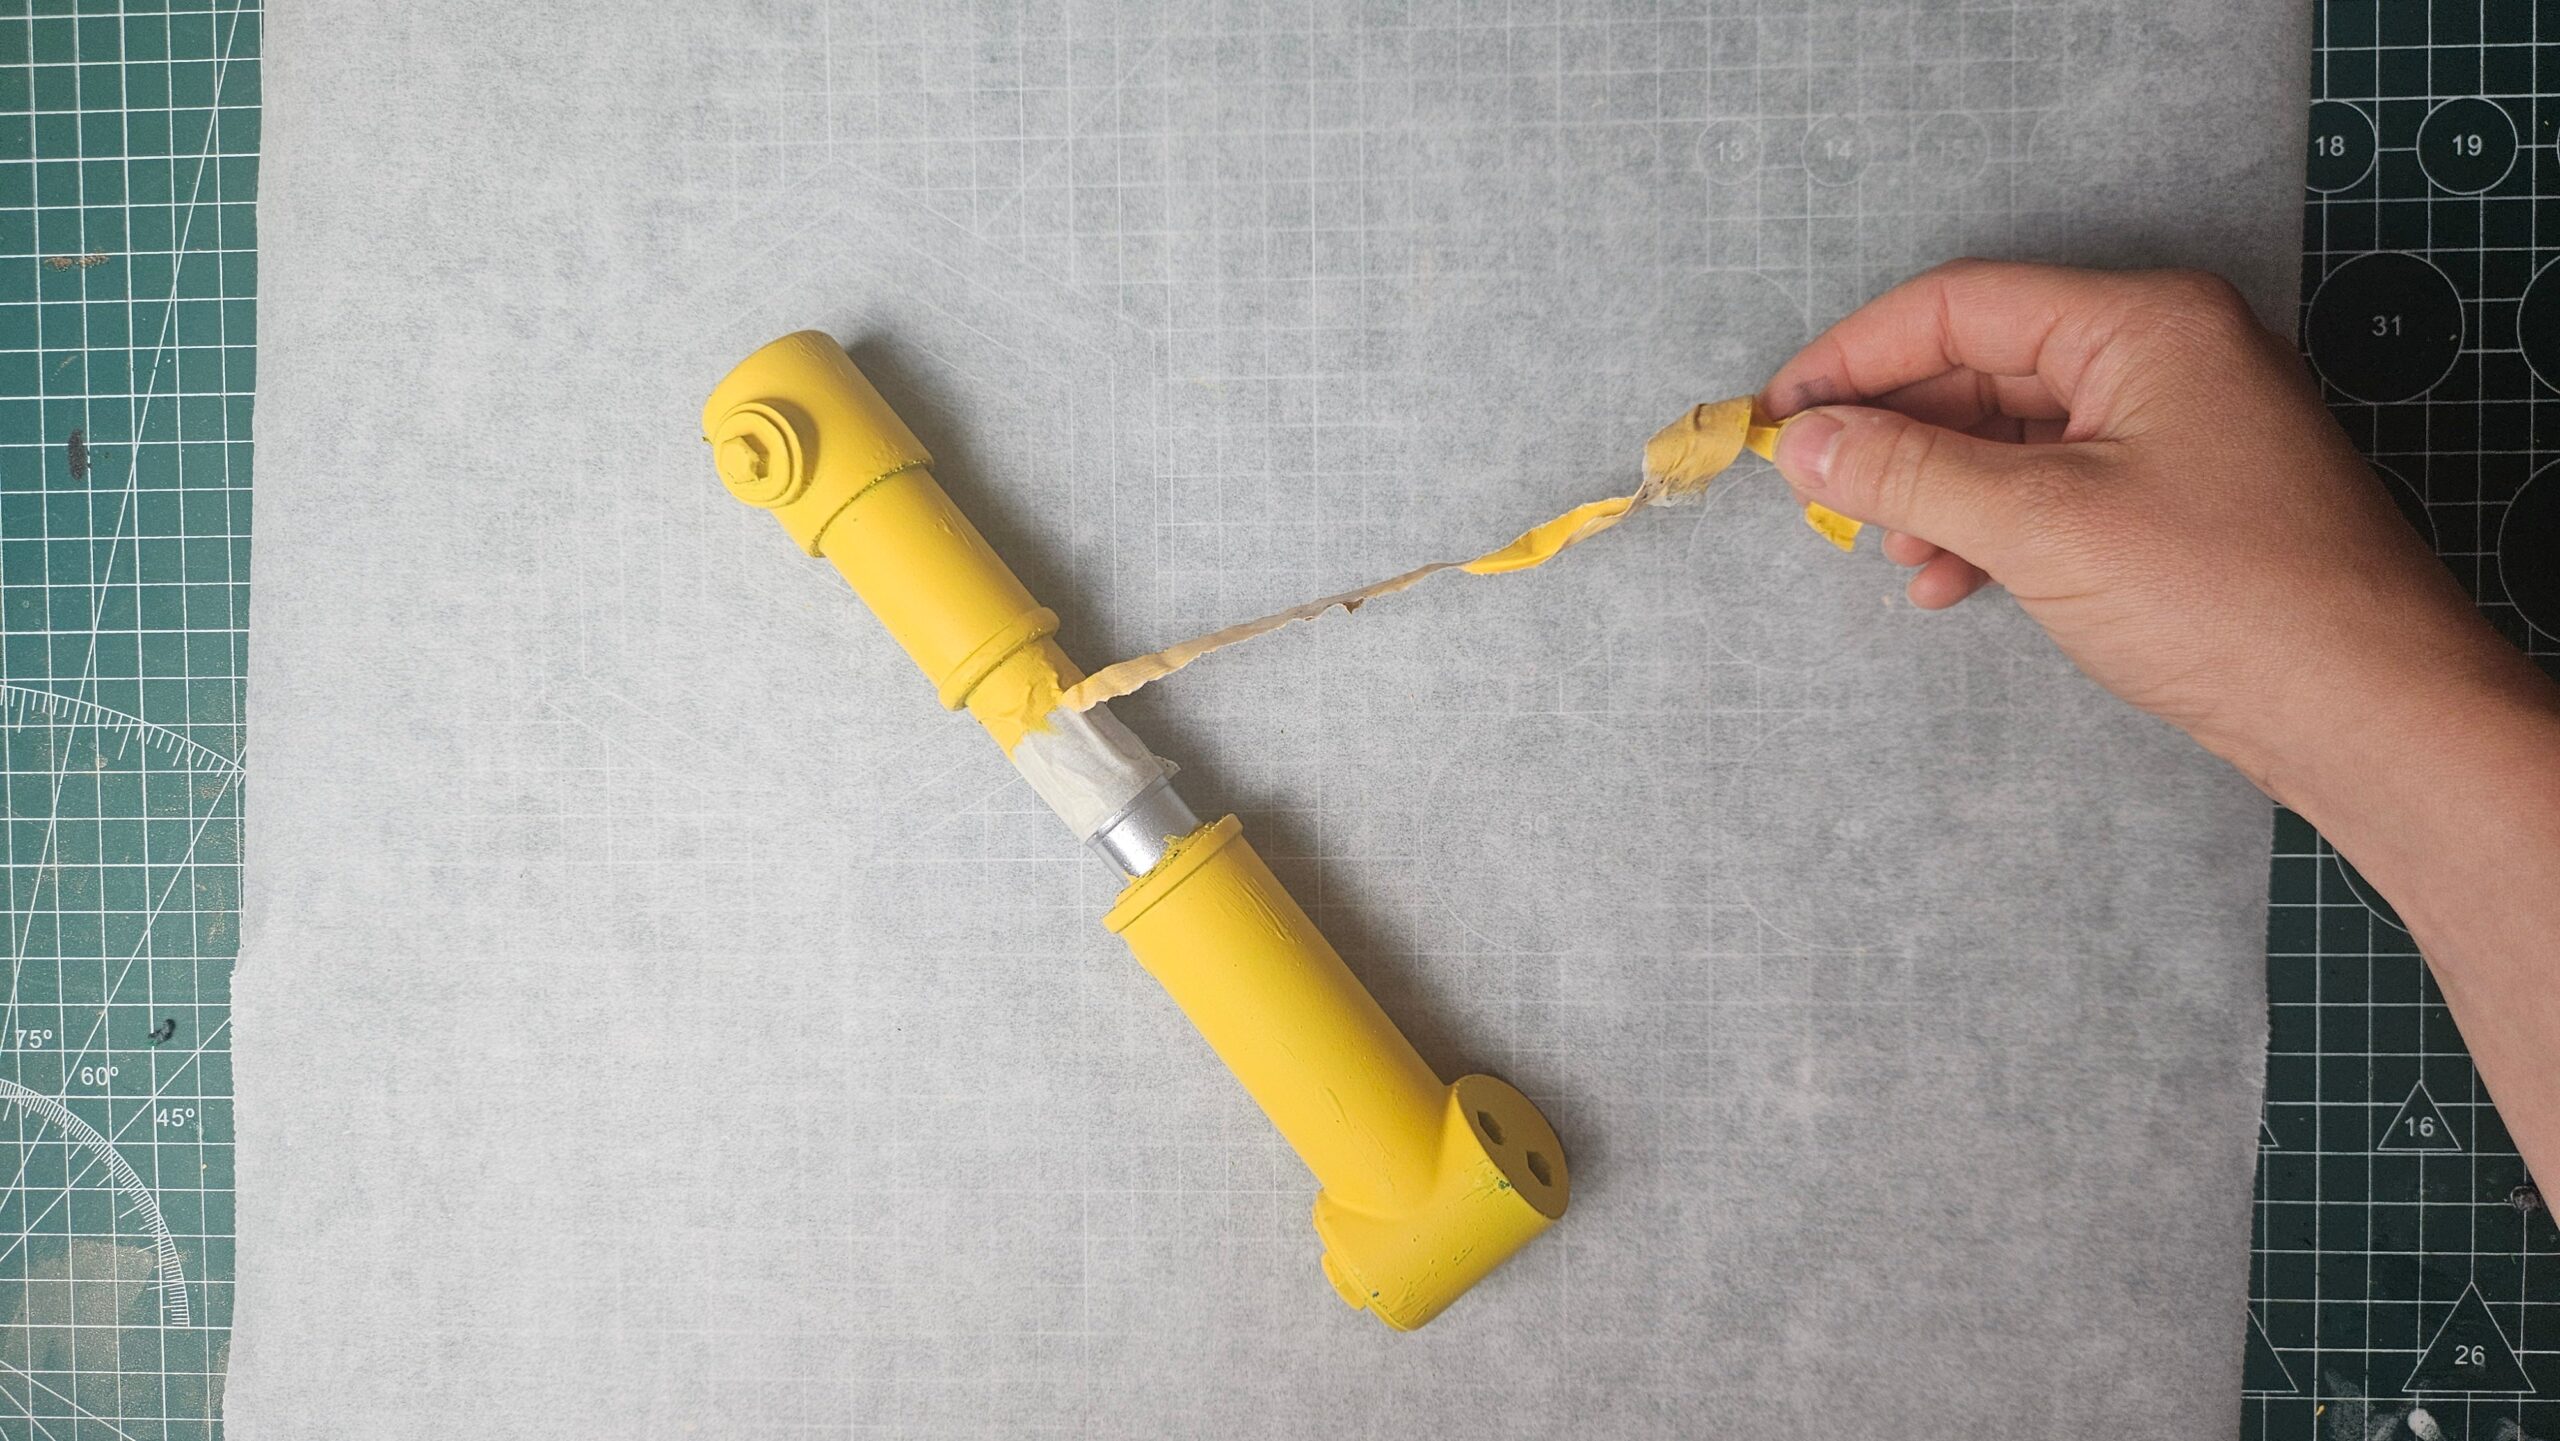
Now comes the satisfying part – removing the previously painted masks.
Check if the yellow paint has fully dried; then carefully remove the liquid mask from the surface. I used a small tool and my fingers to gently lift and peel it away without scratching the paint. As the mask came off, it revealed the silver metallic layer underneath, creating realistic chips and worn areas in the yellow finish.
I feel like these clean silver details immediately give the Power Fist that used and worn look. Pretty much a base for something that survived years in the wasteland.

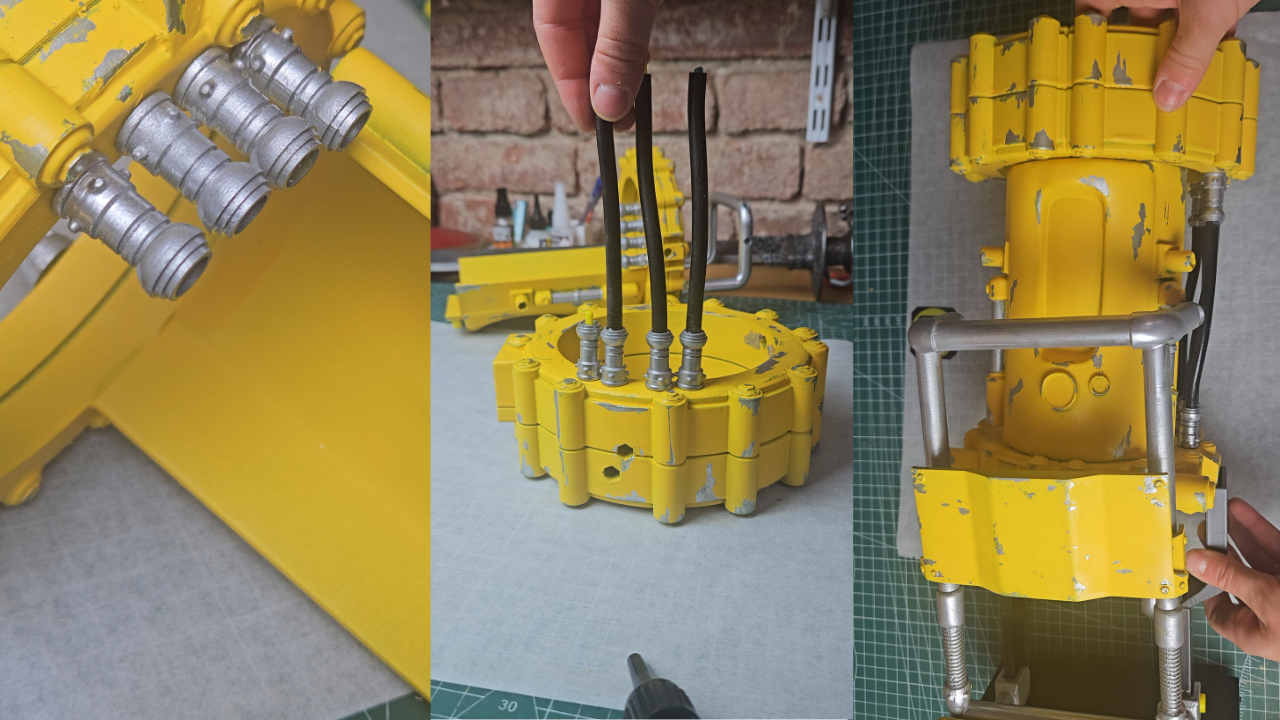
STEP 8: Final Power Fist Assembly
Now glue the rest of the pieces together. This step should be easy. 🙂
Be careful with the silver cable ends – always glue the same sizes together on one side.
STEP 9: Rust and Wasteland Weathering
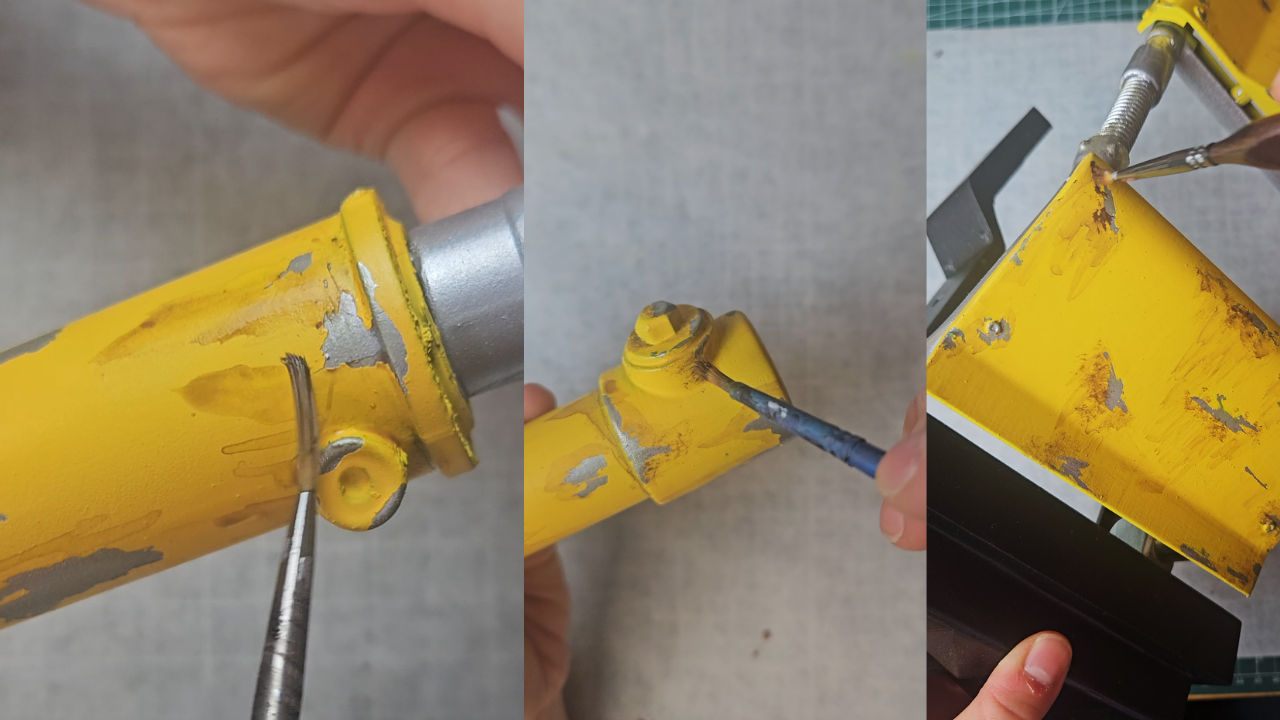
The next step awaiting you is painting rust/wear.
Use any shade of acrylic that reminds you of rust or dirt.
Dilute it with water and dab around areas where you want your rust or wear and tear to be.
Wait for it to dry. Then take the same colour and dilute it just a bit so that you can build texture and paint over the same areas. The final pass is using non-diluted paint to further accentuate the rust. Do this sparingly.
There is no right or wrong area to paint – just use your creativity. 🙂
Step 10: Final Result
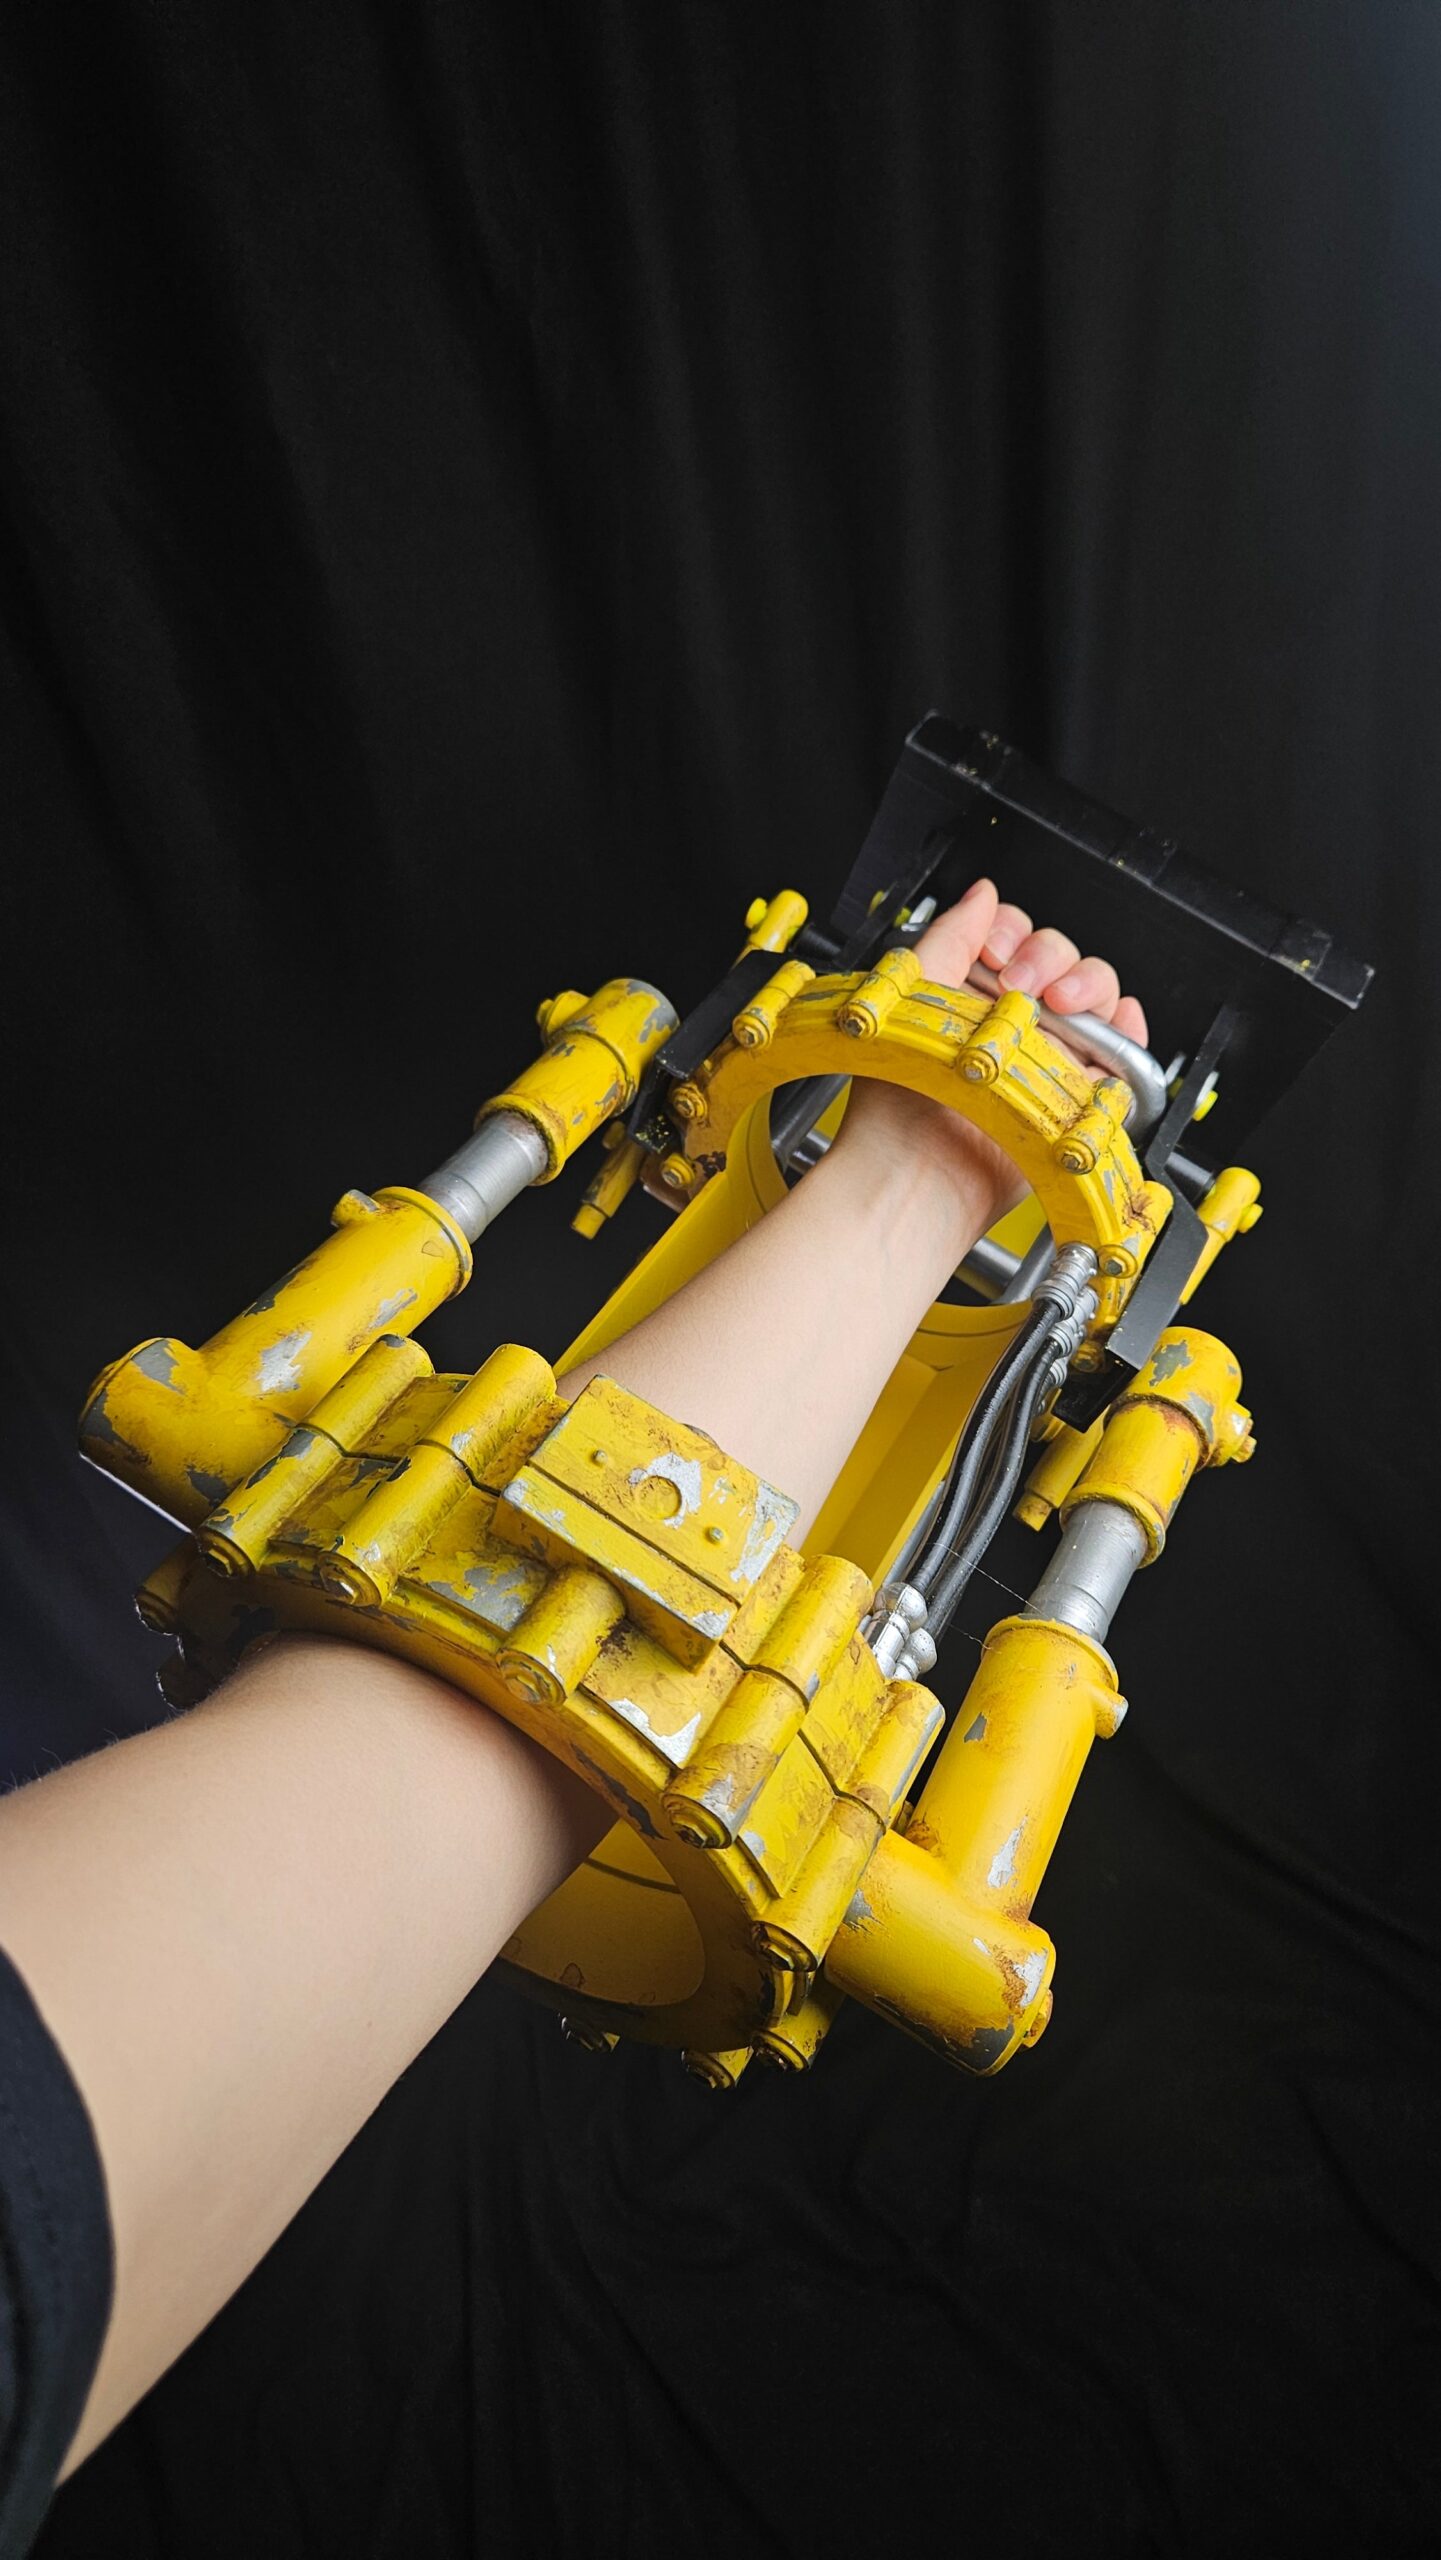
And here it is!
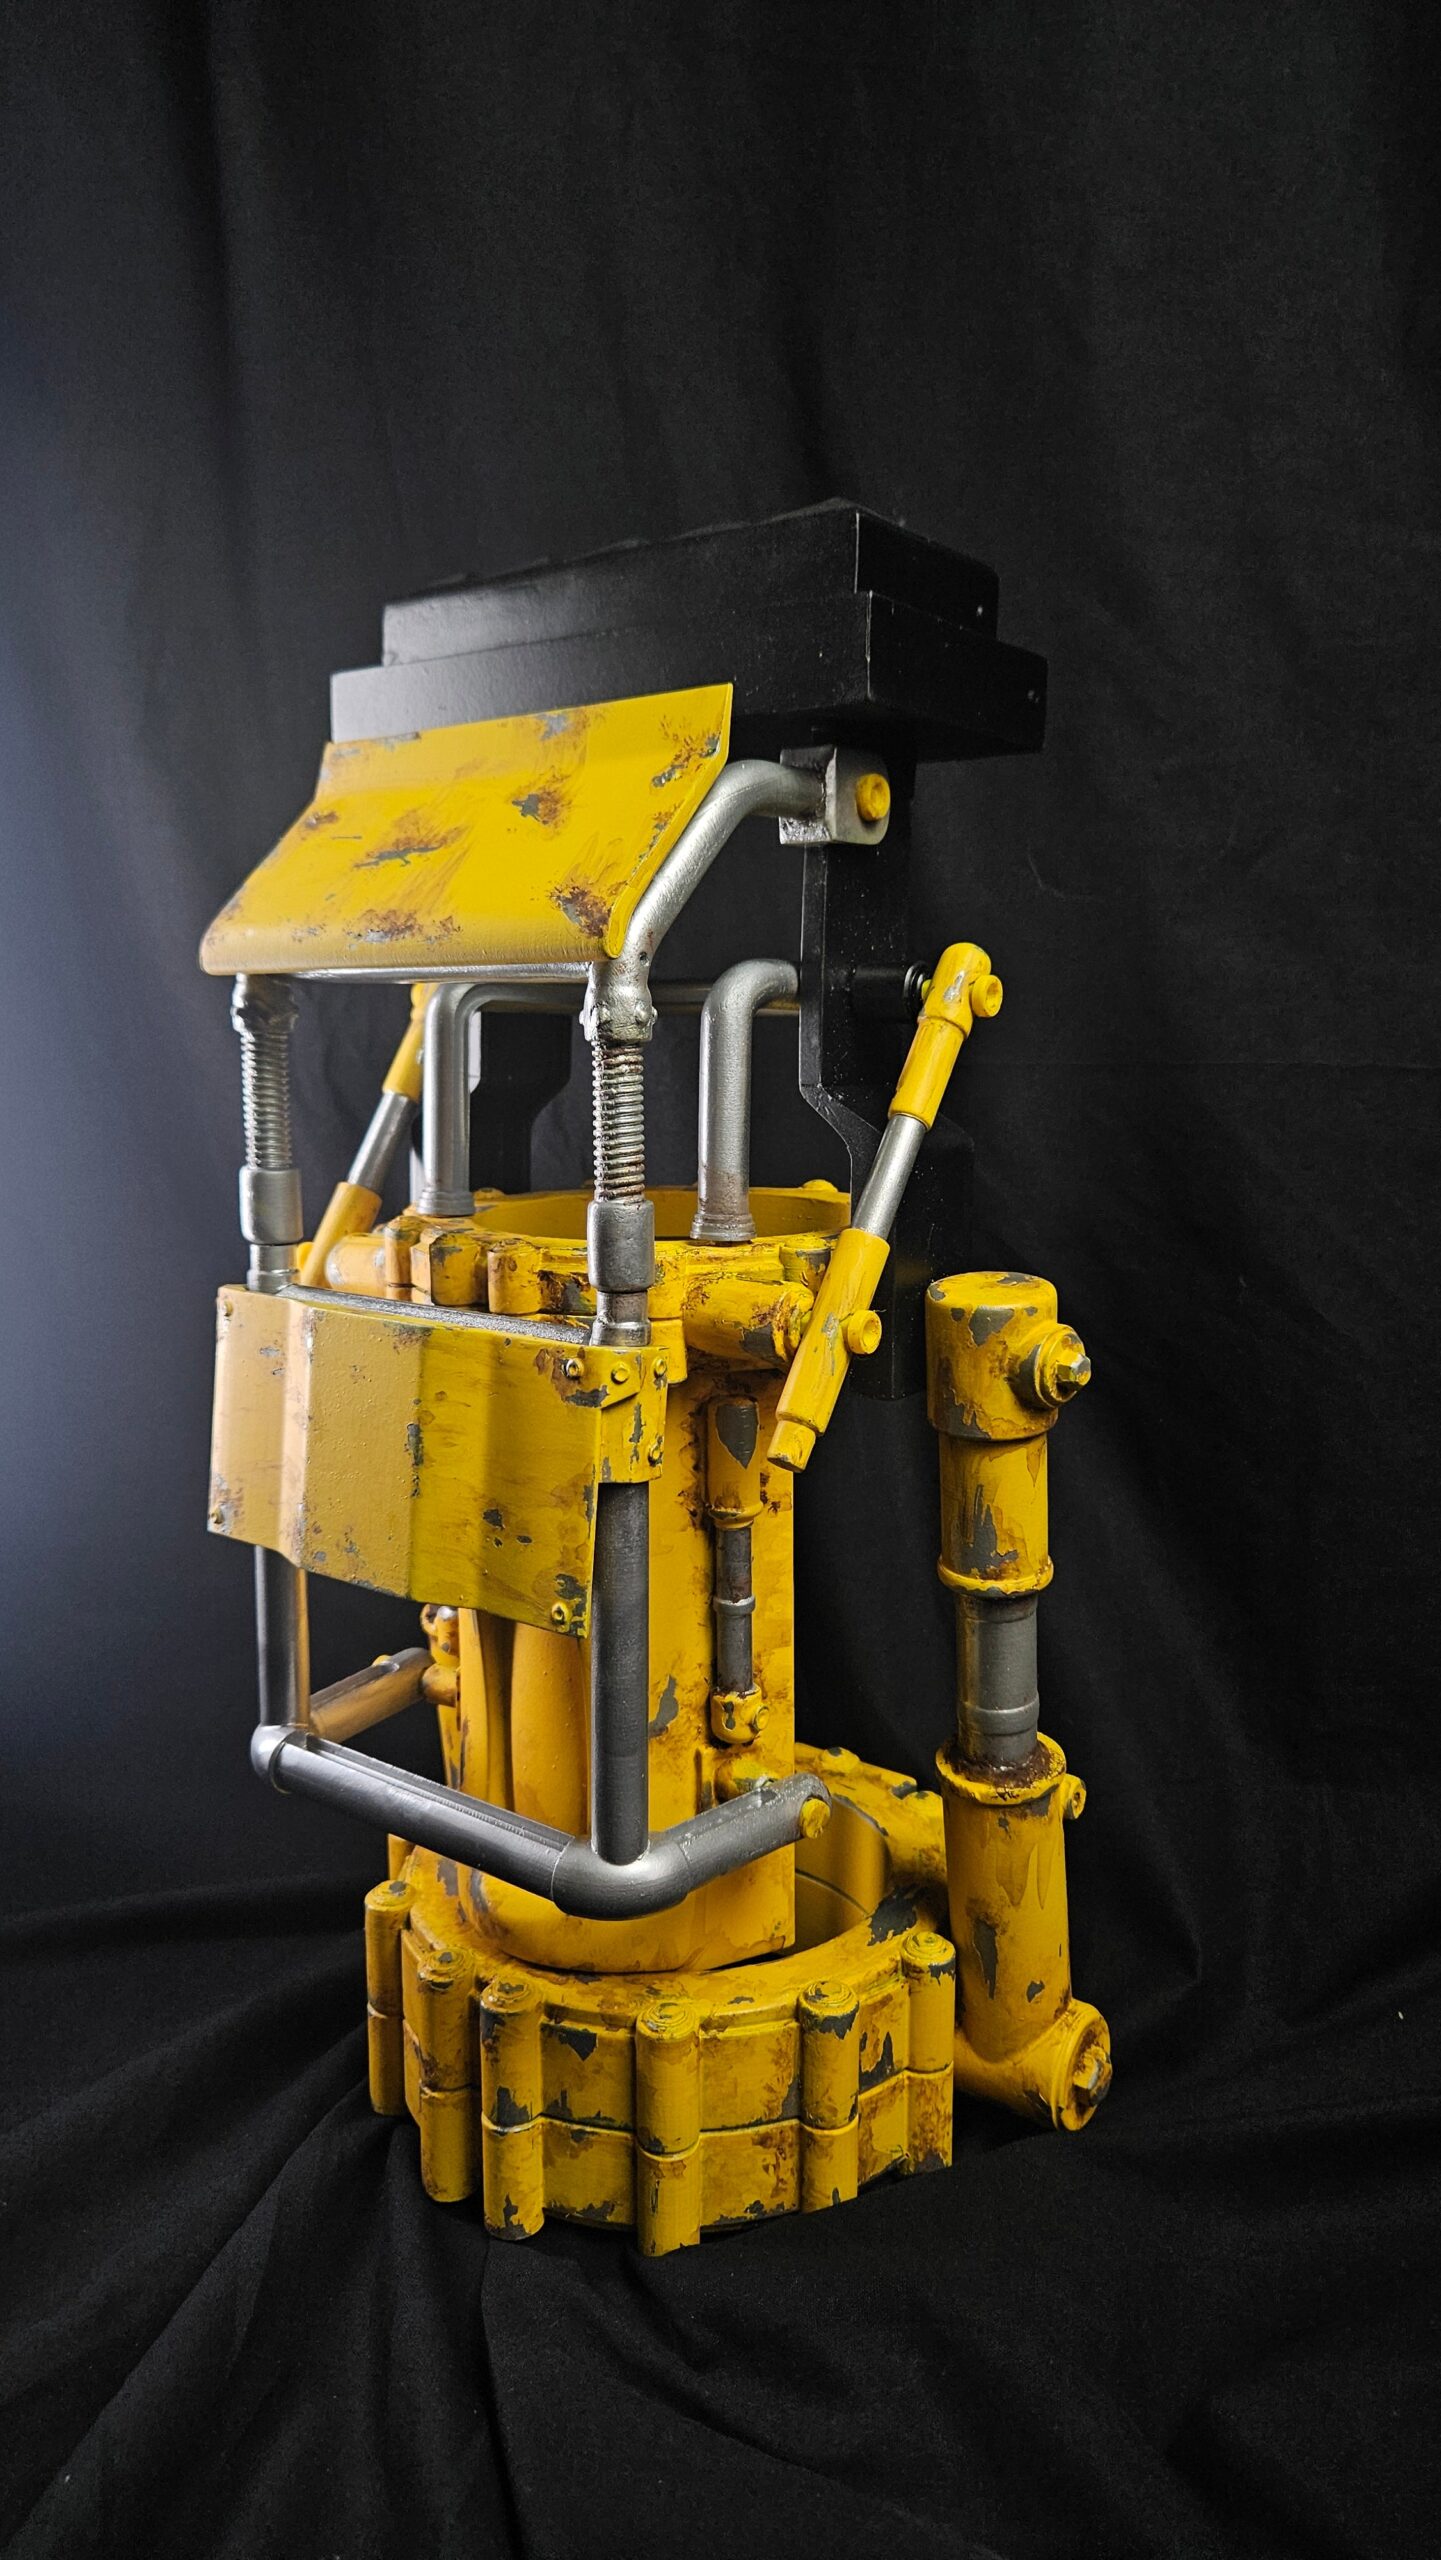
Lucy’s Power Fist from the Fallout series is ready for display or cosplay.
This build required a lot of different types of painting and definitely lots of creativity haha.
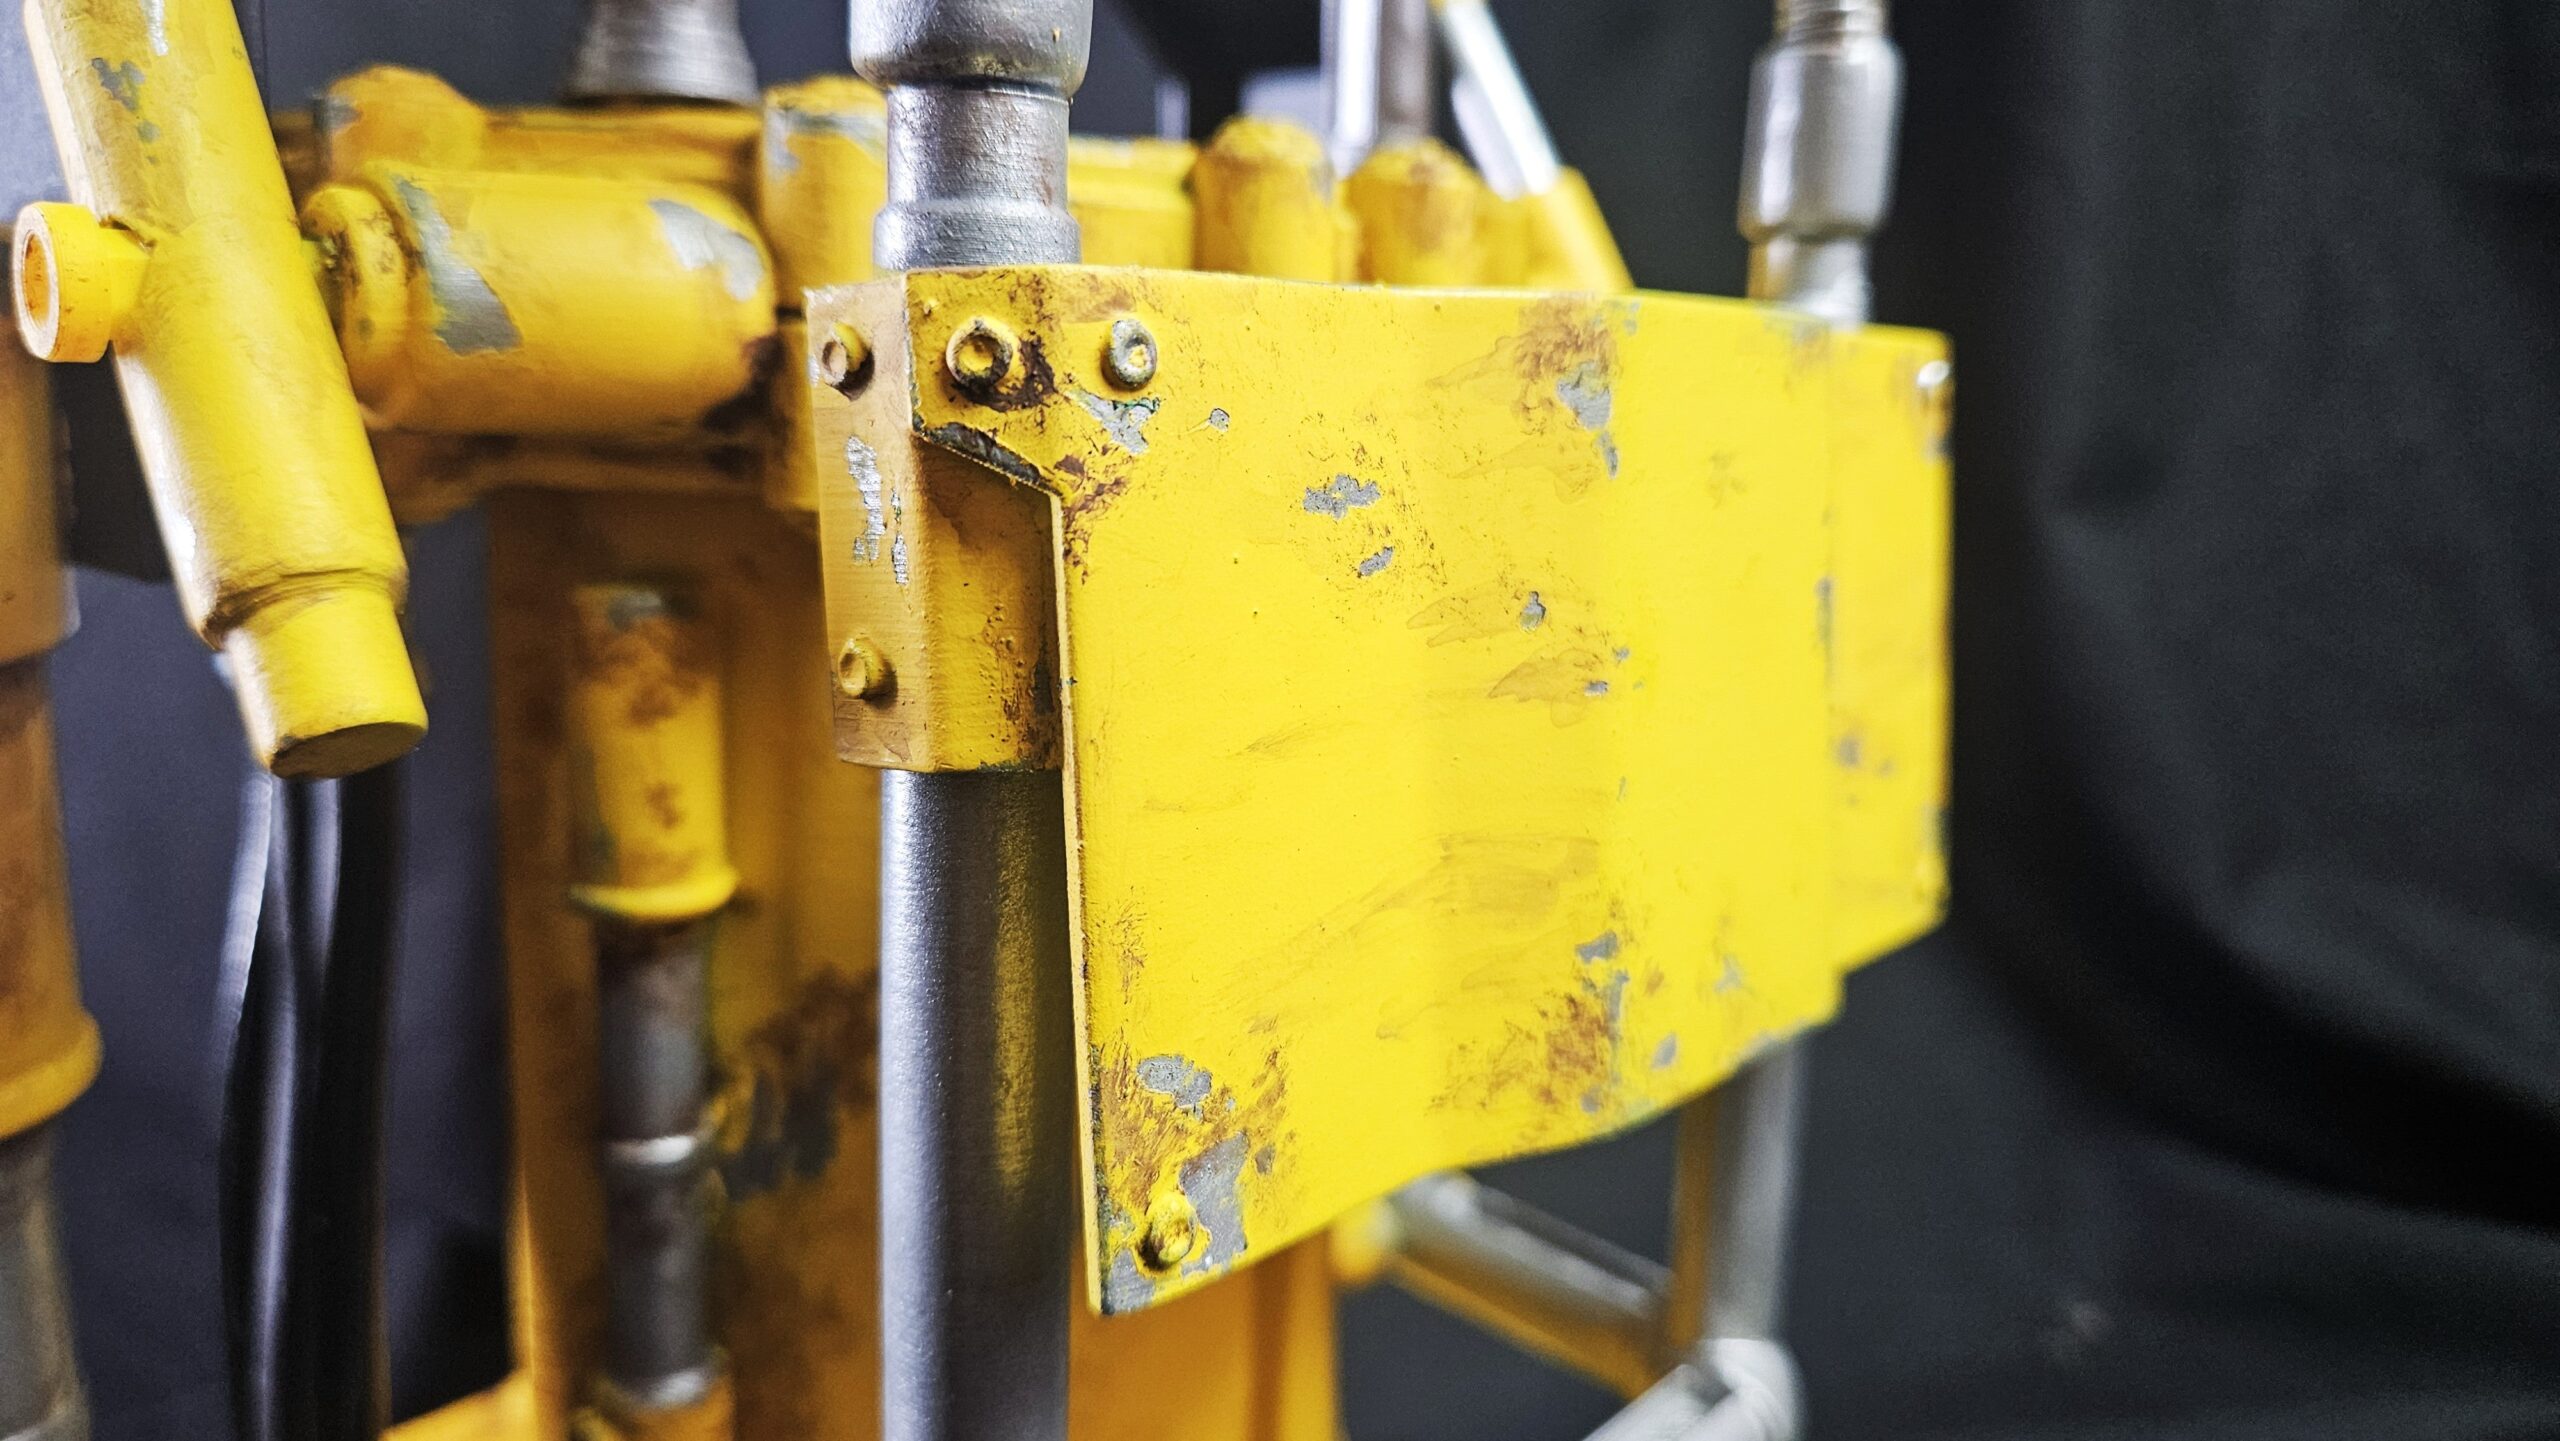
The chipped yellow paint, exposed metallic areas, scratches, and weathering really helped give it that worn Fallout look, as it had already survived a few adventures through the wasteland. Exactly what a proper Fallout weapon should look like!
Good luck with making your own, and if you want to share your process or finished piece with us, use tags on Instagram or any social media 🙂 or DM us your pics/videos so we can share your amazing work with the world!
Leave a Comment