This article is shared courtesy of Gary Stanton, who 3D printed our Anubis guard helmet and Jaffa staff from Stargate.
✨For more content, check his Instagram account!
- - -
So this is the story all about how,
I printed a costume sometimes upside down,
And it might have taken hours and not be possible to wear,
But I’ll tell you how I became the Stargate Anubis guard to all those that care

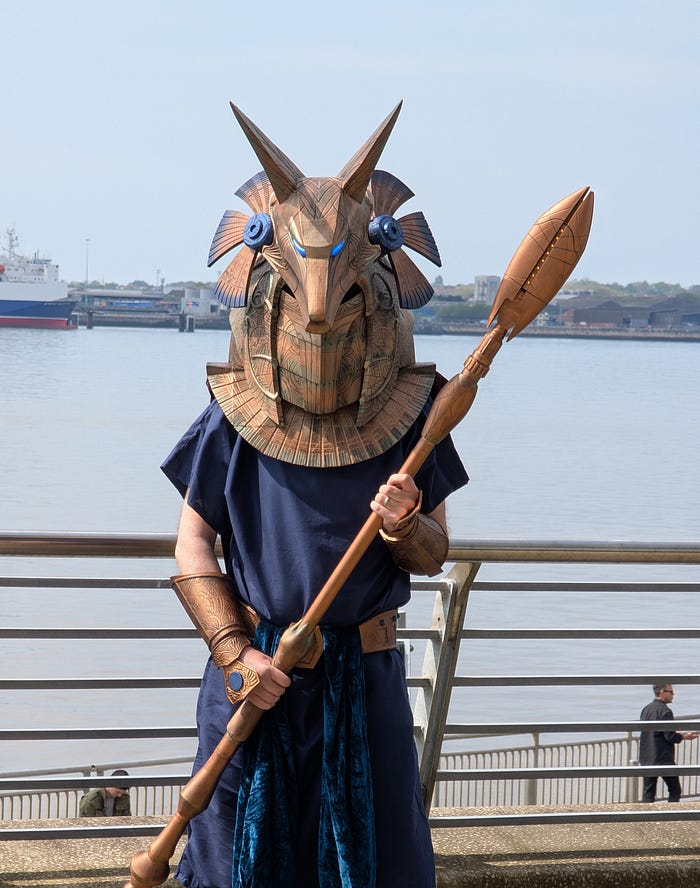
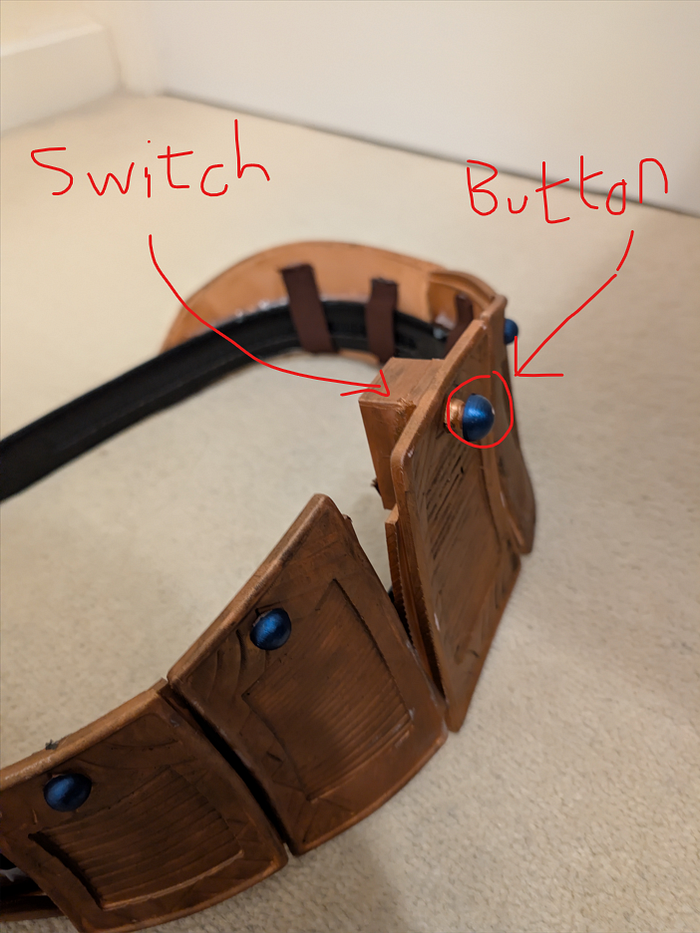
Finished Costume @comicconlpool
I remember first watching the Stargate movie and being frightened by the Anubis Guards first appearance and at the same time in awe.
More than two decades later when looking for what to make and wear next to a local con, after my first iteration of the Witch-king costume (previous article), I found a 3D model of the Anubis Guard for purchase from the 3Demon website. It was on sale so I bought it on a whim and so began the 3D printing voyage…
Construction
I wasn’t too sure if the 3D models I bought would work as a costume, especially for a long period of wearing it. I decided to power through printing all of what I could and putting
it together as a starting point. If it didn’t work as a costume I’d have a nice display peiece.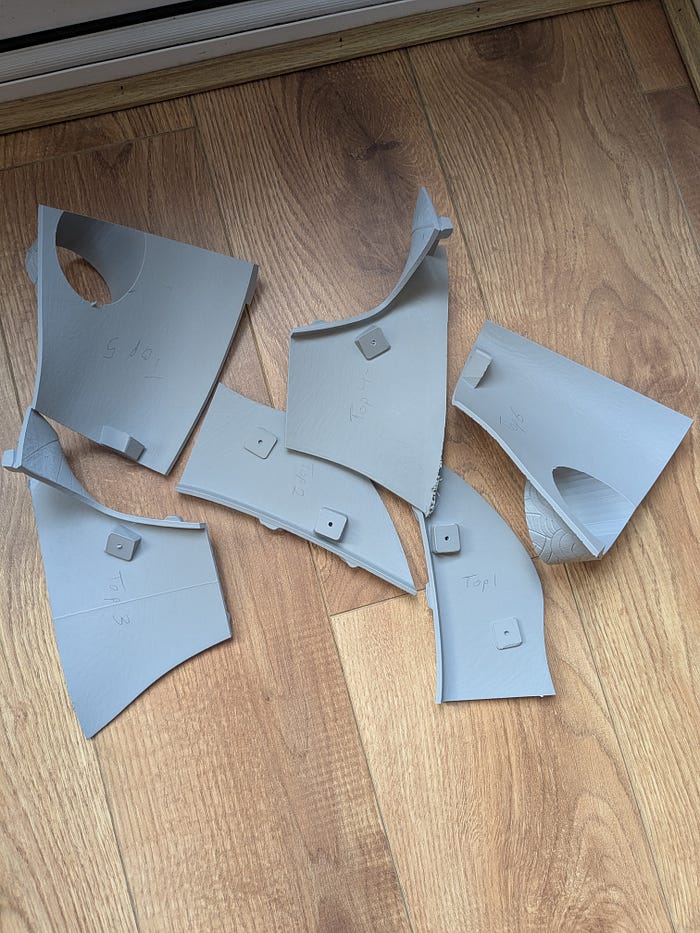
Labelling is essential when printing all in one go — there were no instructions for the pre sliced files.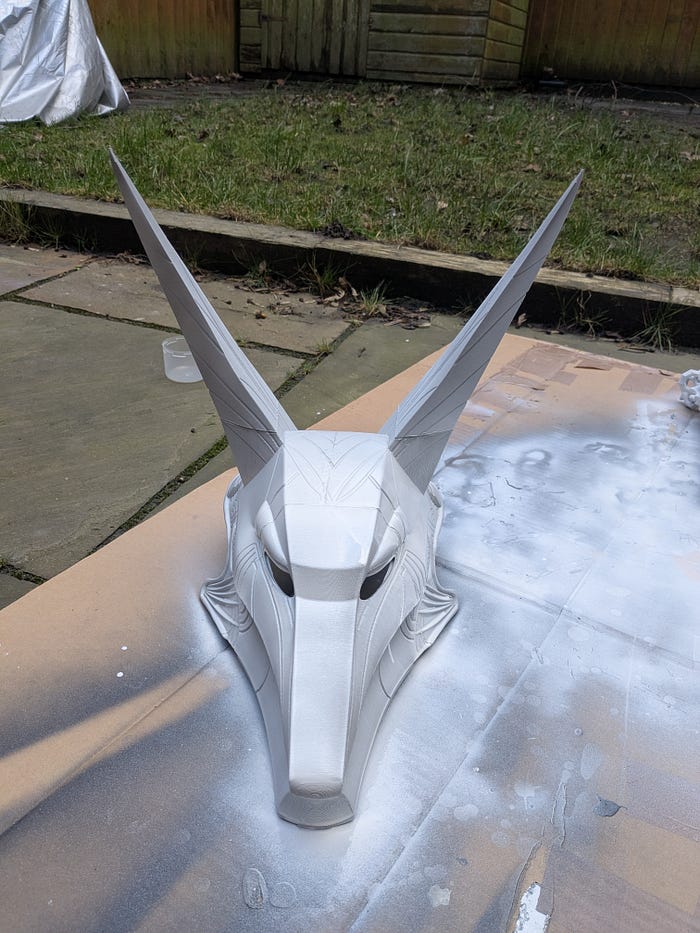
Head primed
The general process was:
- Join — with superglue/by melting with soldering iron
- Smooth joins — Liquidtex, sanding
- Prime — Using spray can
- Paint— Using mainly an airbrushed copper coloured paint from Vallejo
- Weather — Wet kitchen paper slightly, paint on black, rub off
-
Top coat — Spray
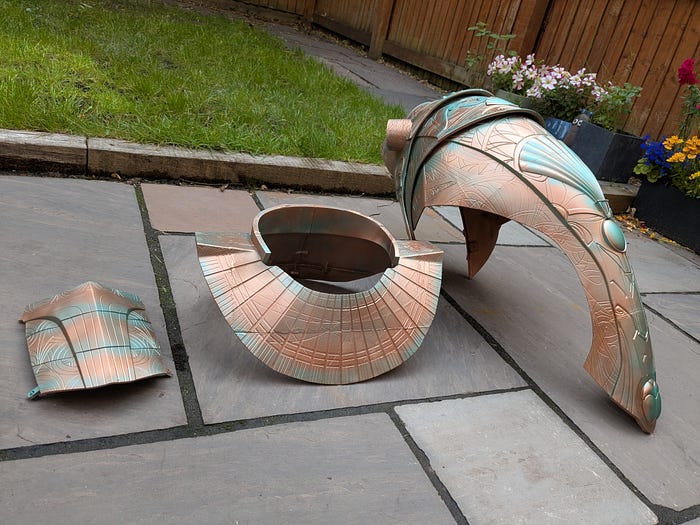
Face cover, collar and main head piece, pre-weathering
The staff was created by using a plastic tube and sliding the 3D printed sections over (quickly with superglue applied):
Hollow staff
This would likely be a good moment to mention that the models had options for electronics and either powered mechanical parts or static ones. I ended up with a middle ground due to the complexity of those designs and sometimes modelled my own parts in OpenScad to ease the process.
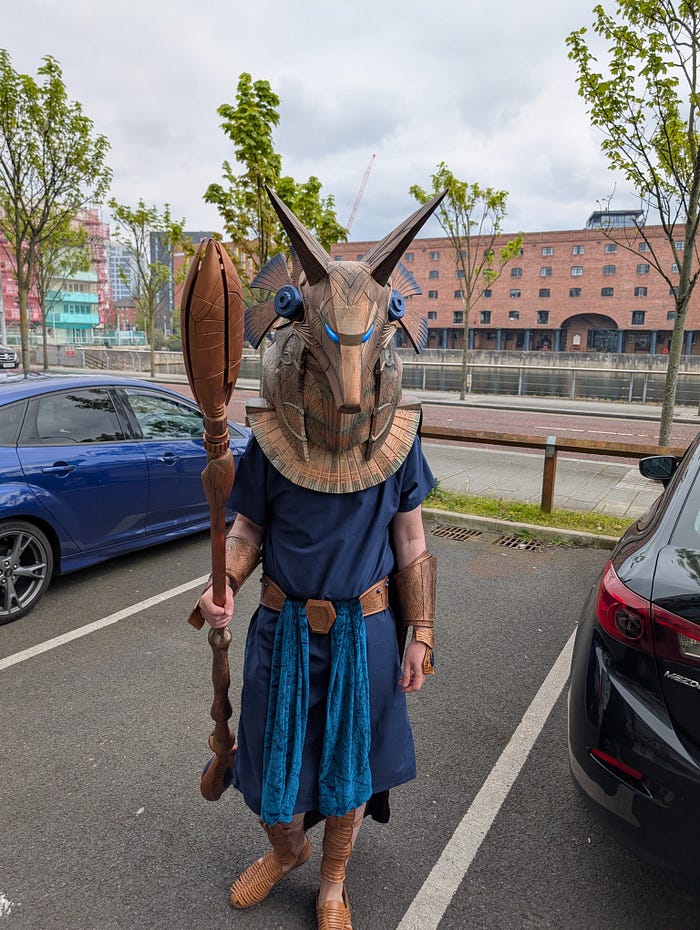
The staff has four led strips all soldered together with an Arduino nano embedded in the end to control it: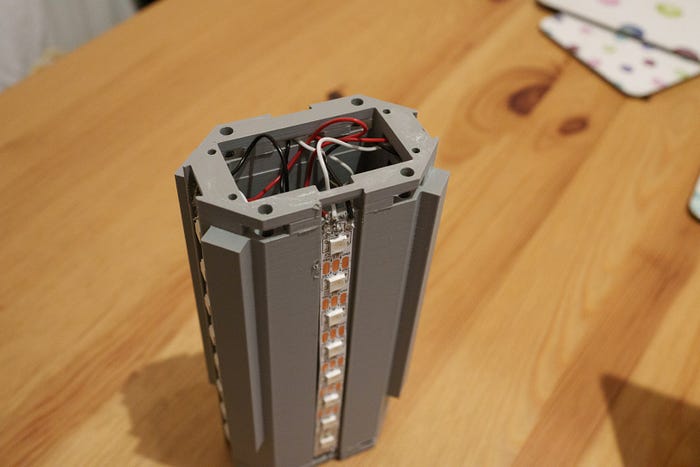
End piece of staff with LEDs and Arduino Nano
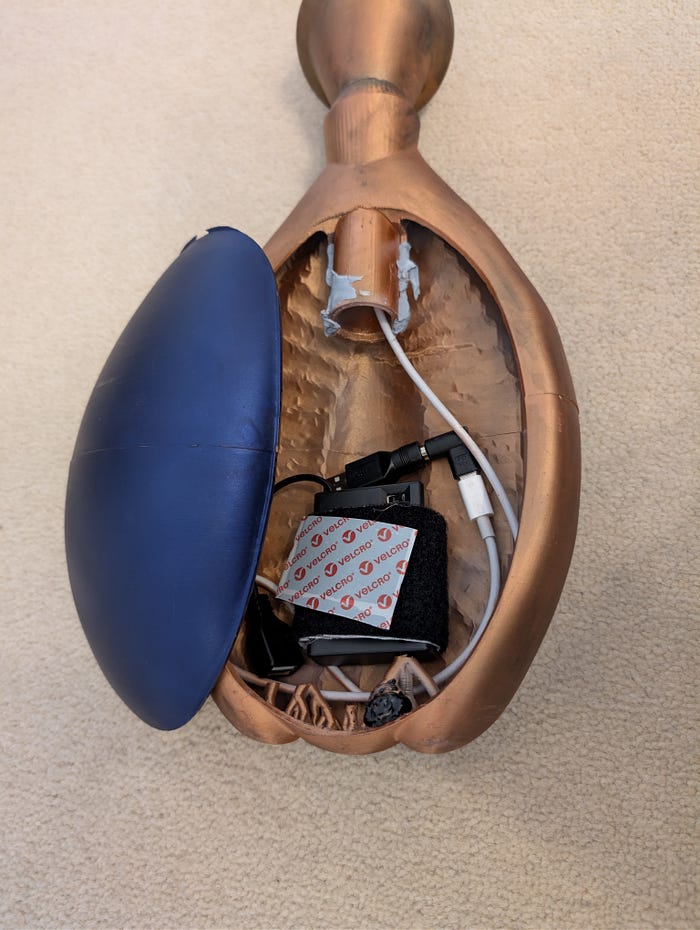
After assembling the staff and sealing in the Arduino for good, I worked on coding a gyro solution to enable the arduino to flash the lights in sequence, as if firing. They fired whenever the staff is held horizontally, otherwise they glow on and off — no extra complexity of switches. Three AA batteries in the base with a usb cable threaded all the way to the top powered the Arduino and LEDs.
The head has movable wing/ears, making use of an Arduino Uno and two servo motors, these were wired into the main head piece. I custom designed the holder for the servos as the purchased model had a more complex fan out design. Simplifying it to a basic spin made this doable for my skill level and more likely for it to work consistently.
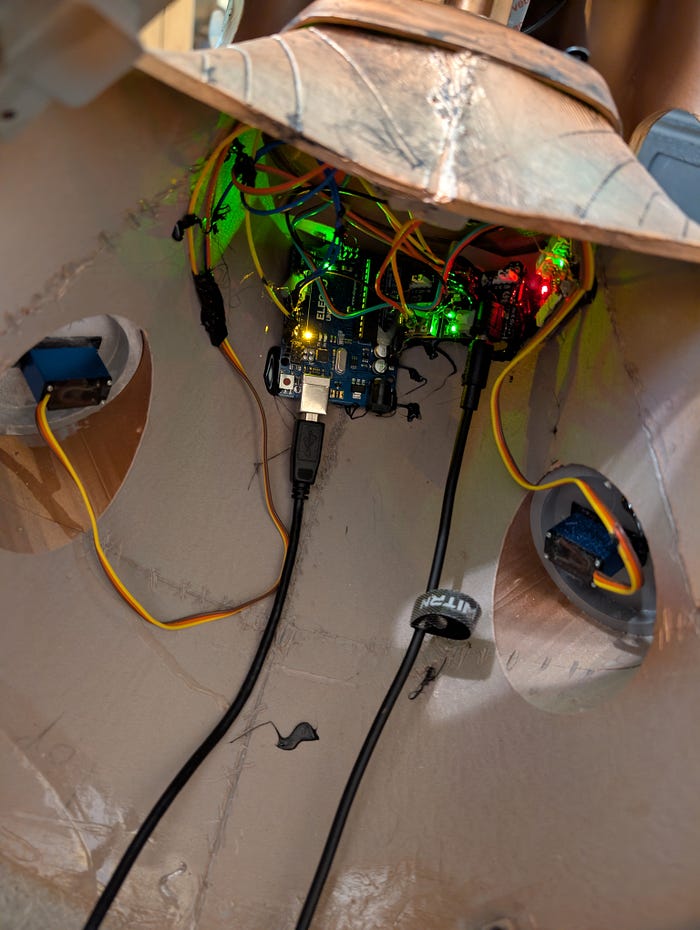
Servos on either side, arduino tucked up inside (early photo, later cleaned up with a single splitpower cable and cable management)
I also wanted to be able to control these servos remotely — to turn them off when taking off the head to prevent damage or in order to be able to hear anyone. Deciding to avoid bluetooth and with a need for a wireless solution, I opted for a DFRobot self-powered wireless switch.
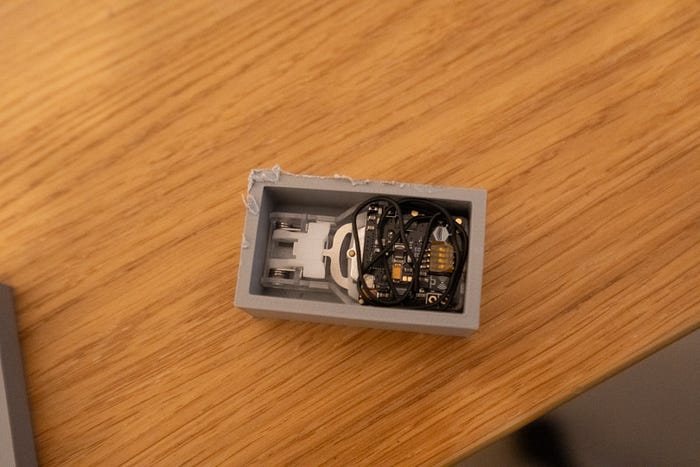
Checking dimensions by printing a test box
This switch I planned to fit into the armoured belt I would be making. Using OpenSCAD I designed a way to hide it somewhat in the existing design so I could turn on/off the servos by pushing my lower back:
Example of OpenScad code for the box above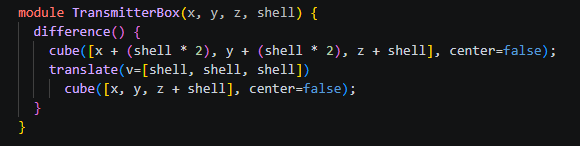
Hidden switch in belt
WATCH the reveal here:
The last significant piece to work on was the tunic. As I’ve only done a couple of brief hand sewn seams before — this was a challenge. With some help from family, I was shown how to use a sewing machine and armed with a sewing pattern I made a basic tunic, plain, simple but all made by me.
Addding a velvet cape and using another piece of velvet to cover the joins of the belt gave it some visual flair needed.
Liverpool Comic Con, May 2026
With the costume made it was time to try it out.
The lights and servos all worked flawlessly — though, for the next day, I adjusted the timings and removed the shake feature of the staff so the LEDs stayed the one colour and didn’t turn off.
I decided to enter in the Cosplay Showcase on the Sunday, the less formal competition where you don’t need to have created the costume by yourself. This was my first ever contest so was unsure what to expect and not naturally something I would seek to do. I managed to go on stage and in the end won the Solo category! I was at the back and I couldn’t hear or see the host so it was only when everyone else in front turned to face me that I relealised I had won.
Whats Next?
I’m going to work on improving a few things on this costume to hopefully bring a version 2.0 for next October’s con. I’m looking to reprint the collar as the current one has very visible joins (the first thing I ever 3d printed and joined), whilst investigating how I can make claws practical. I had already made the claws but they prevented me being able to get the helmet on and off so immediaetly left them behind.
I’d also like to look at how feasible it would be for me to motorise the head, but we’ll see how it goes.
My Instagram: https://www.instagram.com/stanton.photography/