

3D Printable Lightsaber Gravity Stand Manual

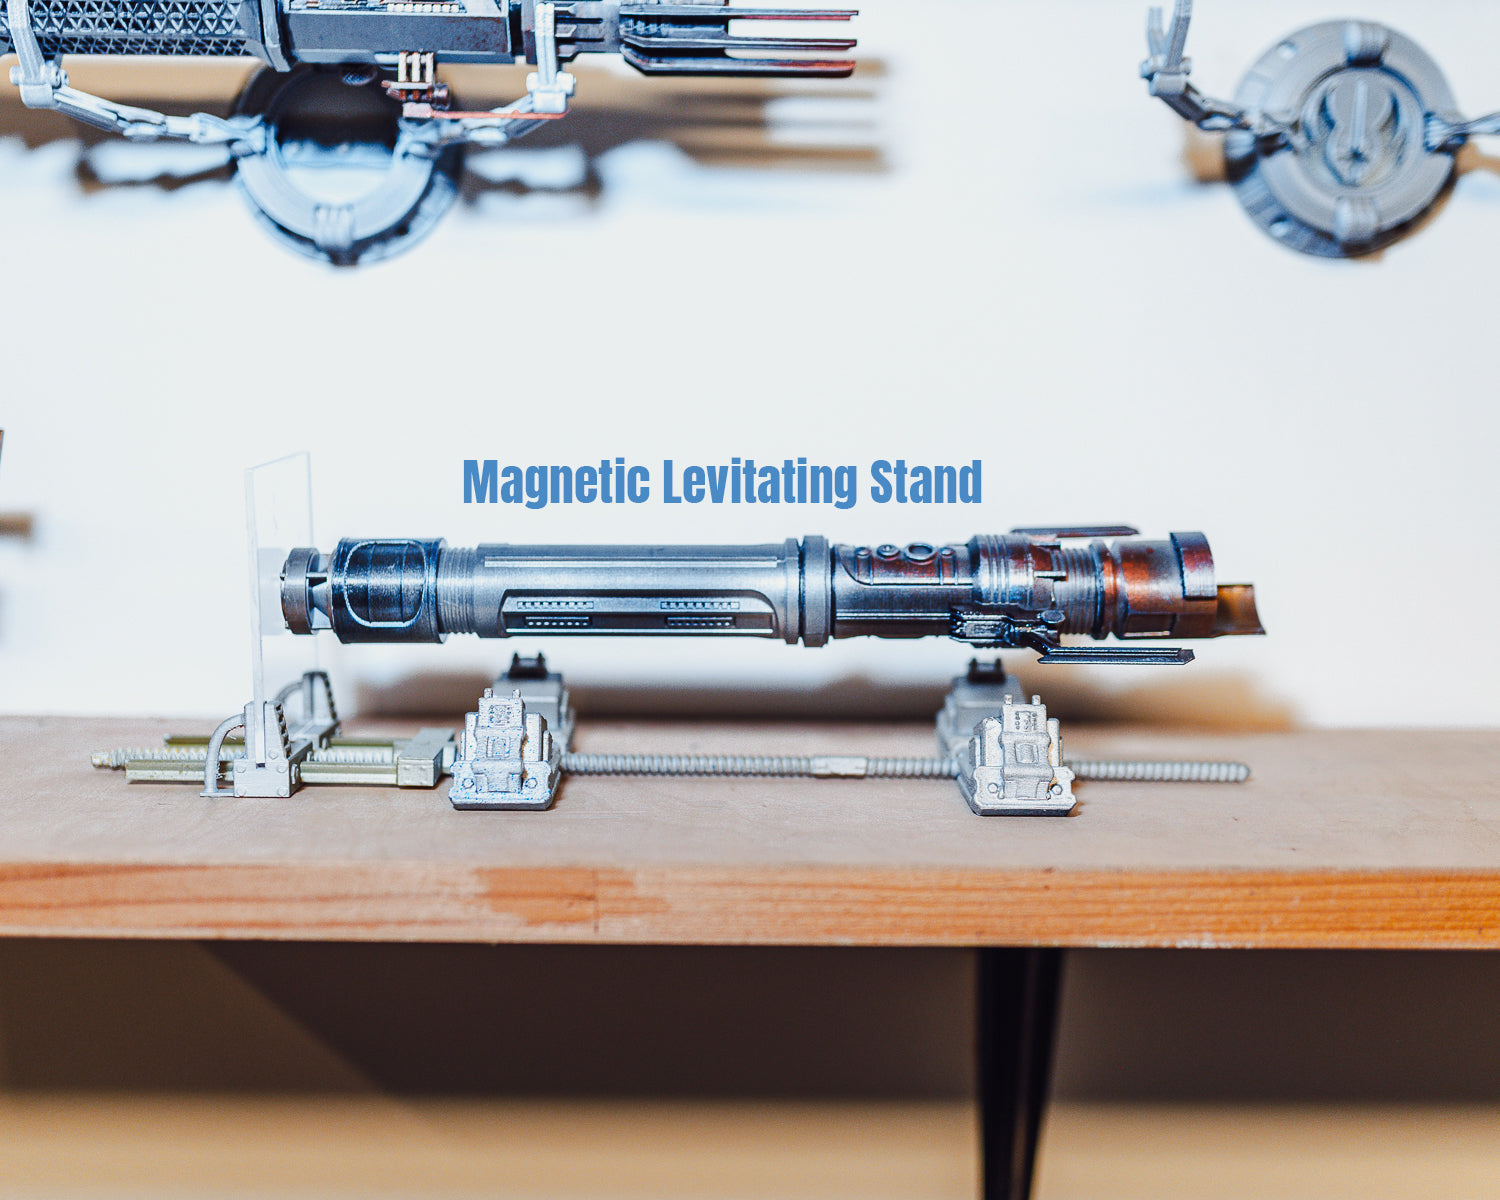
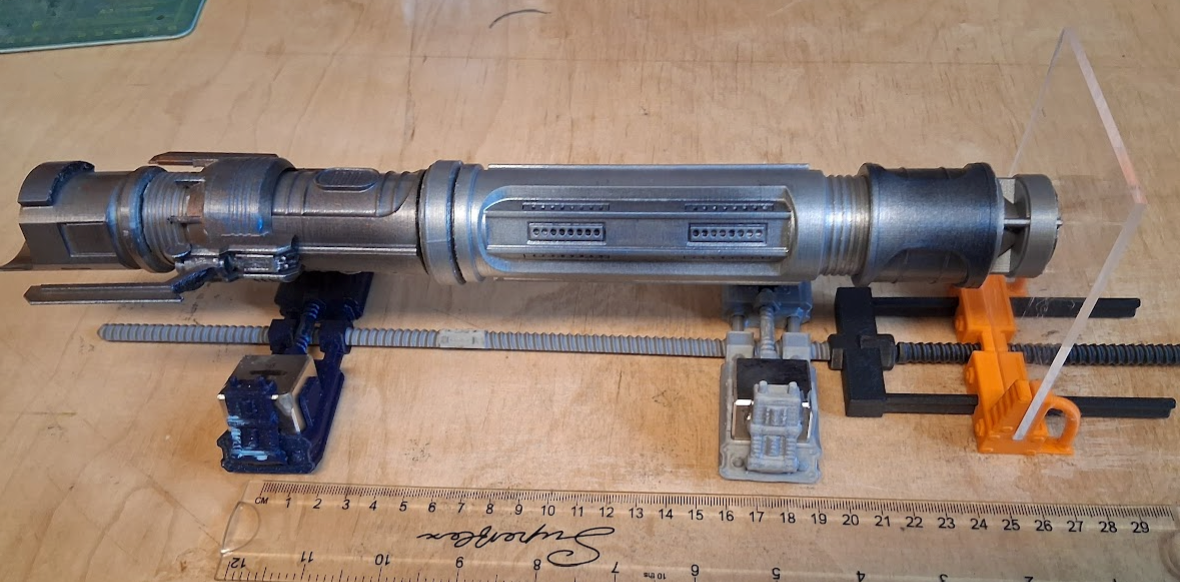
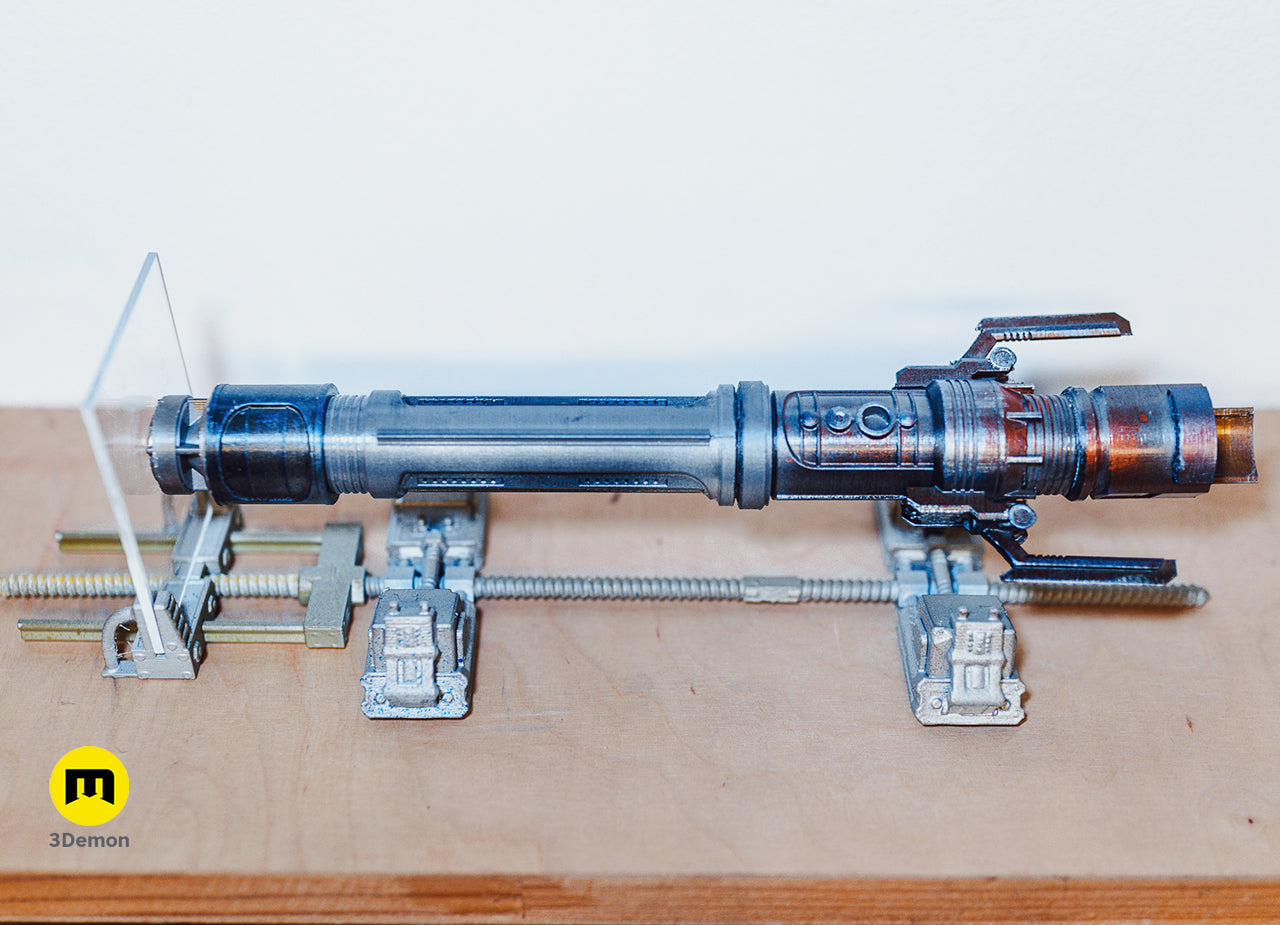
This guide walks through a fun little project I put together to make the Jedi Survivor lightsabers look like they’re floating. The setup uses four neodymium cube magnets hidden in the stand and two cylindrical magnets inside the lightsaber to create a clean magnetic levitation effect. The saber is lightly stabilized by a single piece of plexiglass on one side, but otherwise it just hangs there doing its thing. ✨ 🧲
Materials Needed 🛠️
-
Cube magnets: 25 mm
-
Cylindrical magnets: 20 mm diameter × 10 mm height
- I got my magnets from Unimagnet.cz store
-
Any lightsaber from our Jedi Survivor series
-
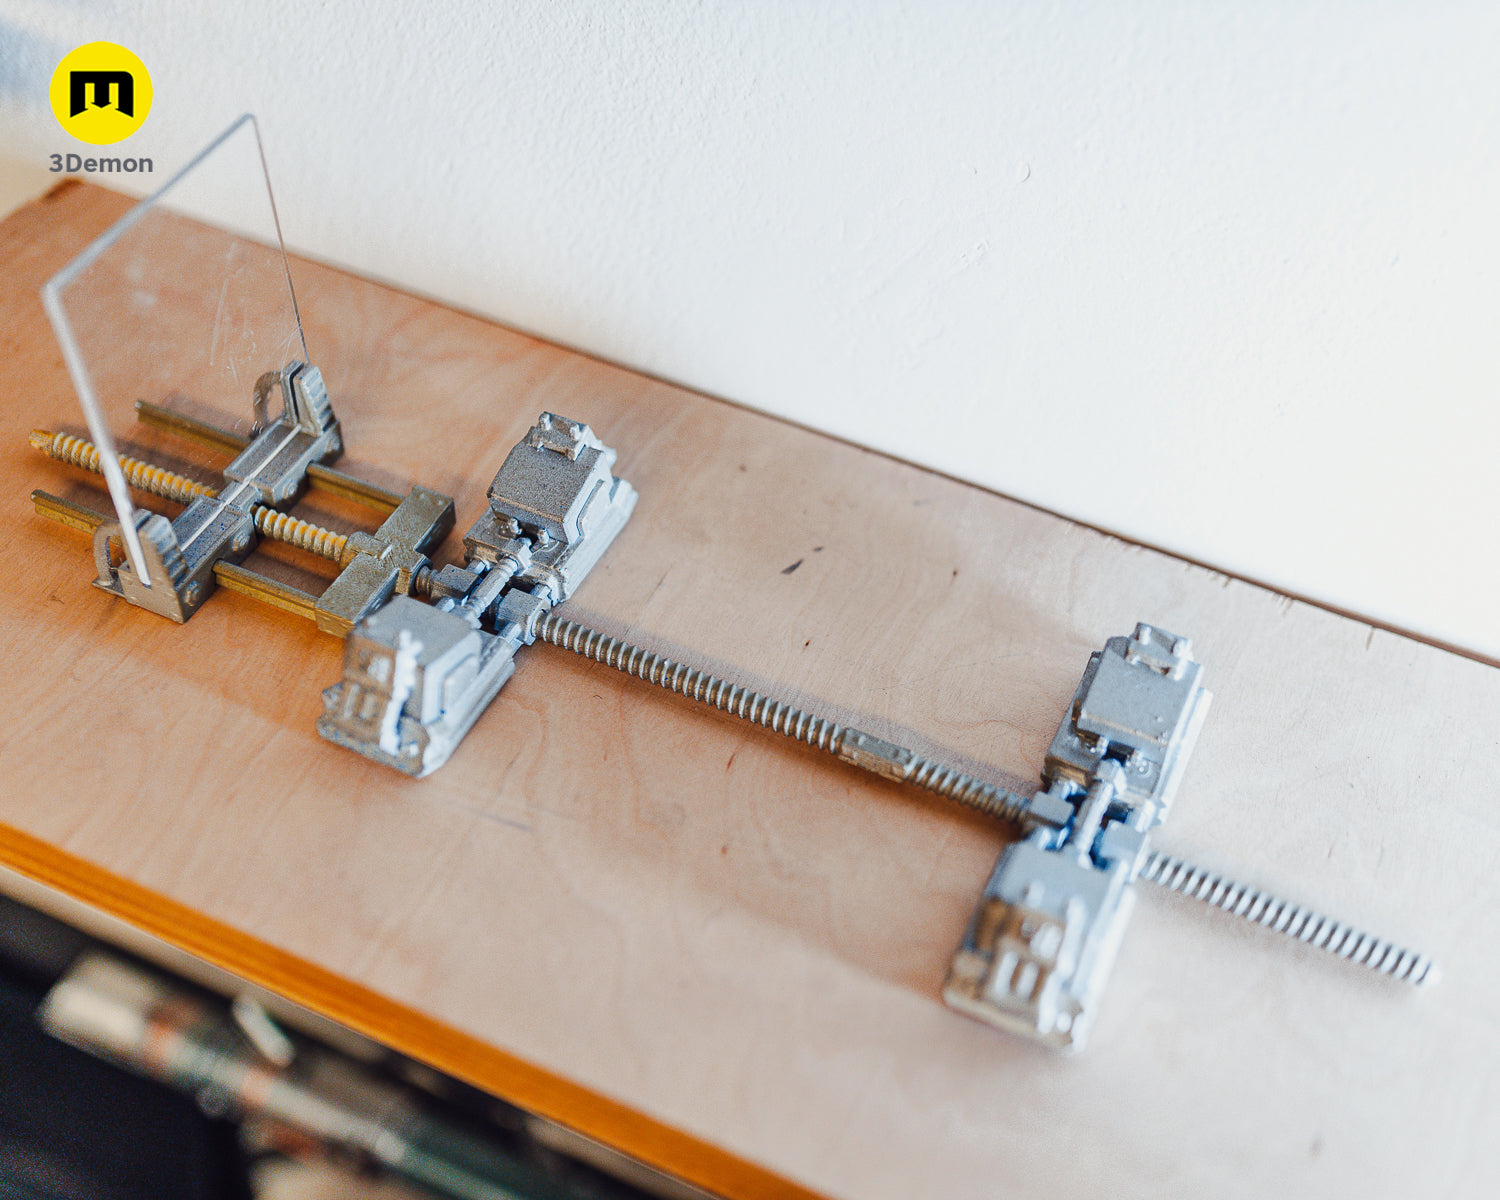
Gravity mount lightsaber stand (3D-printed parts)
-
Plexiglass or glass: 100 × 80 mm, thickness 2–3 mm
-
Gel adhesive: for securing magnets and joints
Step 1: Print the Stand Parts 🖨️
-
Download the 3D model
-
Print all parts.
-
Supports: Only needed for the locking tabs.
-
The rest can be printed without supports.
-
Printing time: about 3–4 hours.

Step 2: Assemble the Carriages
-
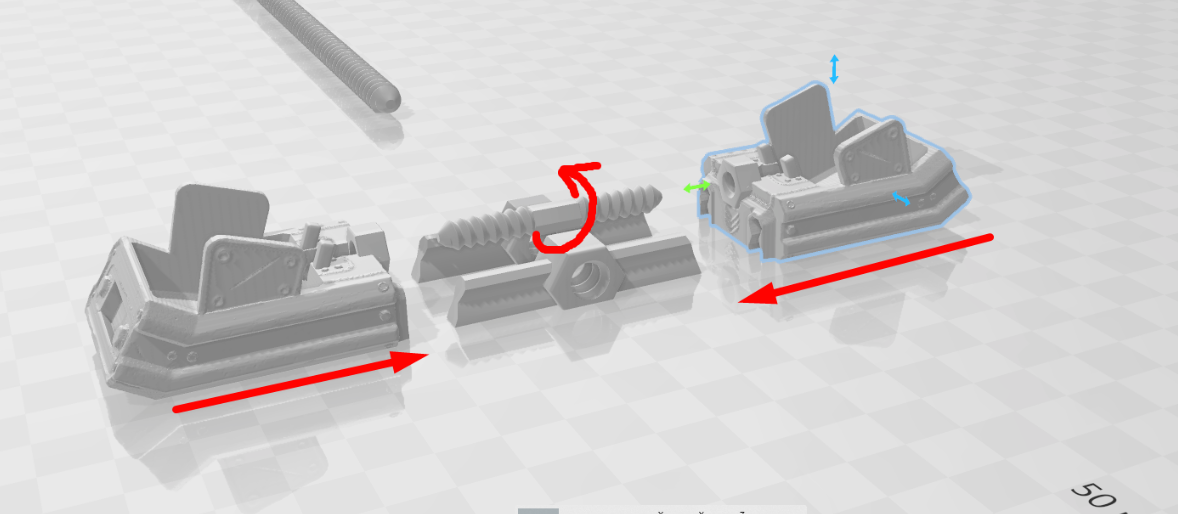
Start by assembling the first carriage.
-
Place the rails and thread together, then press both carriages onto the thread.
-
Rotate until the threads catch—this will naturally pull the carriages together.
-
Screw in the large screw to lock.
-
Free tabs will later secure the magnets.
-
Assemble the second carriage in the same way, on the opposite side.
-
Position the two carriages about 230 mm apart (works for most sabers).
-
The exact distance will be adjusted later once magnets and saber are installed.
Step 3: Set the Magnet Poles 🧲
This step is critical for safe handling!
-
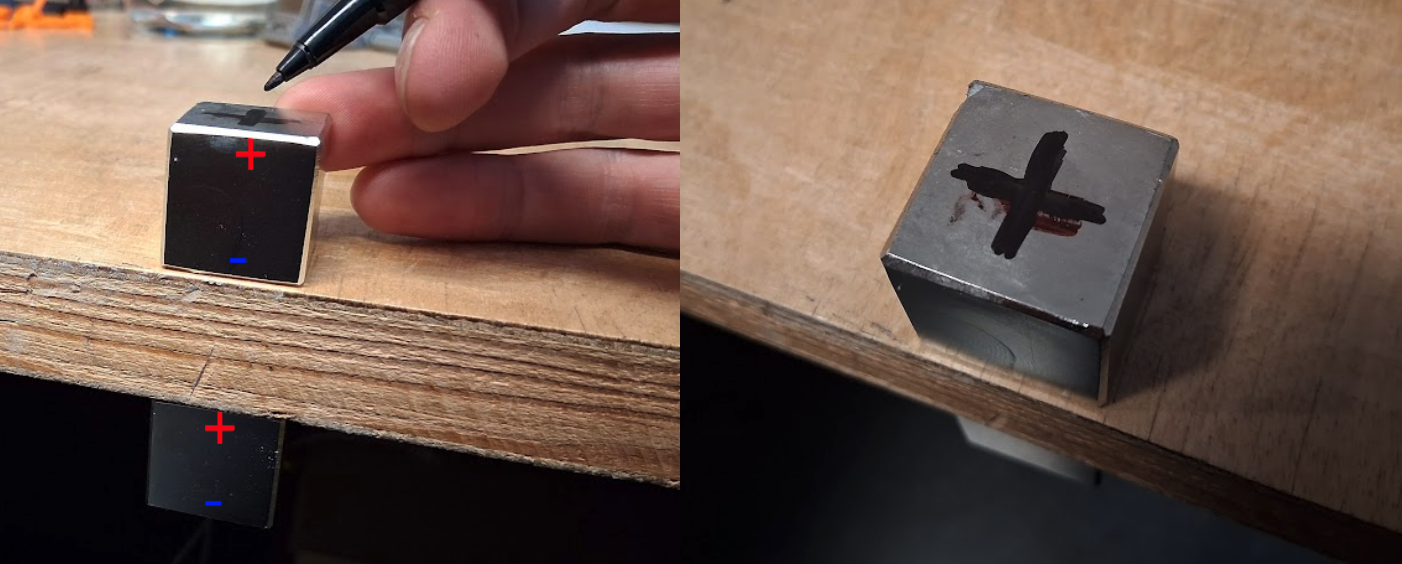
Cube magnets (25 mm) are extremely strong. Never bring them together without a separation board (wood or tabletop).
-
Keep them at least 8 cm apart – any closer and they may snap together with enough force to break.
-
Place one magnet on one side of a board and another on the opposite side. The magnet will rotate and align itself.
-
Mark the pole orientation with a marker.
-
Repeat the same process for the cylindrical magnets.
Step 4: Install the Magnets
-
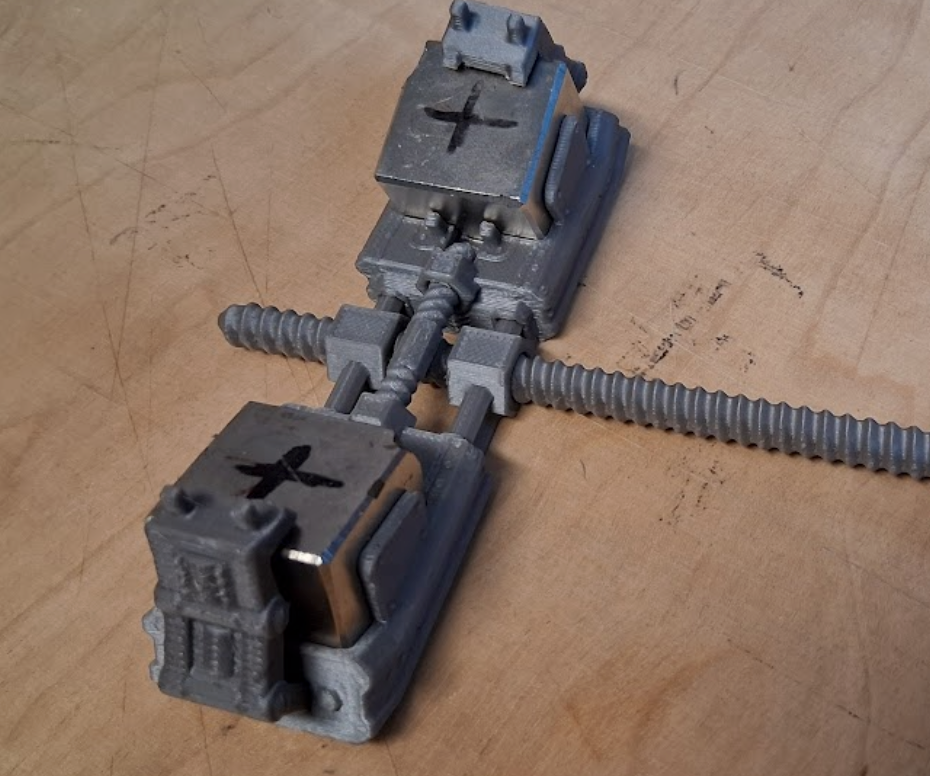
Insert the cube magnets into the carriage slots, making sure orientations match.
-
After placing the first magnet, lock it with a tab and cover it temporarily before inserting the second.
-
Keep magnets far apart during this process!
-
Repeat for all magnets.

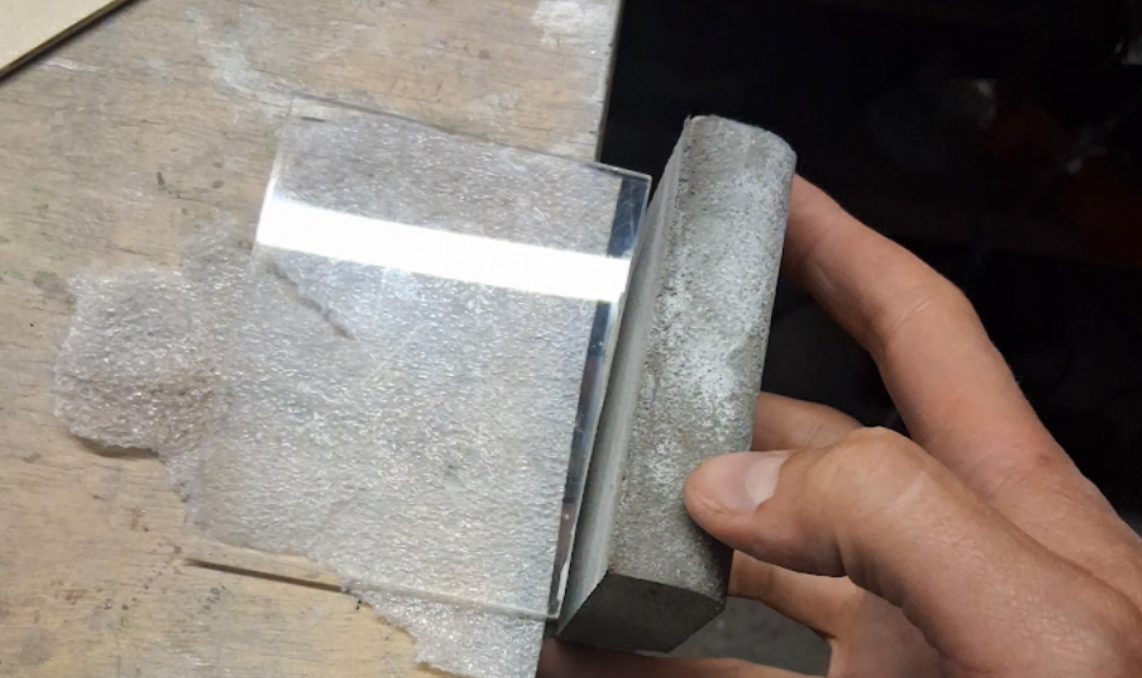
Step 5: Prepare the Plexiglass
-
Cut plexiglass to 100 × 80 mm, 2–3 mm thick.
-
Polish the edges.
-
Glue the plexiglass into the mount.
Step 6: Assemble the Stand
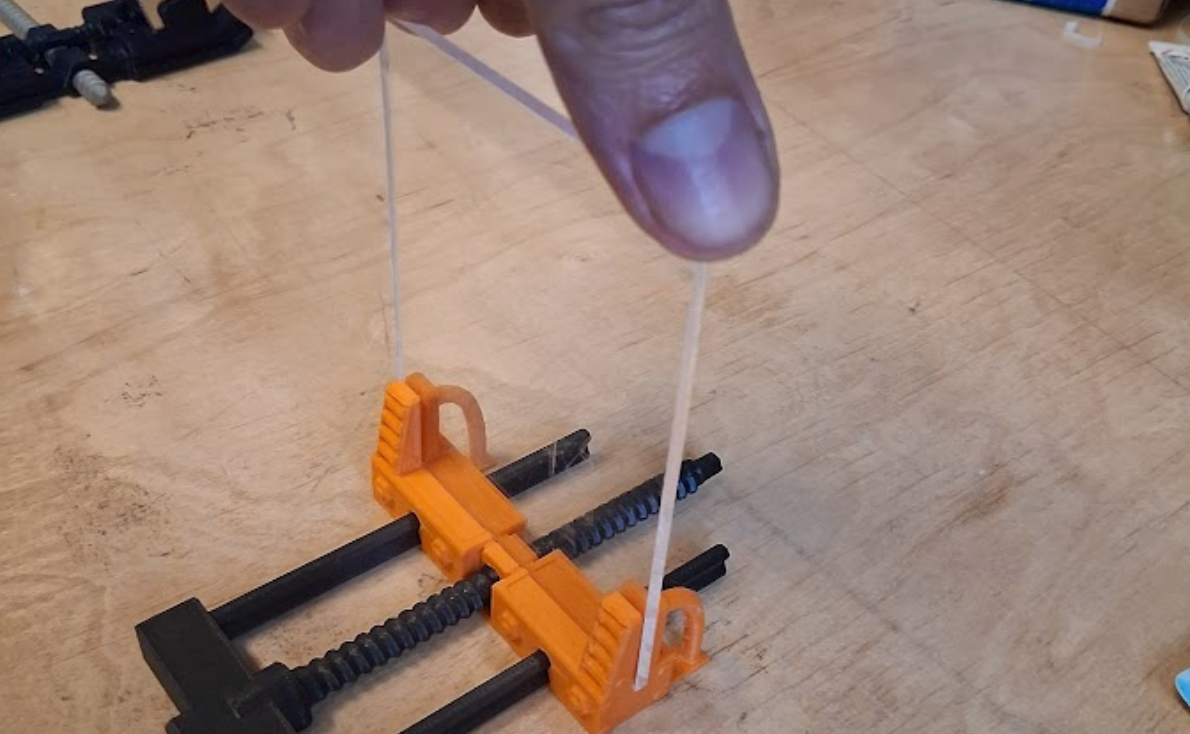
-
Put all the parts together.
-
Make sure magnets are firmly secured with adhesive.
-
Double-check stability before moving on.
Step 7: Install Magnets in the Lightsaber
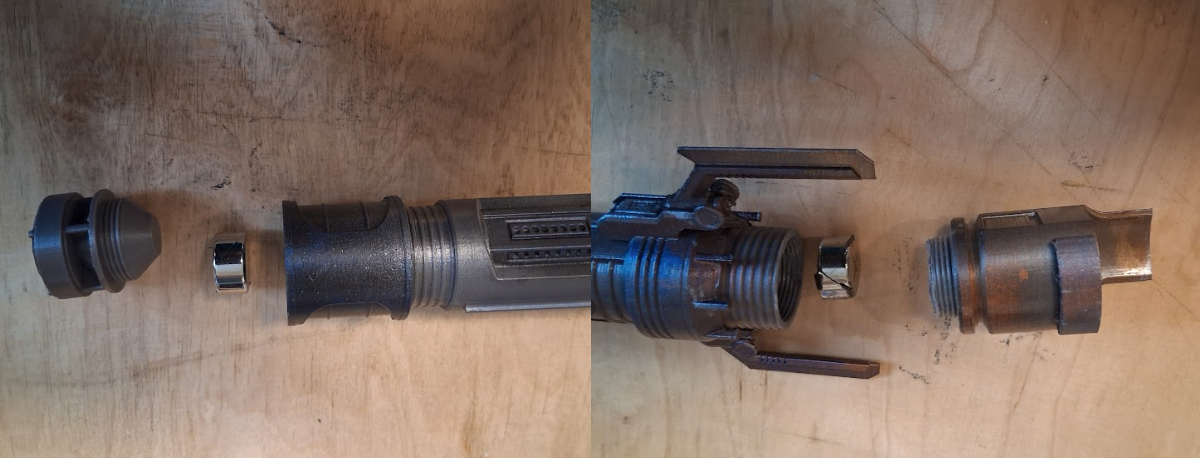
-
Insert two cylindrical magnets into your lightsaber, oriented in the same direction.
-
The orientation determines where the saber will hover.
-
Once the poles are aligned, the saber must rest against the plexiglass.

Reference Magnet Distances 📏
Here are recommended magnet spacings (in mm) for different lightsaber hilts when magnets are aligned the same way in the Jedi Survivor Collection
|
Lightsaber Name |
Distance (mm) |
|
Jaro Tapal |
230 |
|
Patience |
215 |
|
Edgehawk |
200 |
|
Diligence |
230 |
|
Serenity |
230 |
|
Assembly |
230 |
|
Justice |
230 |
|
Detachment |
230 |
|
Temperance |
230 |
|
Scrapyard |
220 |
|
Harmony |
225 |
|
Persistence |
220 |
|
Duelist |
230 |
|
Hunter |
240 |
|
Santari Khri |
220 |
|
Eno Cordova |
230 |
|
Cere Junda |
210 |
|
Rebel Hero (Luke) |
230 |
Final Notes 🚀
-
Adjust distances gradually until your lightsaber levitates smoothly.
-
Enjoy your floating lightsaber display – a perfect blend of 3D printing, engineering, and Star Wars fandom! 🌌
Safety
-
⚠️ Always handle magnets with care – they can be dangerous if mishandled. Wear safety glasses at all times.
-
⚠️ Once two magnets are accidentally joined, they may be impossible to separate
-
⚠️ Magnets of this strength can produce sparks and may shatter if allowed to snap together from a distance.
Leave a Comment