
Shopping cart
$0.00

Painting in Arcane Style – Ekko’s sword

3D printed Ekko sword from Arcane painted in cel-shaded cosplay style – finished build

Ekko’s sword looks cool before paint, but the cel-shaded finish is what really makes it feel like it belongs in the world of Arcane!

In this post, I will show you how I painted Ekko’s sword in a cel-shaded Arcane-inspired style and explain how you can create that animated hand-painted look on your own 3D-printed prop. All that without a postprocess!

So let’s get started!

3D printed Ekko sword from Arcane painted in cel-shaded cosplay style

Supplies

  • Printed 3D model of Ekko’s sword (print files here )

  • Acrylic paints (white, yellow, black, gold, brown)

  • Brushes

  • White acrylic marker (We used Posca)

  • Velvet clear coat

  • Patience

Process steps in order:

1.  Print and assemble your sword

2. Get your table ready for painting 

3. Prep your colours

4. Painting darker colours

5. Painting lighter areas 

6. Edge paint

7. Fixing colours

8. Your beautiful sword being done! 💛

Timing

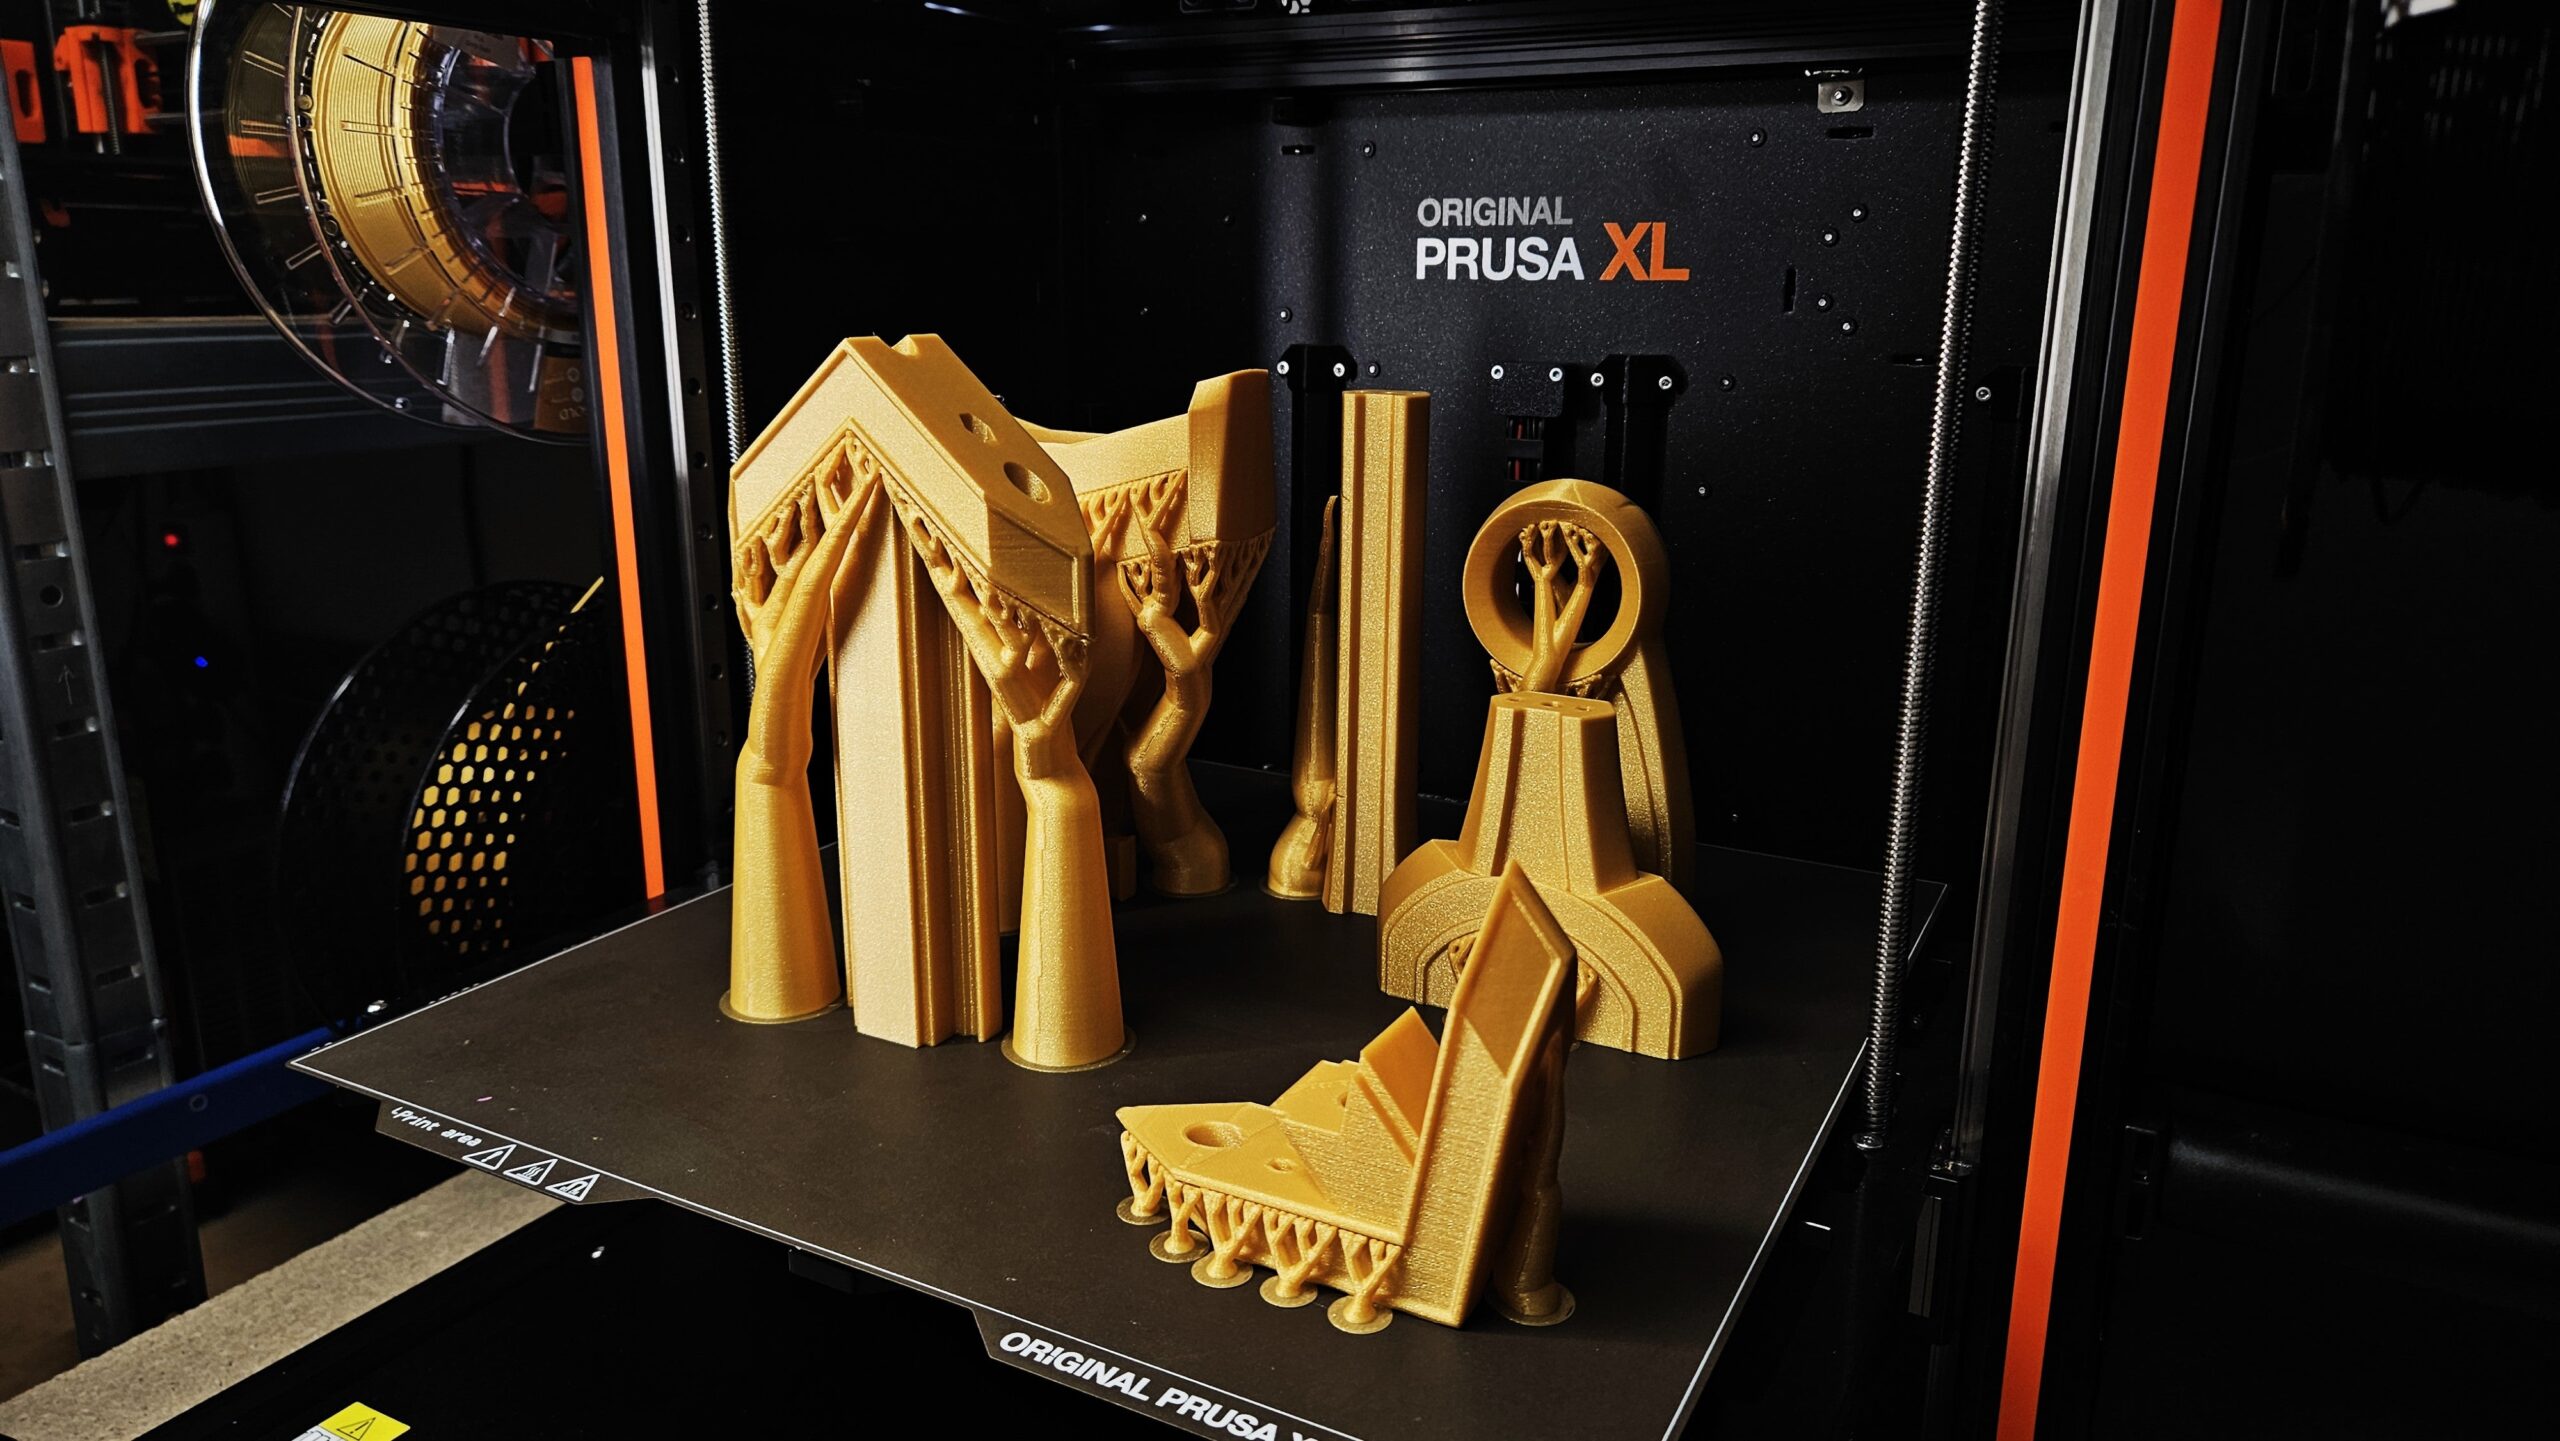
  • Printing:  25h blade, 28h gold parts (save time printing on 2 printers)
  • Assembly: 1hr
  • Painting: 4 hrs
  • Material used: 355g
  • Verdict: Can be done in the “last minute” pre-con crush week! 🔥

Step 1: Print and assemble your sword

I started by printing all the STL files. You can find all of them HERE🌟

Since I wasn’t about to do any post-processing, I used a layer height of 0.15mm so that the texture of the lines on the surface would be finer.

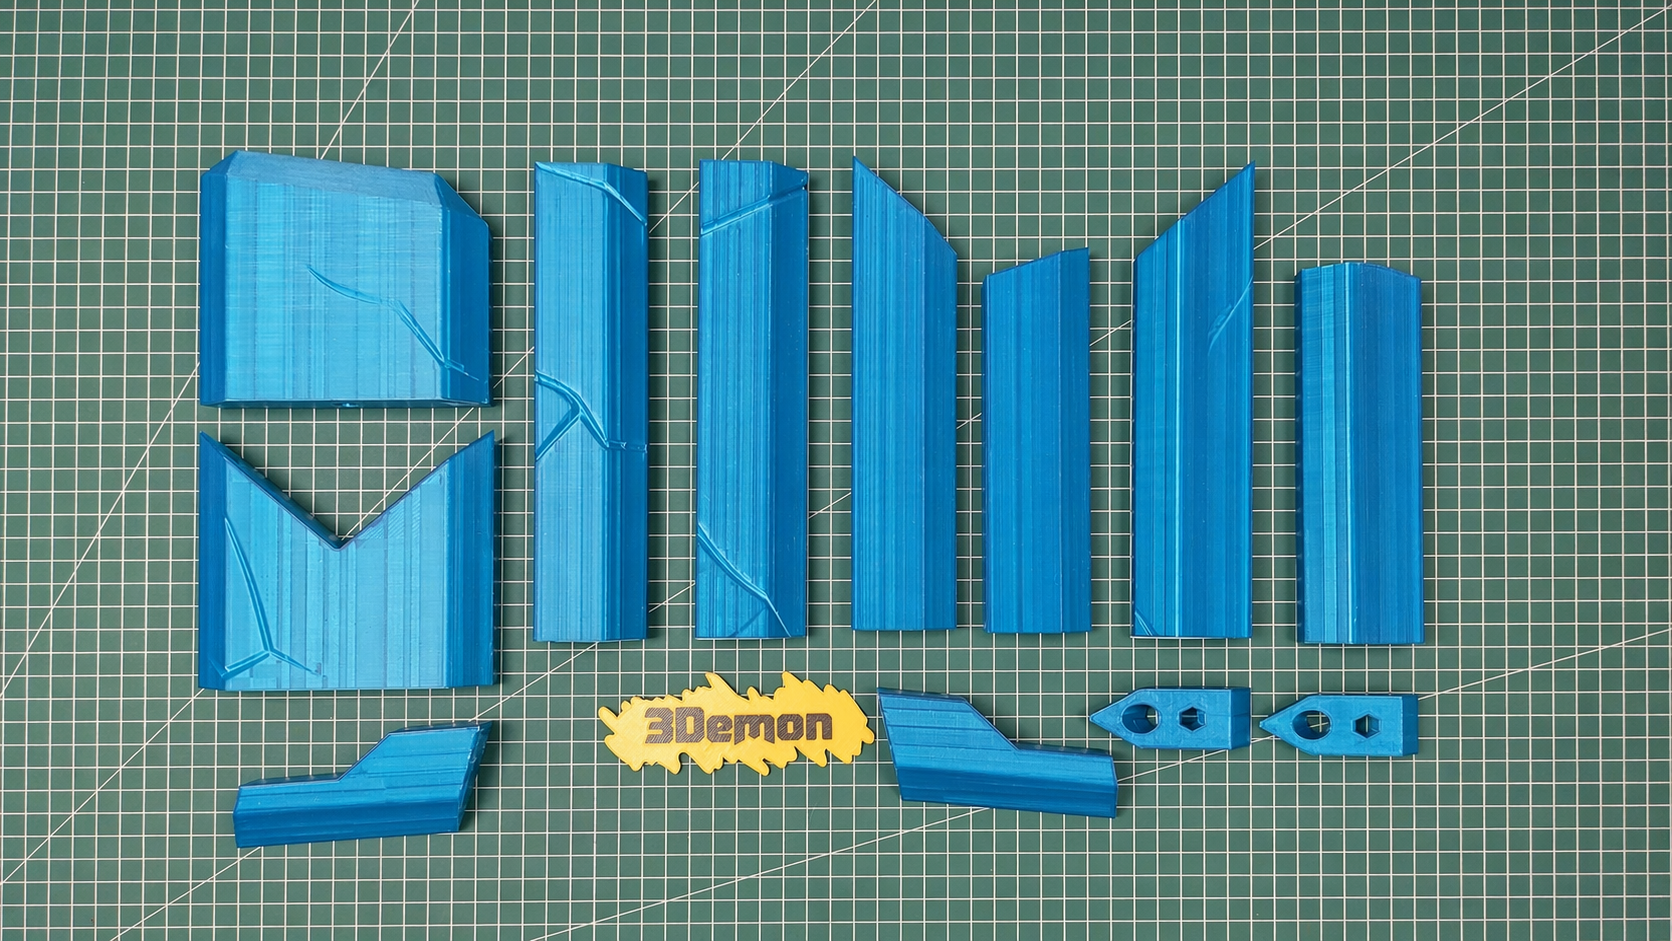
Bear in mind that if you want the blueish edge parts to be a little see-through, you will have to carefully select the right infill. I tested many different infils. The one that really stood out was “Hilbert curve”. This infill looks pleasant when placed in front of the light source, as it creates monotonous vertical lines that evenly fill the space. That means that the infil lets the light go through just right – not too much and not too little. 
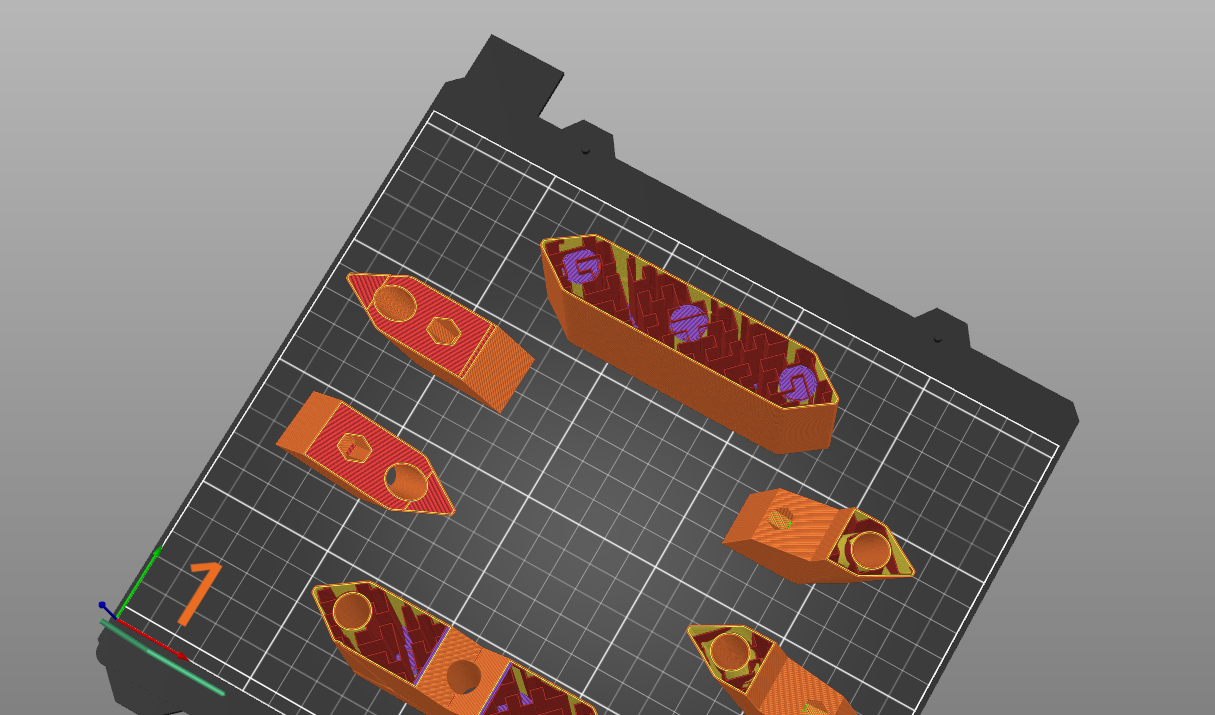
3D printed Ekko sword from Arcane painted in cel-shaded cosplay style – Print and assemble your sword

*The Hilbert curve shape infill is shown in the picture above.

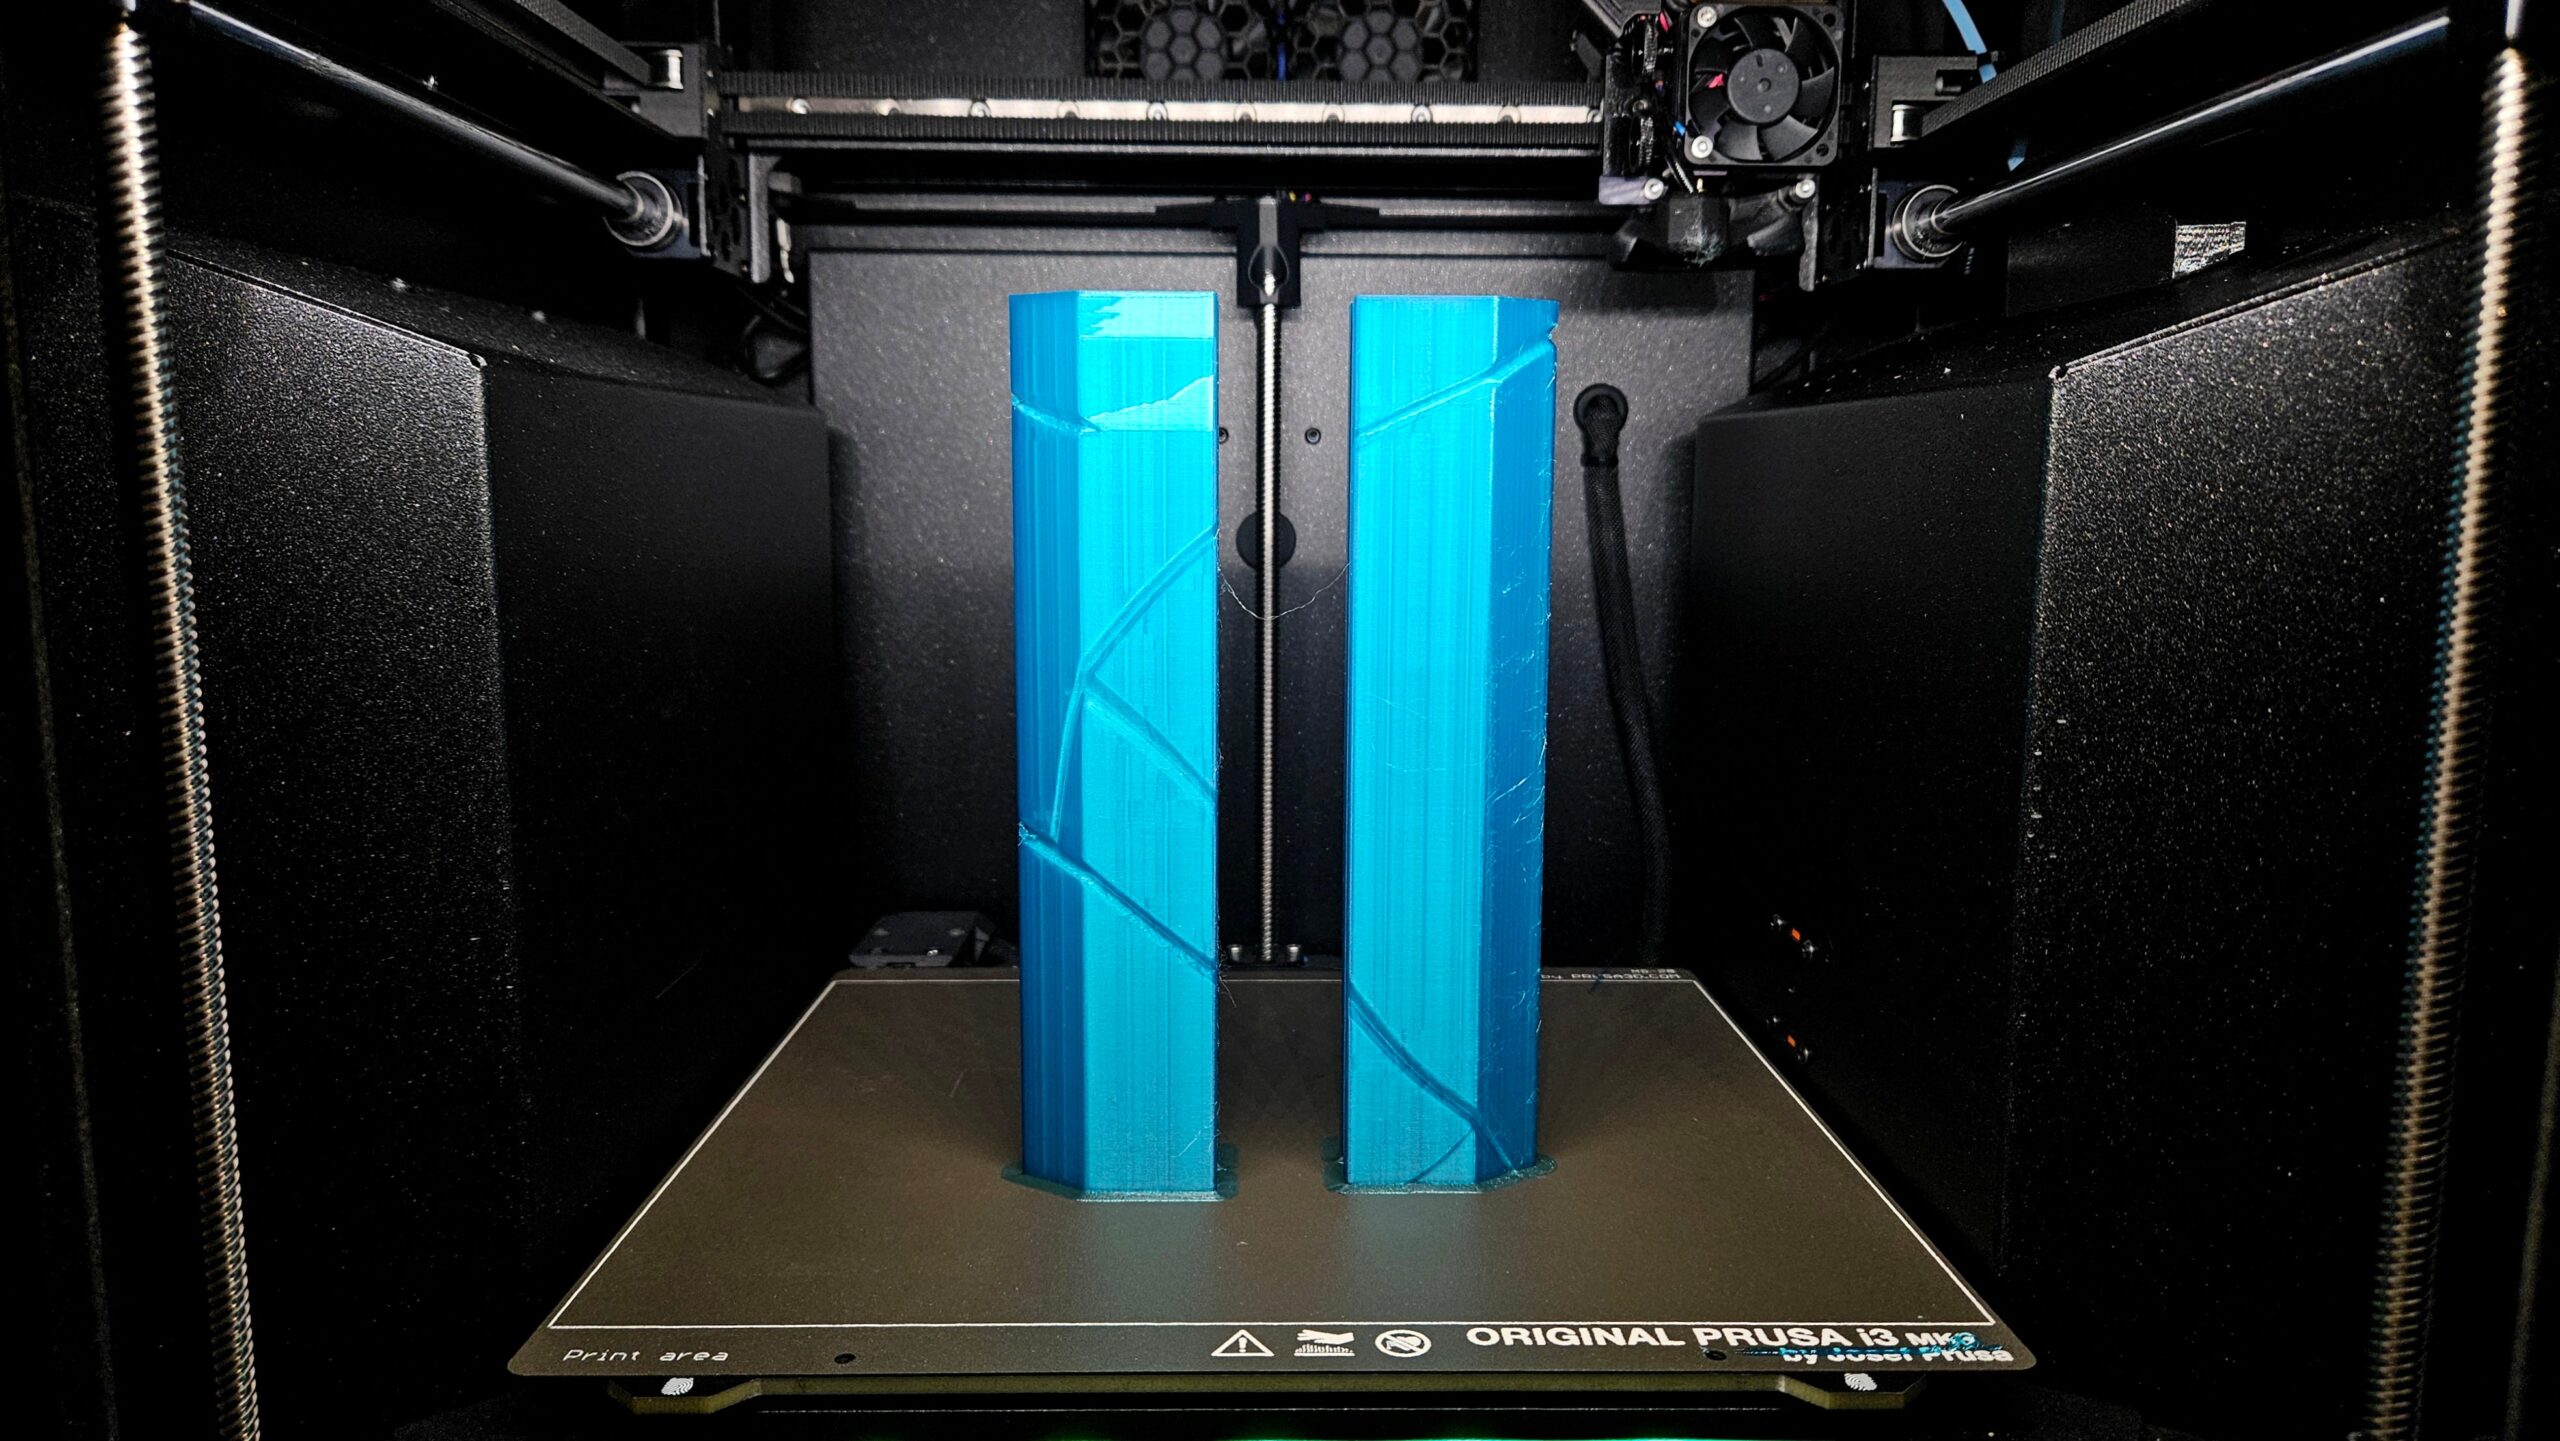
Don’t forget the placement of each part in the final assembly of the sword. This will affect how you place individual pieces on your printing bed. The infill lines have to go in the same direction.
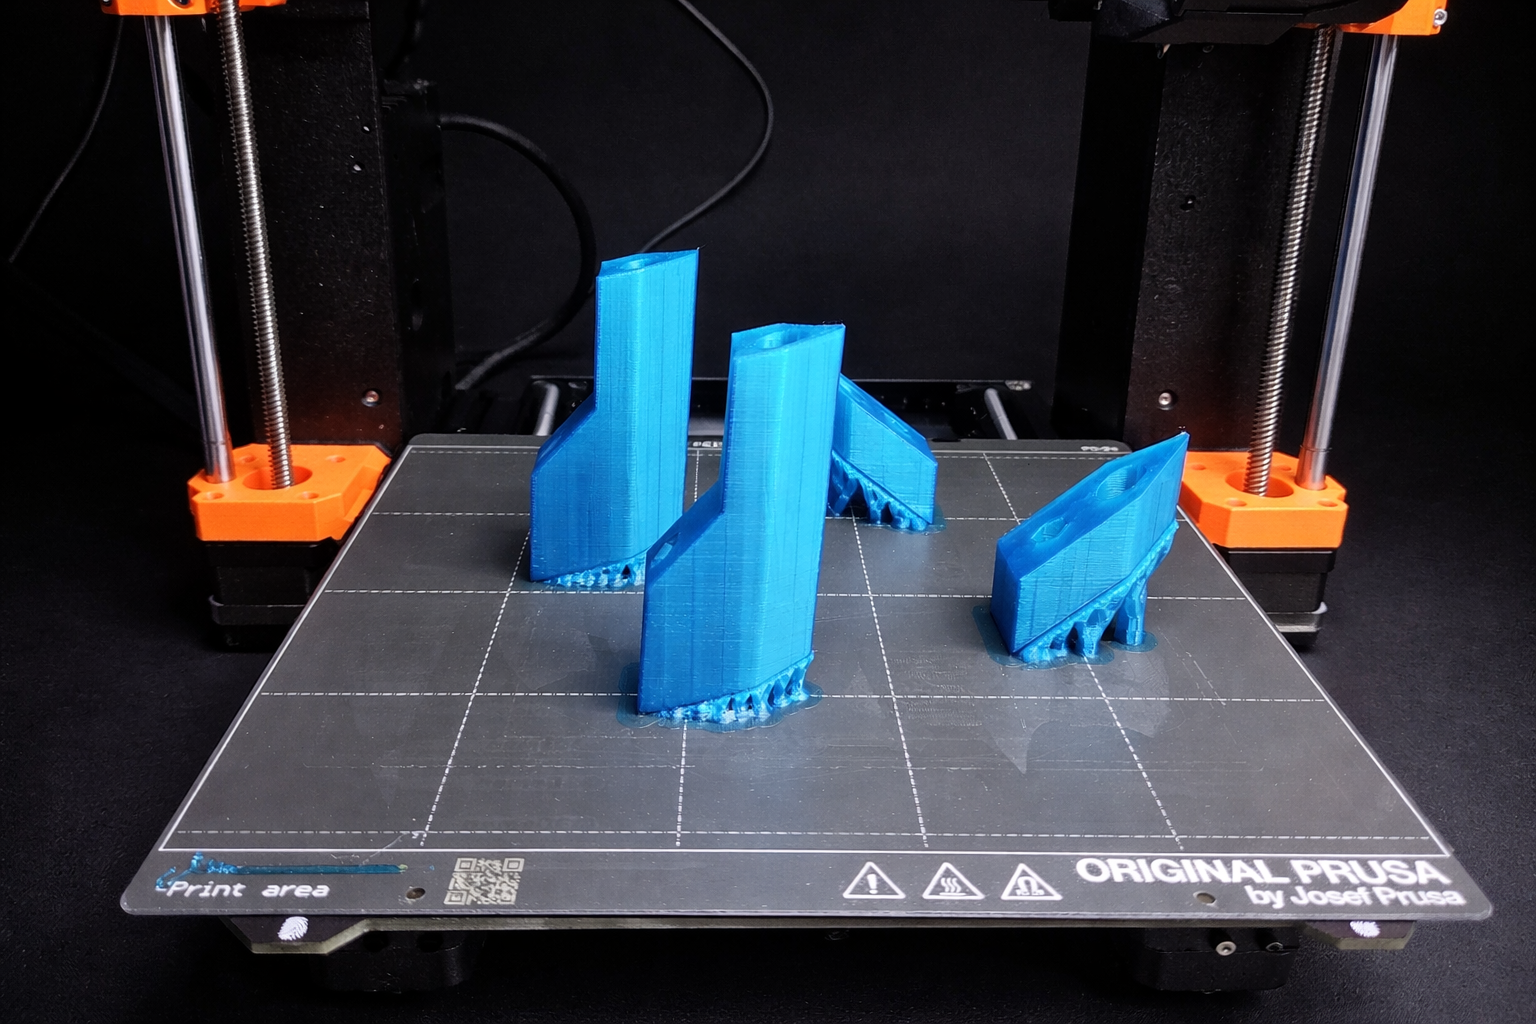
3D printed Ekko sword from Arcane painted in cel-shaded cosplay style – Print and assemble your sword, step photo 2

 3D printed Ekko sword from Arcane painted in cel-shaded cosplay style – Print and assemble your sword, step photo 3

3D printed Ekko sword from Arcane painted in cel-shaded cosplay style – Print and assemble your sword, step photo 4

PLA Filaments I used:

Blue: Bambu Lab Teal Translucent PLA 13612

Gold: Filamentum “Cairo Gold”

3D printed Ekko sword from Arcane painted in cel-shaded cosplay style – PLA Filaments I used

3D printed Ekko sword from Arcane painted in cel-shaded cosplay style – PLA Filaments I used, step photo 2

Step 2: Get your table ready for painting

Before painting, prepare your table because I am sure you don’t want any color splotches on your furniture.
You don’t have to use anything fancy. I am using baking paper most of the time because of its practicality. Once I am done with painting, I simply crumble it and throw it away.
Aside from surface preparation, get a cup of water for brush cleaning, take your colours and brushes, and place them on the table.

Step 3: Prepare your colours

3D printed Ekko sword from Arcane painted in cel-shaded cosplay style – Prepare your colours

You will need:

  • White acrylic paint

  • yellow acrylic paint

  • gold acrylic paint (I had on hand Citadel Liberator Gold)

  • brown acrylic paint

  • black acrylic paint

  • white posca marker (or any white acrylic marker pen)

Step 4: Painting darker colours

To start your painting, I recommend inspecting your prop. One approach you can take is a realistic one, look at where the shadows would naturally form.  The second one is more creative, and that means that the dark parts will be less dependent on real-world physics and more about your own stylisation.
During painting, I myself combined both ways.
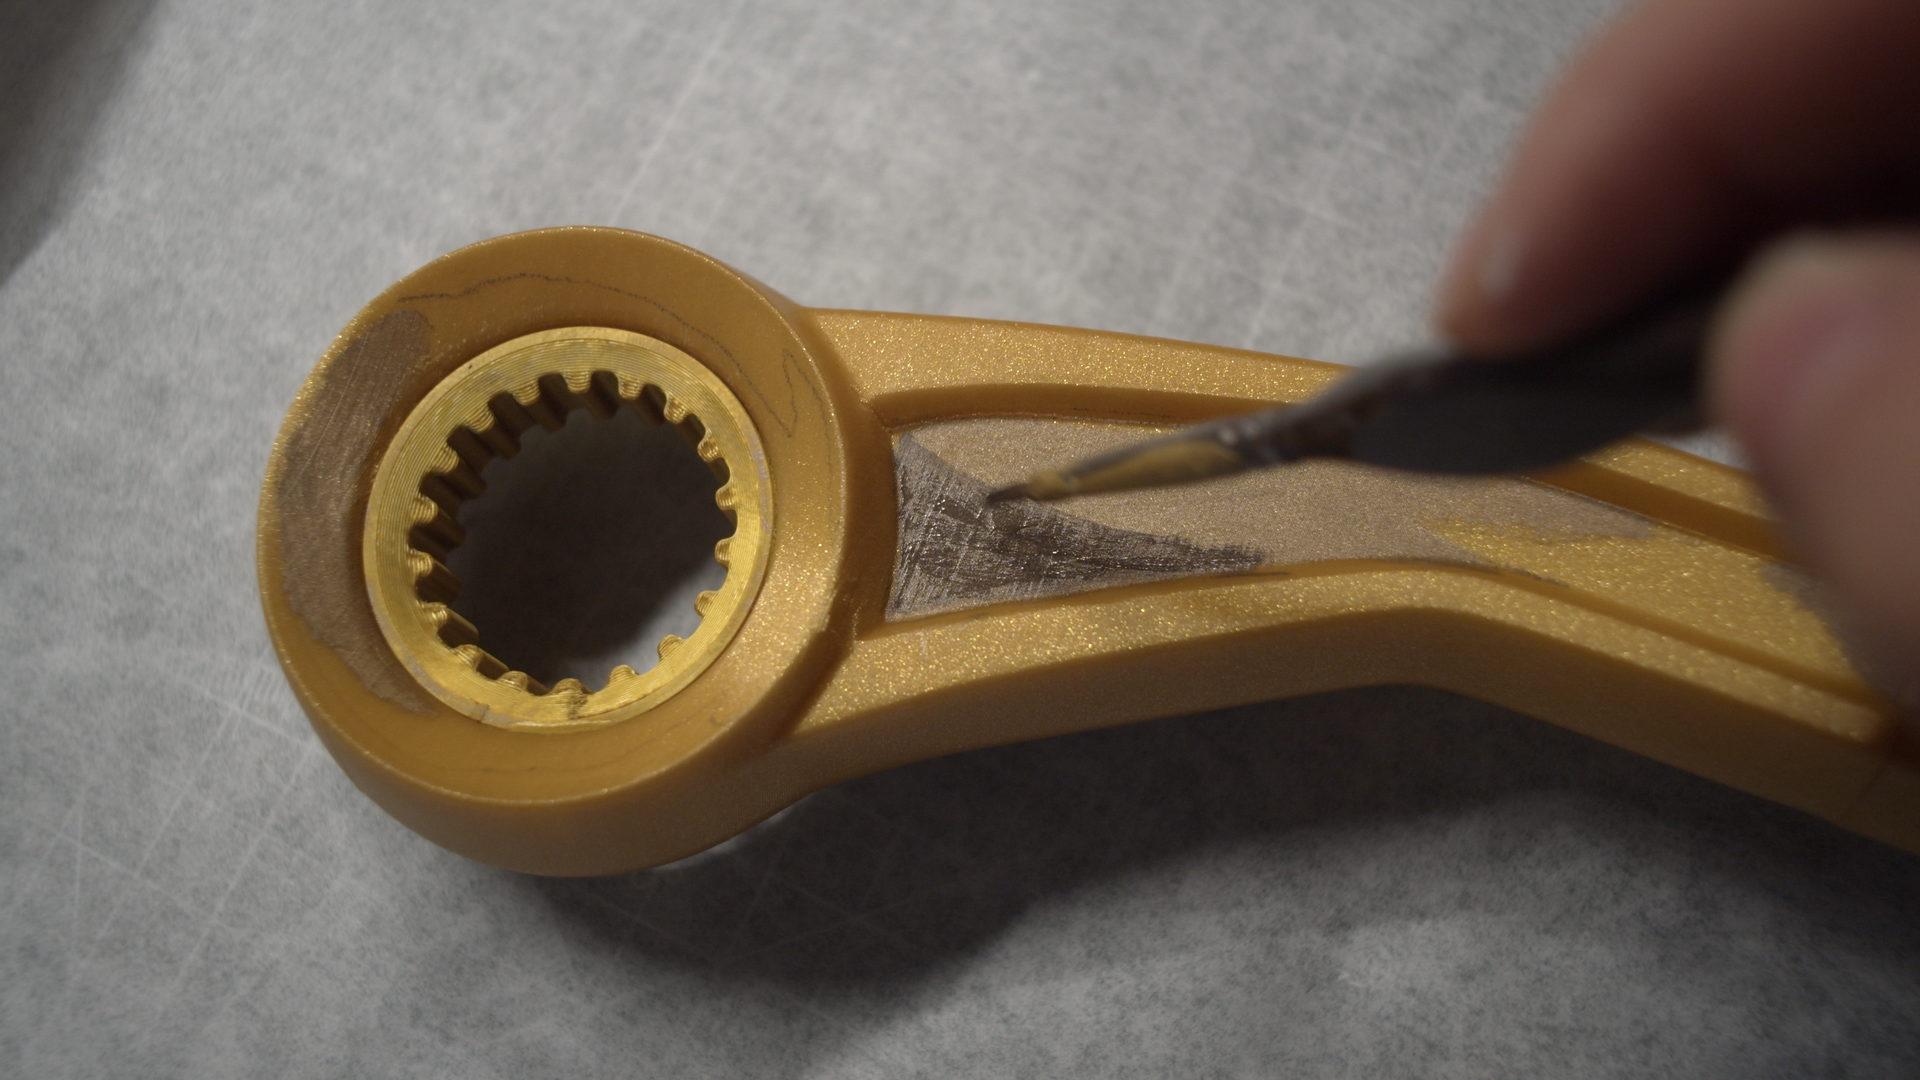
You can also take inspiration from official series screenshots or any Ekko photos available.
For the darkest areas, use a mix of brown and a little black.
3D printed Ekko sword from Arcane painted in cel-shaded cosplay style – Painting darker colours

Then paint lighter shapes around these areas. I used a mix of gold and brown. Remember, there is no right or wrong way to paint the shapes, so just set your creativity free! 🙂

Step 5: Painting lighter areas 
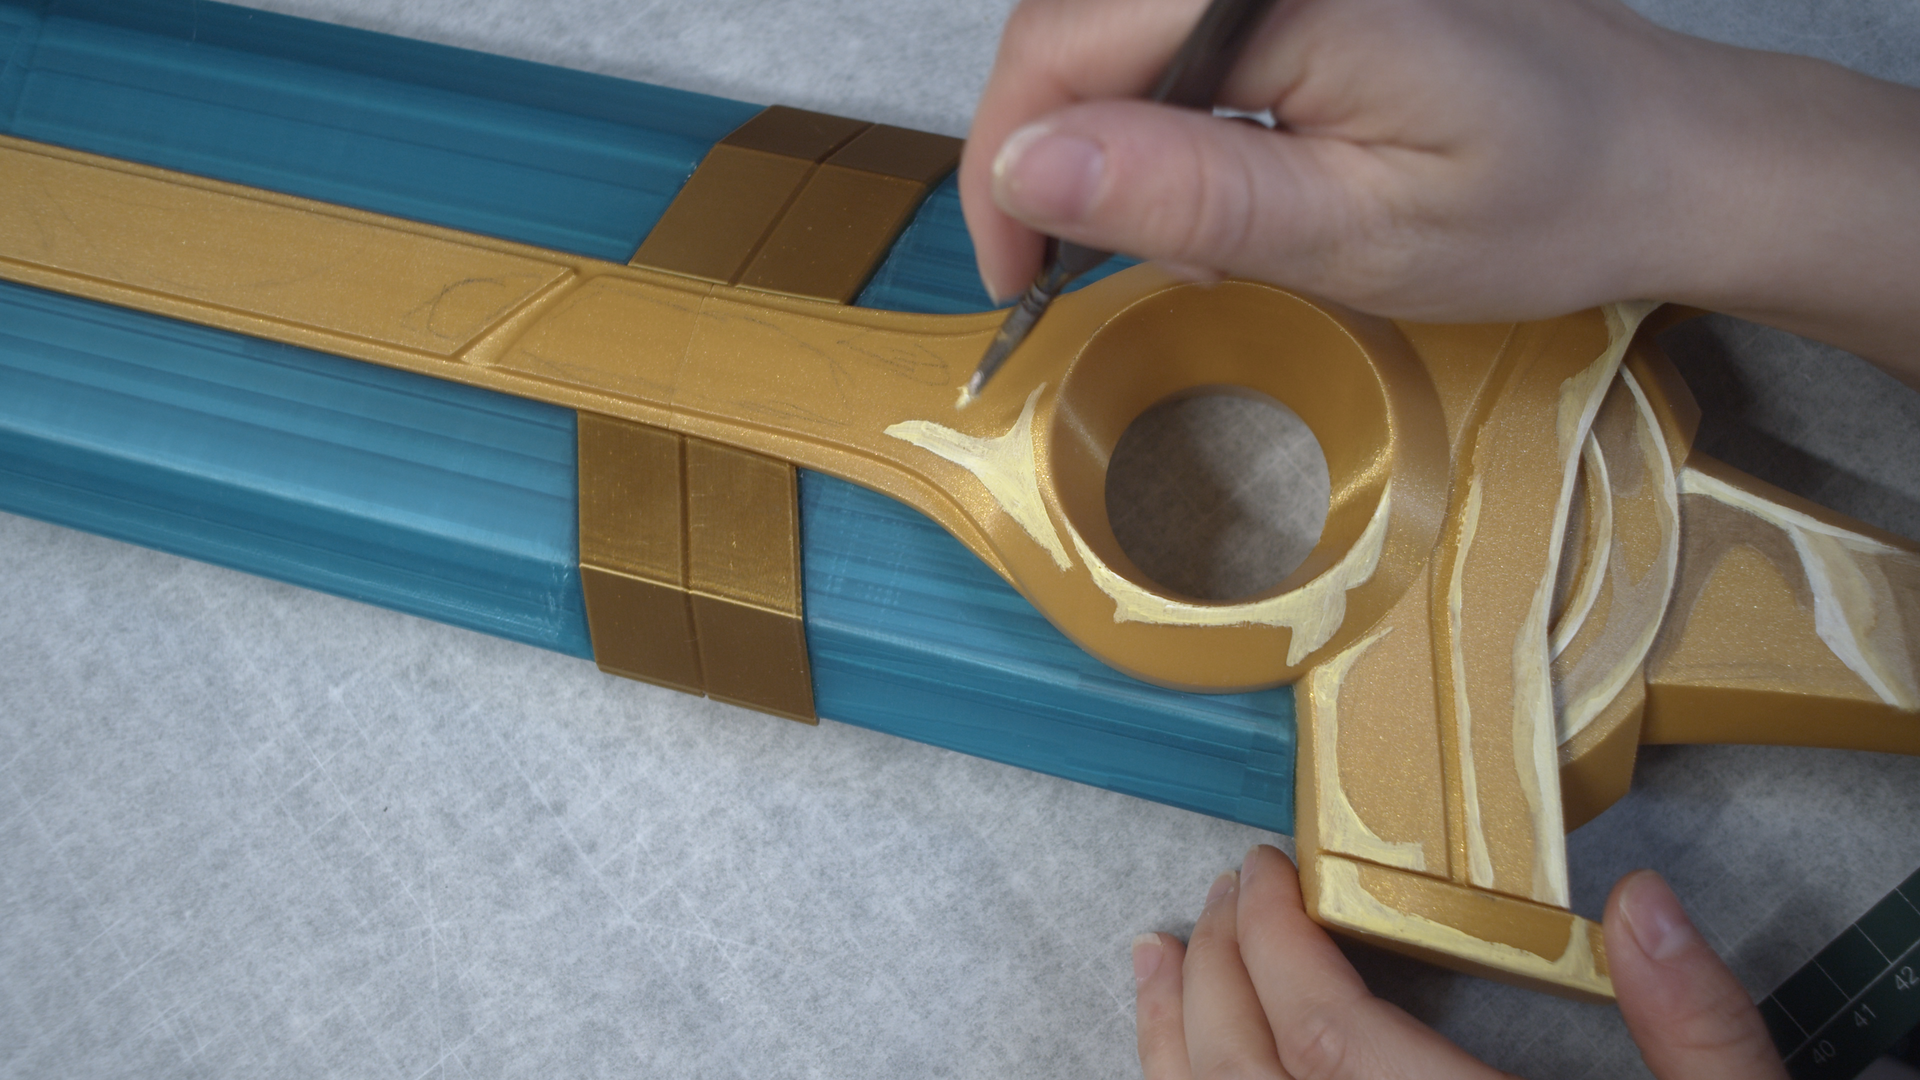
Now that we have the dark areas, we will focus on lighter colours.
Try to look for edges and spots where light would reflect off the surface. I didn’t really select one direction of light source because I like the flatter look of the final prop, but you can absolutely just say that light would hit the sword from the right and paint all highlights in places where they would naturally occur.
Once you figure out where you want your highlights to be, paint them with a mix of white and yellow.
3D printed Ekko sword from Arcane painted in cel-shaded cosplay style – Painting lighter areas
3D printed Ekko sword from Arcane painted in cel-shaded cosplay style – Painting lighter areas, step photo 2

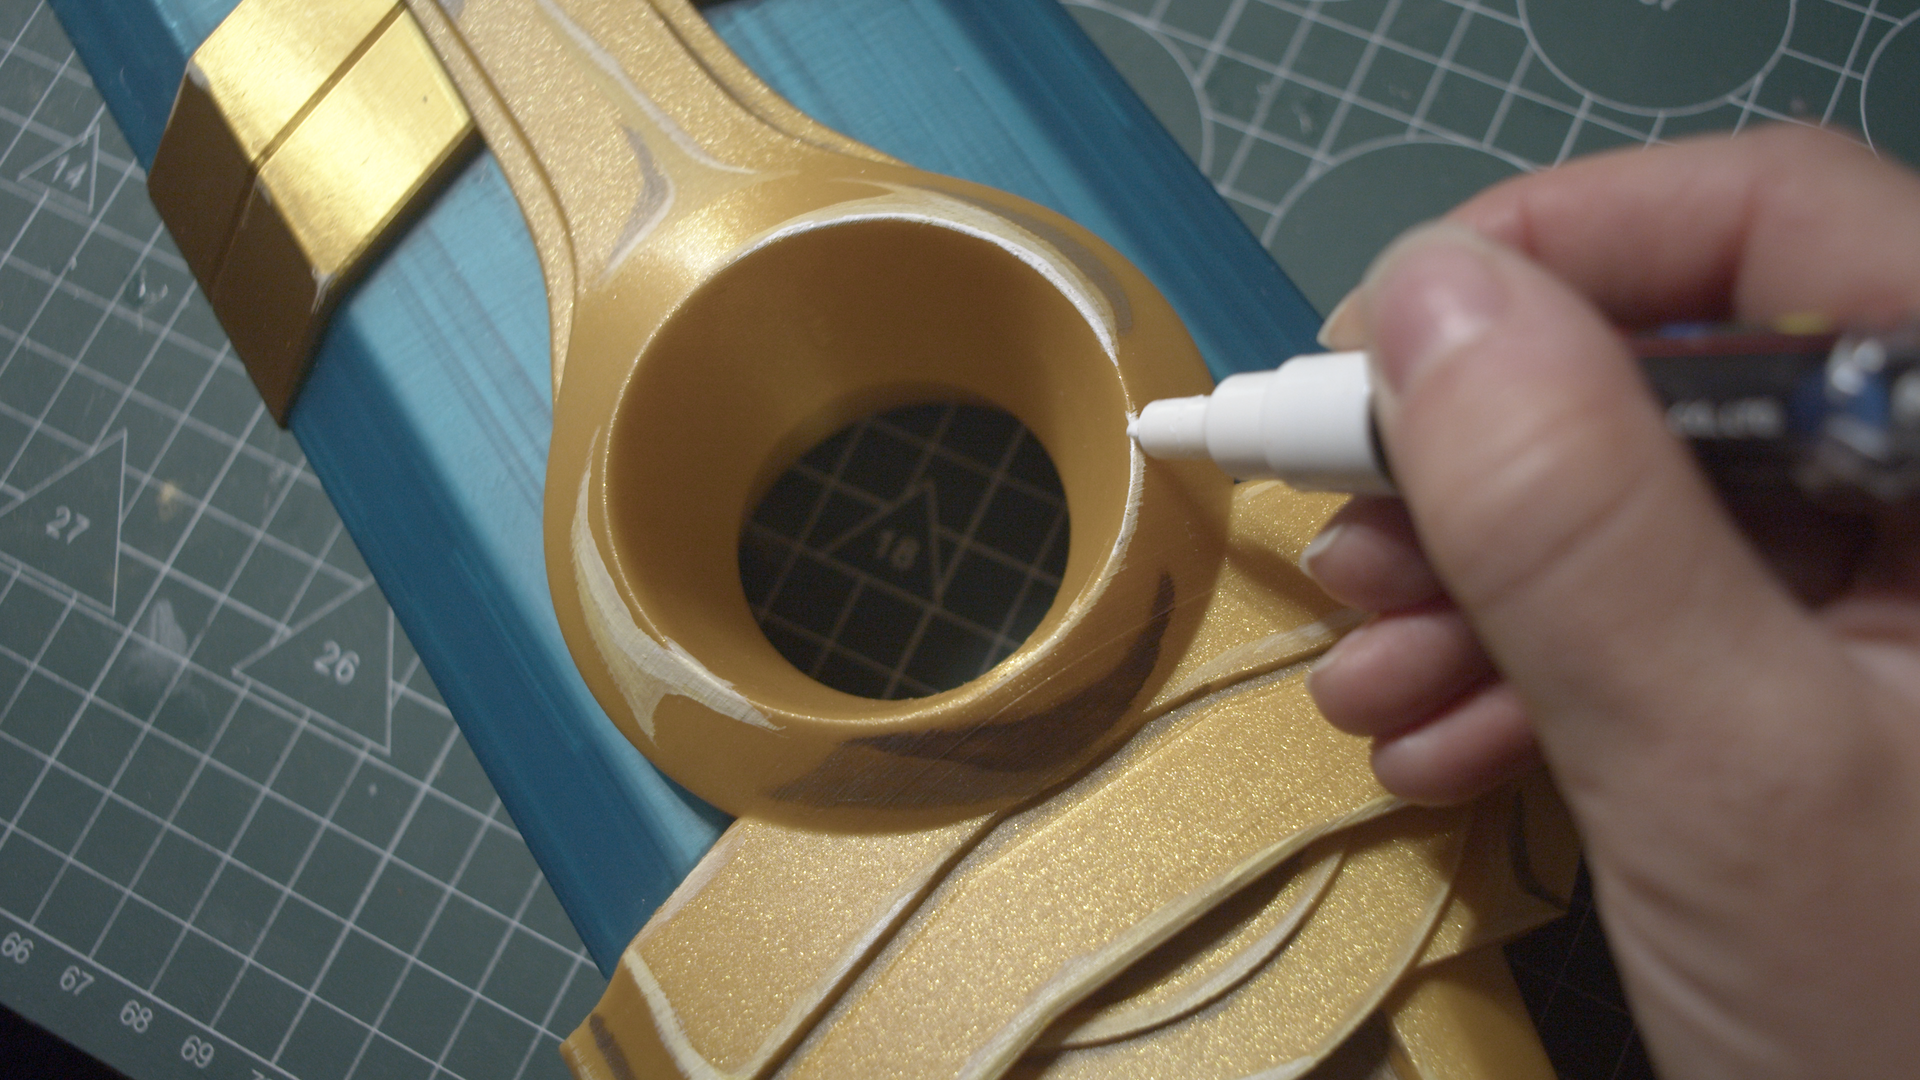
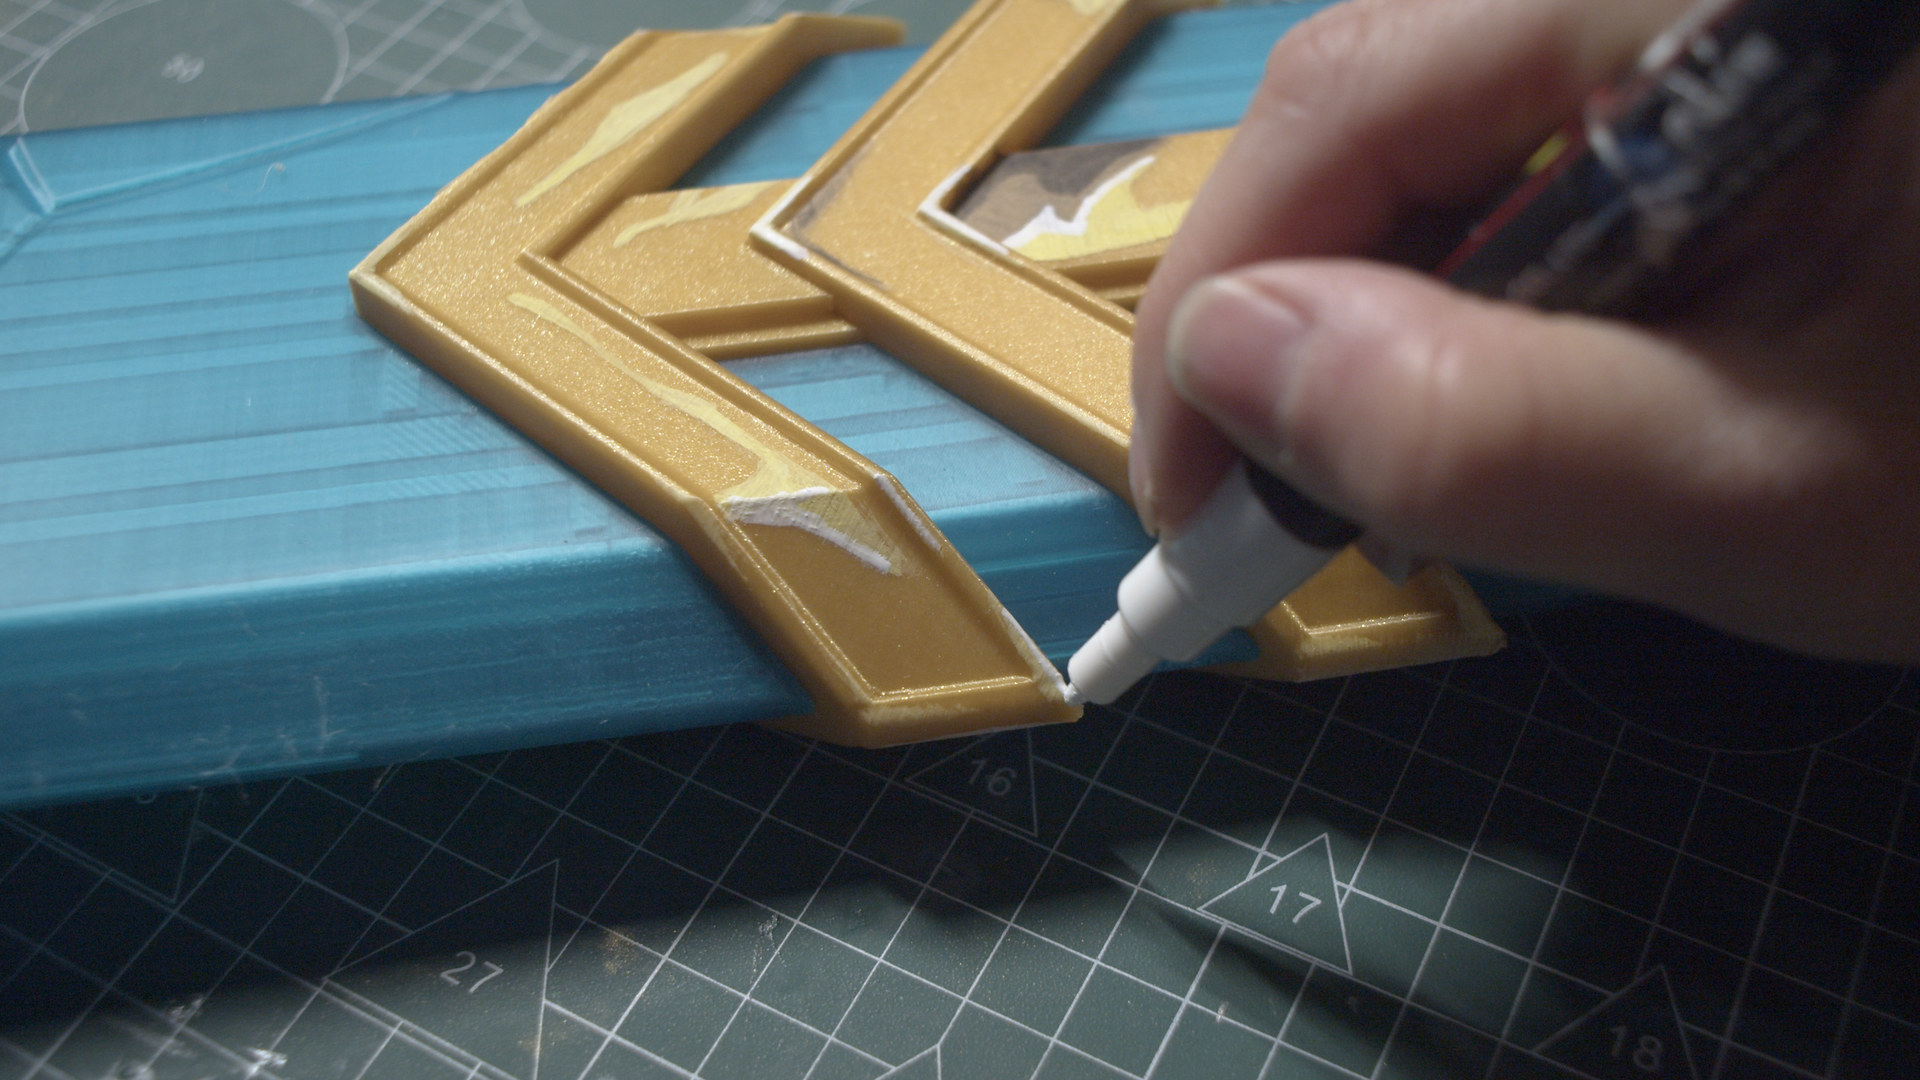
Then outline them with white paint.
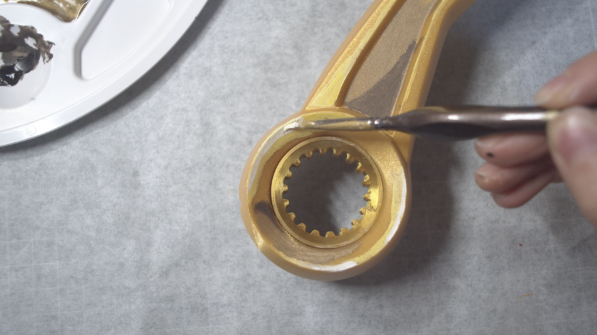
3D printed Ekko sword from Arcane painted in cel-shaded cosplay style – Painting lighter areas, step photo 3

3D printed Ekko sword from Arcane painted in cel-shaded cosplay style – Painting lighter areas, step photo 4

Step 6: Edge paint

Now, for the final touch, take a white acrylic marker and outline rough highlight edges that we painted earlier to create a smoother look.
I also recommend using the marker in other areas, not just the highlights, because this will help you create a comic-like look 
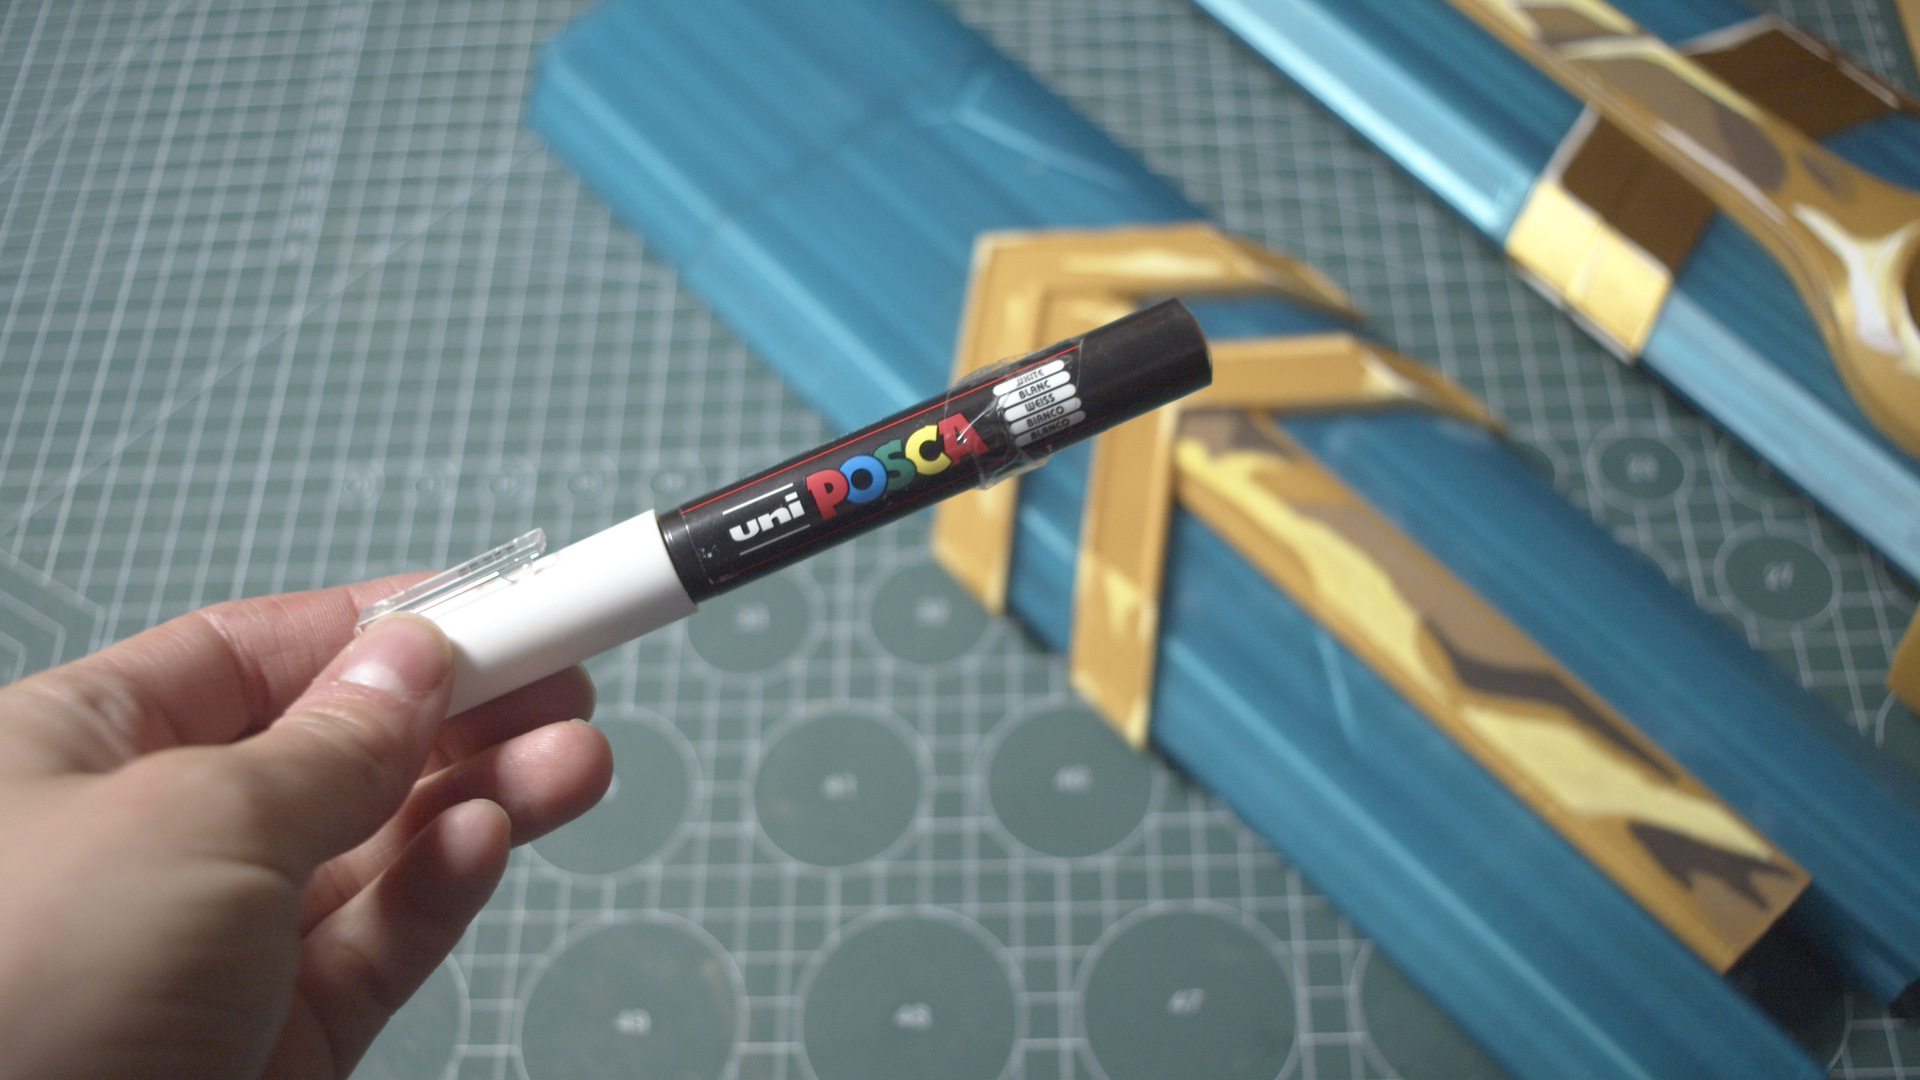
3D printed Ekko sword from Arcane painted in cel-shaded cosplay style – Edge paint

3D printed Ekko sword from Arcane painted in cel-shaded cosplay style – Edge paint, step photo 2
3D printed Ekko sword from Arcane painted in cel-shaded cosplay style – Edge paint, step photo 3

Step 7: Fixing colours

The last step you can take to ensure your paint stays in place is to spray the whole prop with a transparent coat. For this project, I recommend using velvet clear coat because it gives you the best of both worlds when it comes to mat and shine.

Final Result

And here it is: Ekko’s sword from Arcane, printed, painted, and ready for display or cosplay!


Good luck with making yours!

And if you decide to make one, tag us so that we can share your beautiful work with the world, too! <3

Here are more Arcane project ideas! 
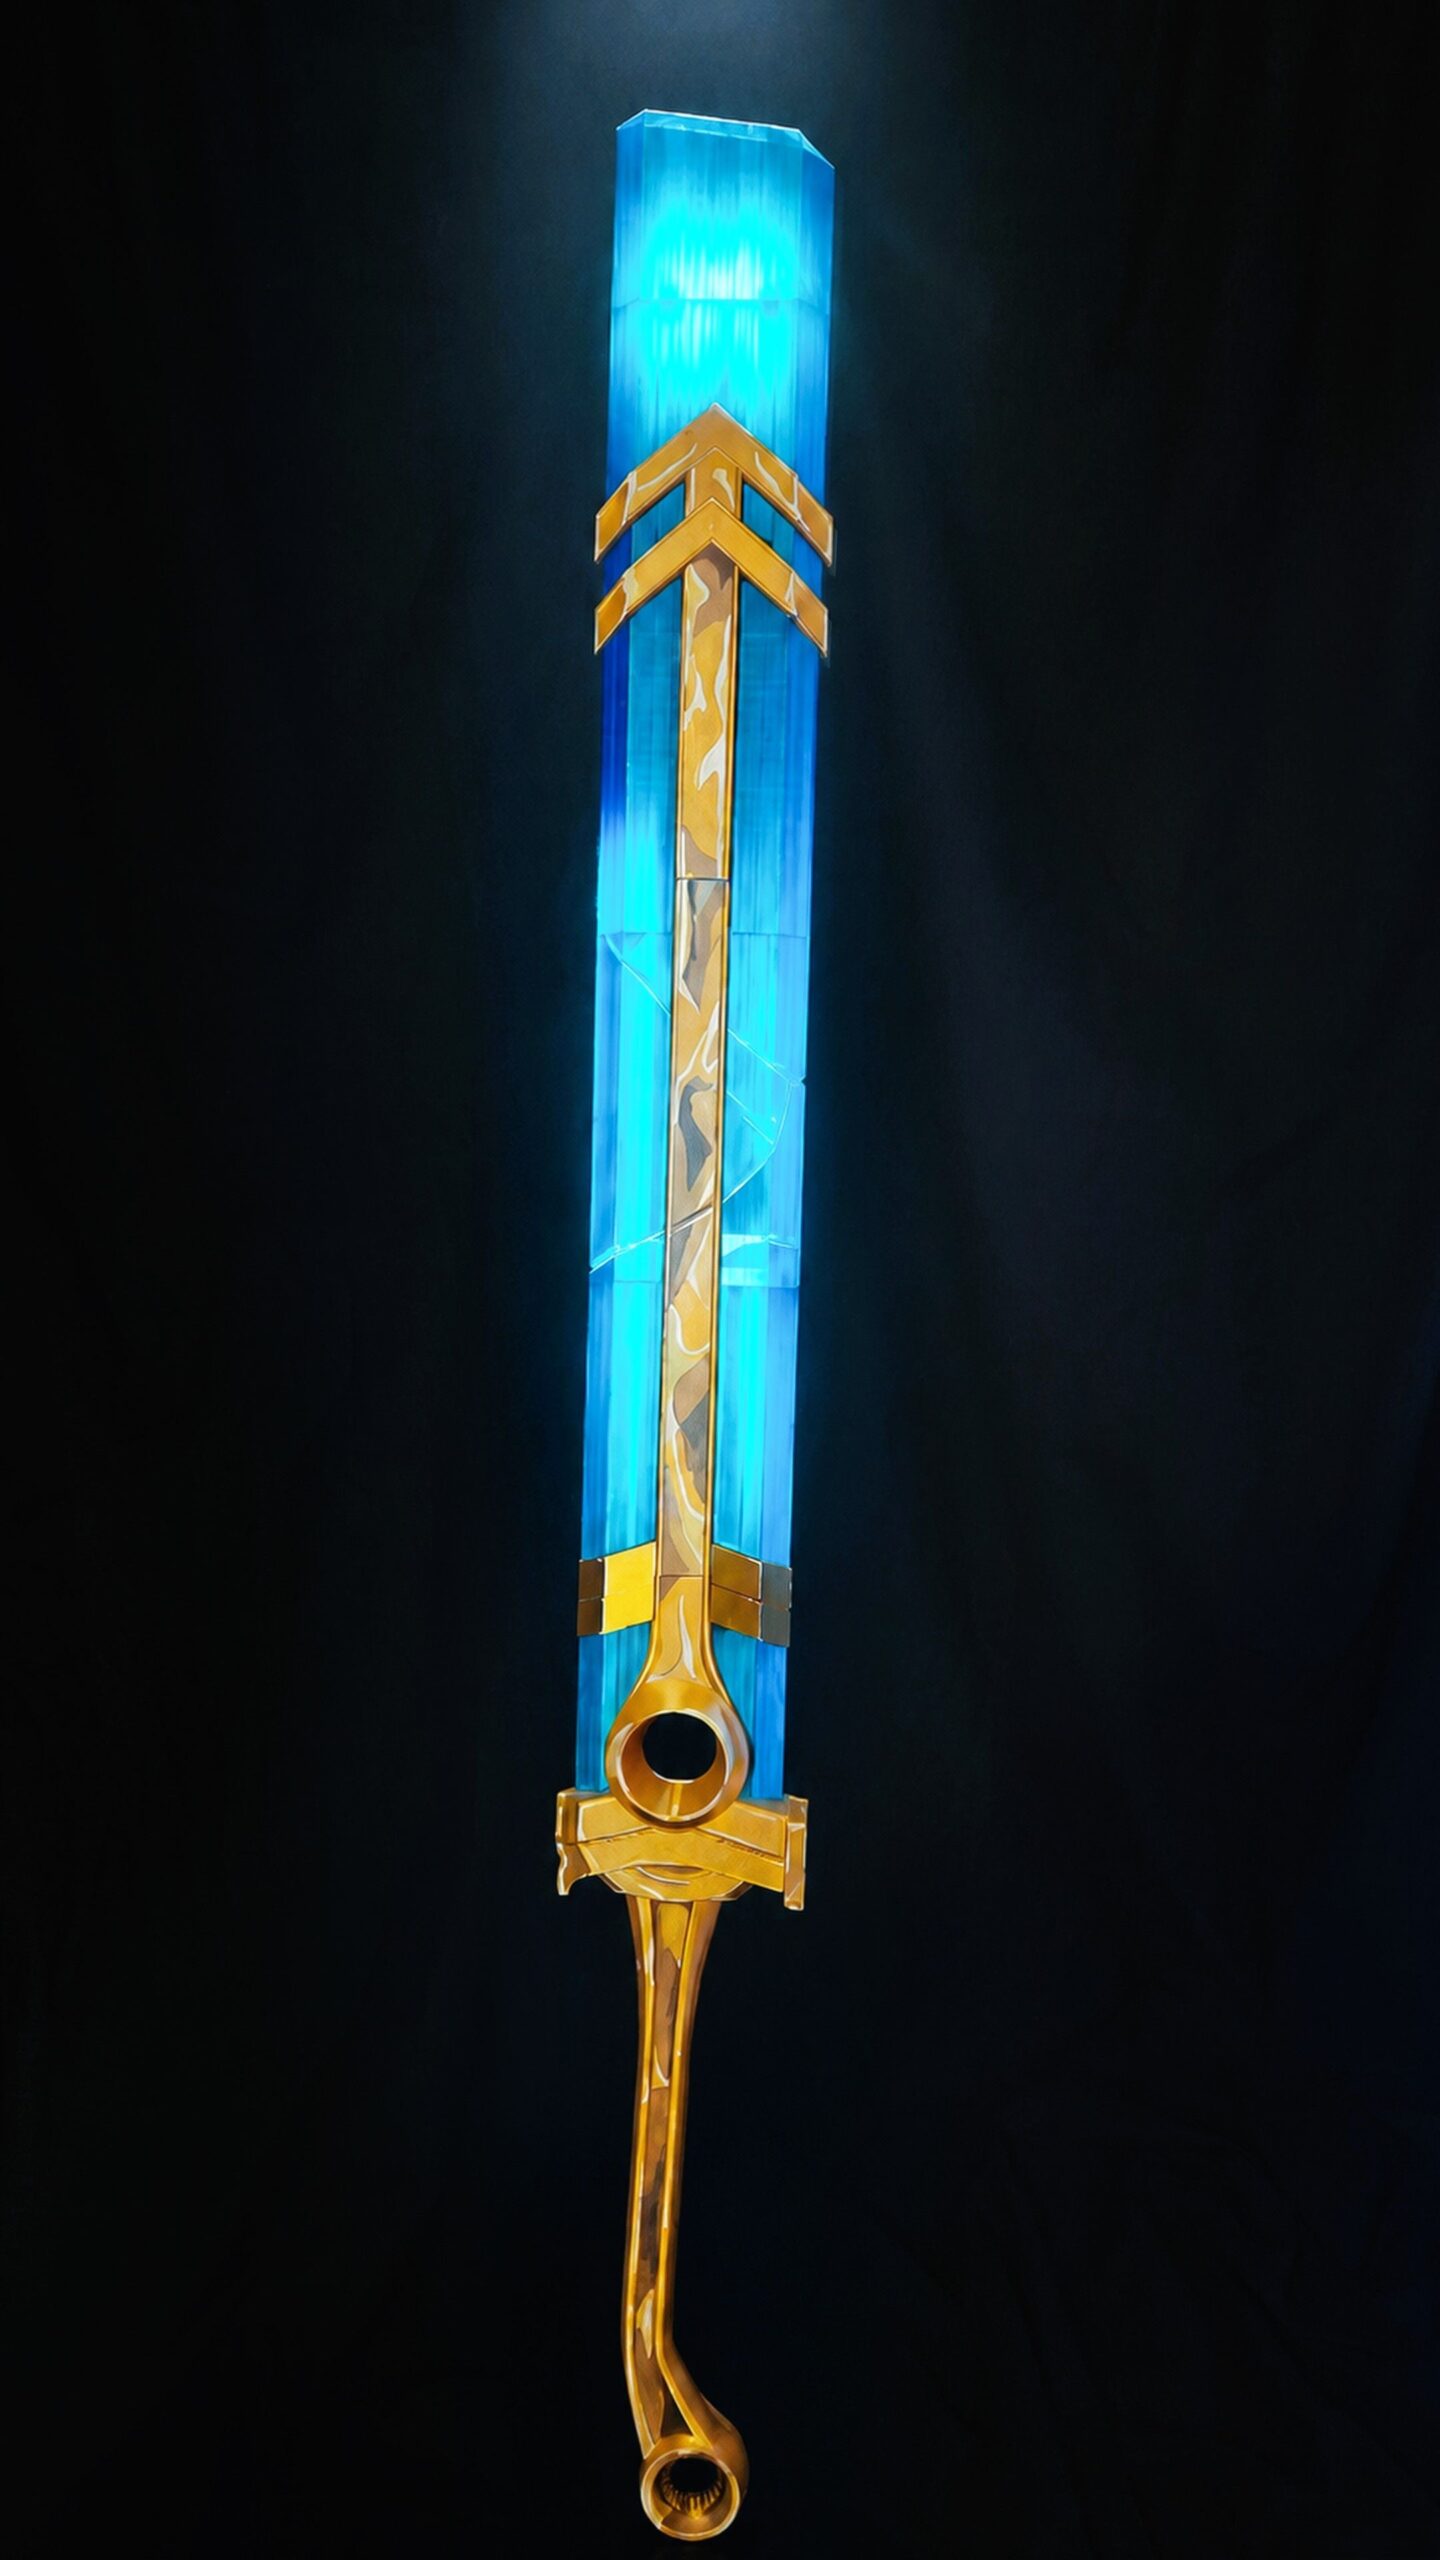
3D printed Ekko sword from Arcane painted in cel-shaded cosplay style – Final Result

3D printed Ekko sword from Arcane painted in cel-shaded cosplay style – Final Result, step photo 2

 3D printed Ekko sword from Arcane painted in cel-shaded cosplay style – Final Result, step photo 3

3D printed Ekko sword from Arcane painted in cel-shaded cosplay style – Final Result, step photo 4

Cosplay Printing & Post-Processing Tutorials

Leave a Comment

Your email address will not be published. Required fields are marked *

Leave the field below empty!

Previous reading
How I made a costume of The Silent from Slay the Spire
Next reading
Easy to make Kasaka’s Venom Fang dagger | Solo Leveling