

How to Create a Damascus Pattern on Any 3D Print


Creating a realistic Damascus pattern is easier than you might think. With a multi-color 3D printer, our free modifier, and the right filament colors, you can give any 3D printed blade a cool Damascus effect.
In this guide, I’ll walk you through the entire process from choosing the right filaments to sanding and applying the final finish. I’ll use my Dark Sister sword from House of the Dragon as an example, but you can apply the same technique to create a Damascus pattern on any 3D model.
What You’ll Need
-
A multi-color 3D printer
-
Clear epoxy glue (recommended)
-
Sandpaper in a range of grits (80–1200)
-
An electric sander (optional, but highly recommended to save time)
-
Clear resin (optional)
-
A UV lamp (optional, for curing the resin)
-
Plenty of patience
1. Choosing the Right Filament
I tested several filament brands and color combinations to find the best match for a realistic Damascus pattern.
My favorite combination was Iron Grey from Filamentum and Fossil Grey from PolyTerra.

2. Setting Up the Slicer for a Damascus Pattern on any blade
Open your slicer and select your multi-color printer. I’m using a Prusa XL with five toolheads. Import your blade model and place it flat on the build plate.
Change the printing parameters as follows:
-
Infill: 10%
-
Infill pattern: Grid
-
Enable brim with 5 mm width
-
Enabled Wipe tower
-
In multiple extruders : Advanced : Maximum width of a segmented region 0.8 mm
-
In multiple extruders : Advanced : Interlocking depth of a segmented region 0.8 mm
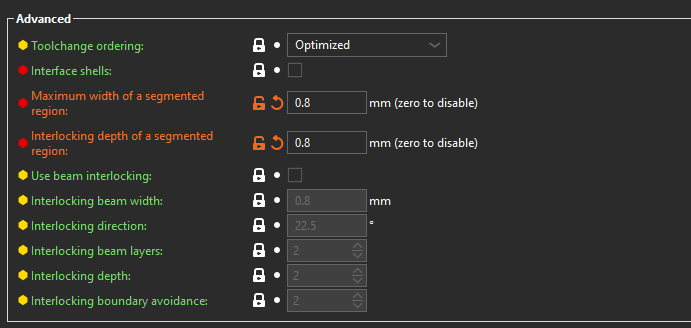
This setting will save printing time, number of tool changes, and used filament.
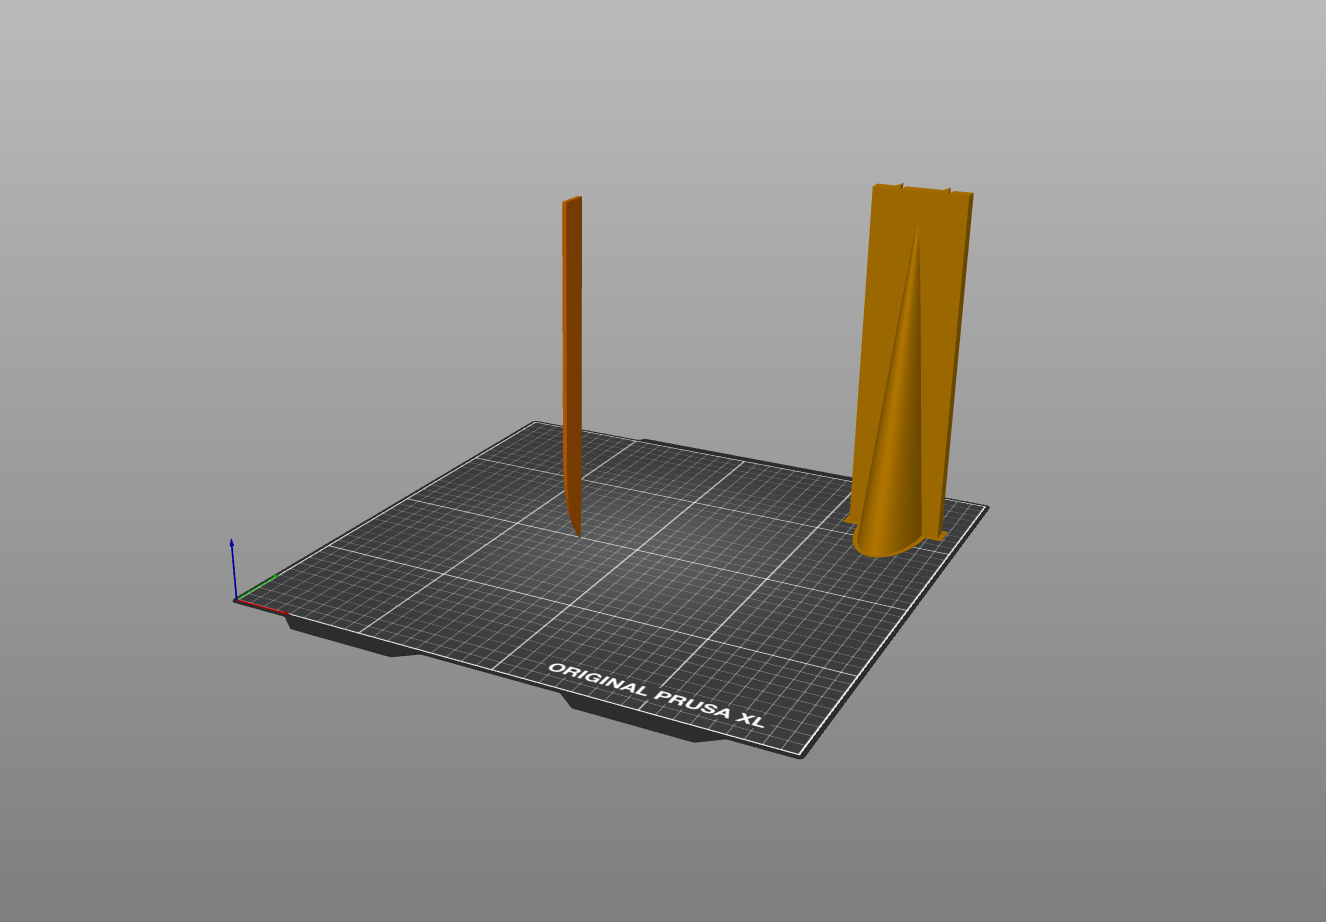
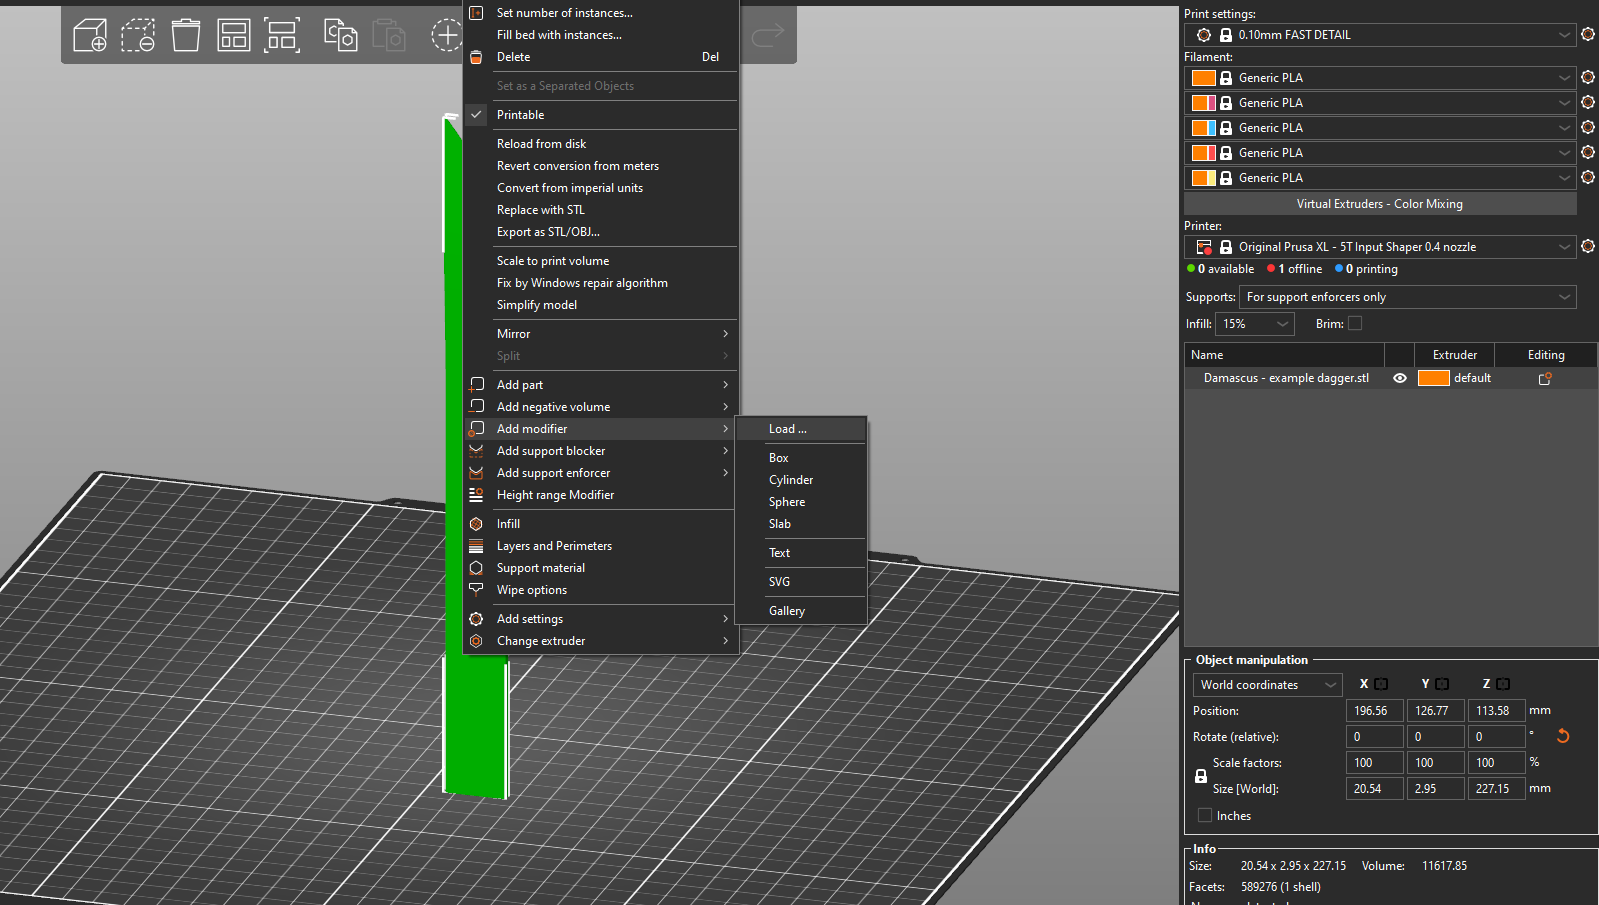
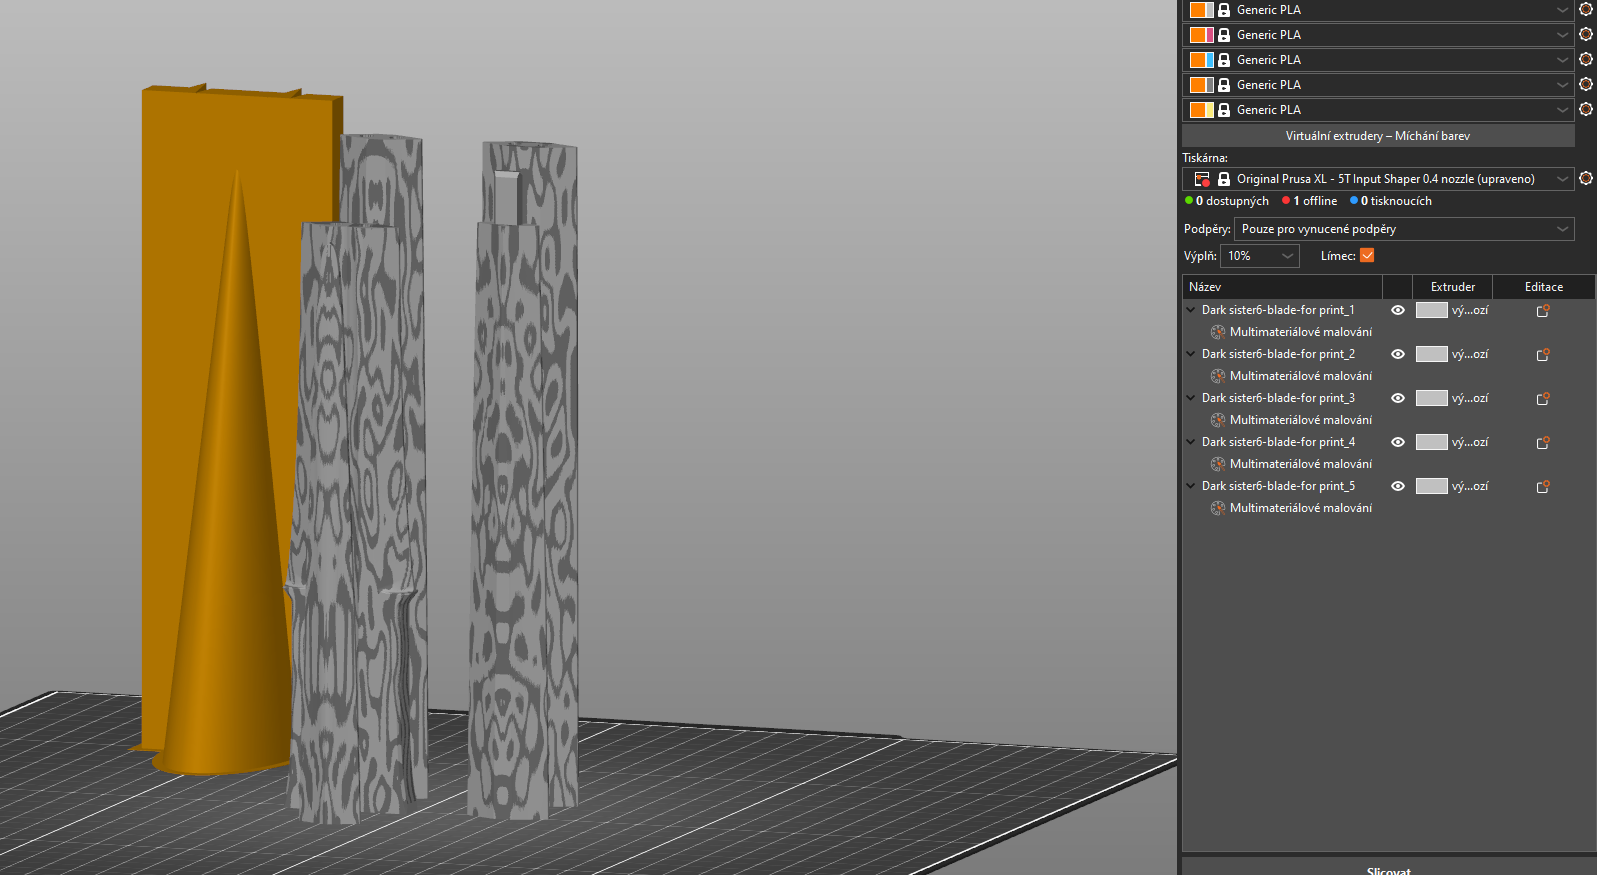
Import the modifier (right-click on the blade – add modifier – import). You can change the extruder numbers and colors to match your filaments.
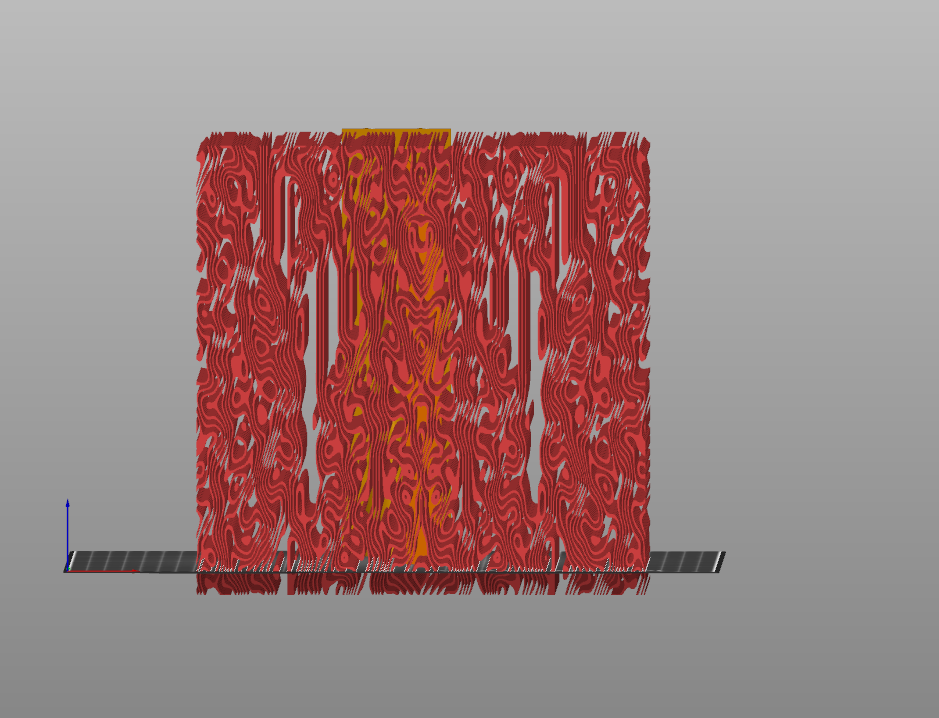
After that, start the slicing process. The result should look similar to this.
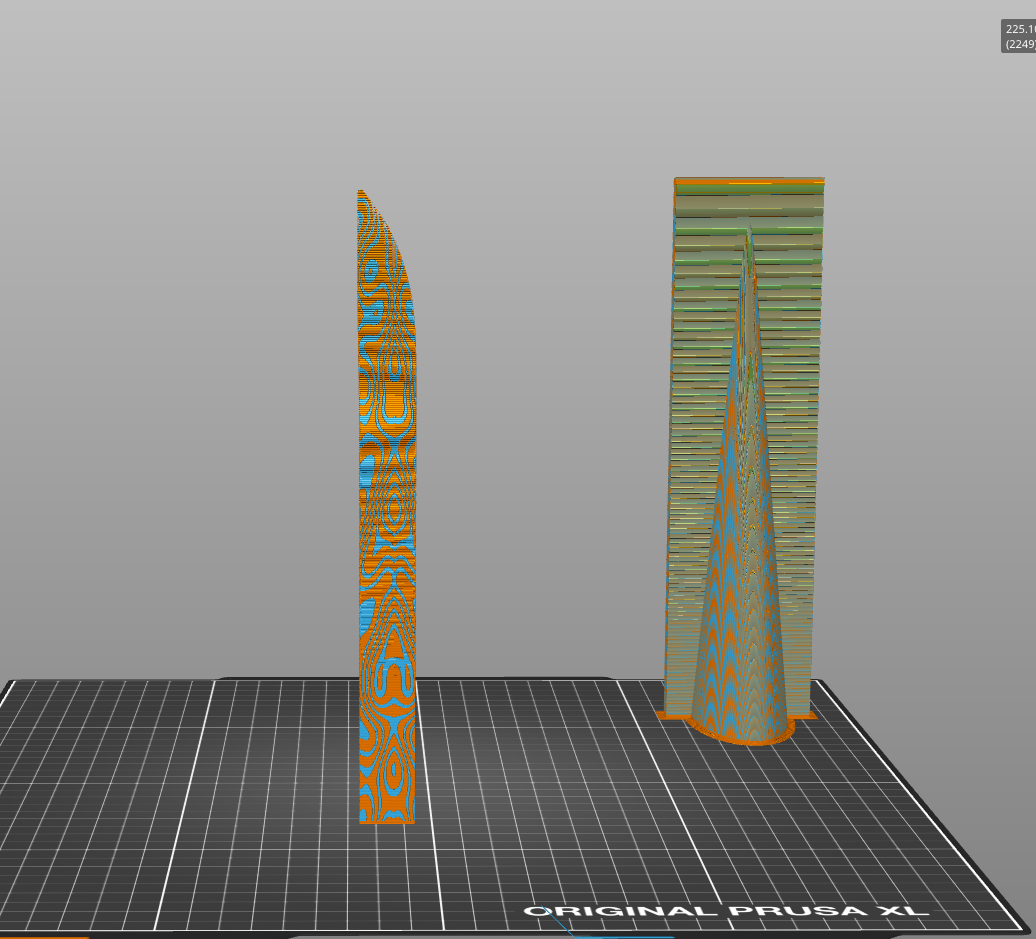
💡 Tip: If you’re printing our Dark Sister sword from House of the Dragon, you’re one step ahead. Just open the included 3MF file – the modifier is already applied to the blade, so it’s ready to print.
Post-processing the blade
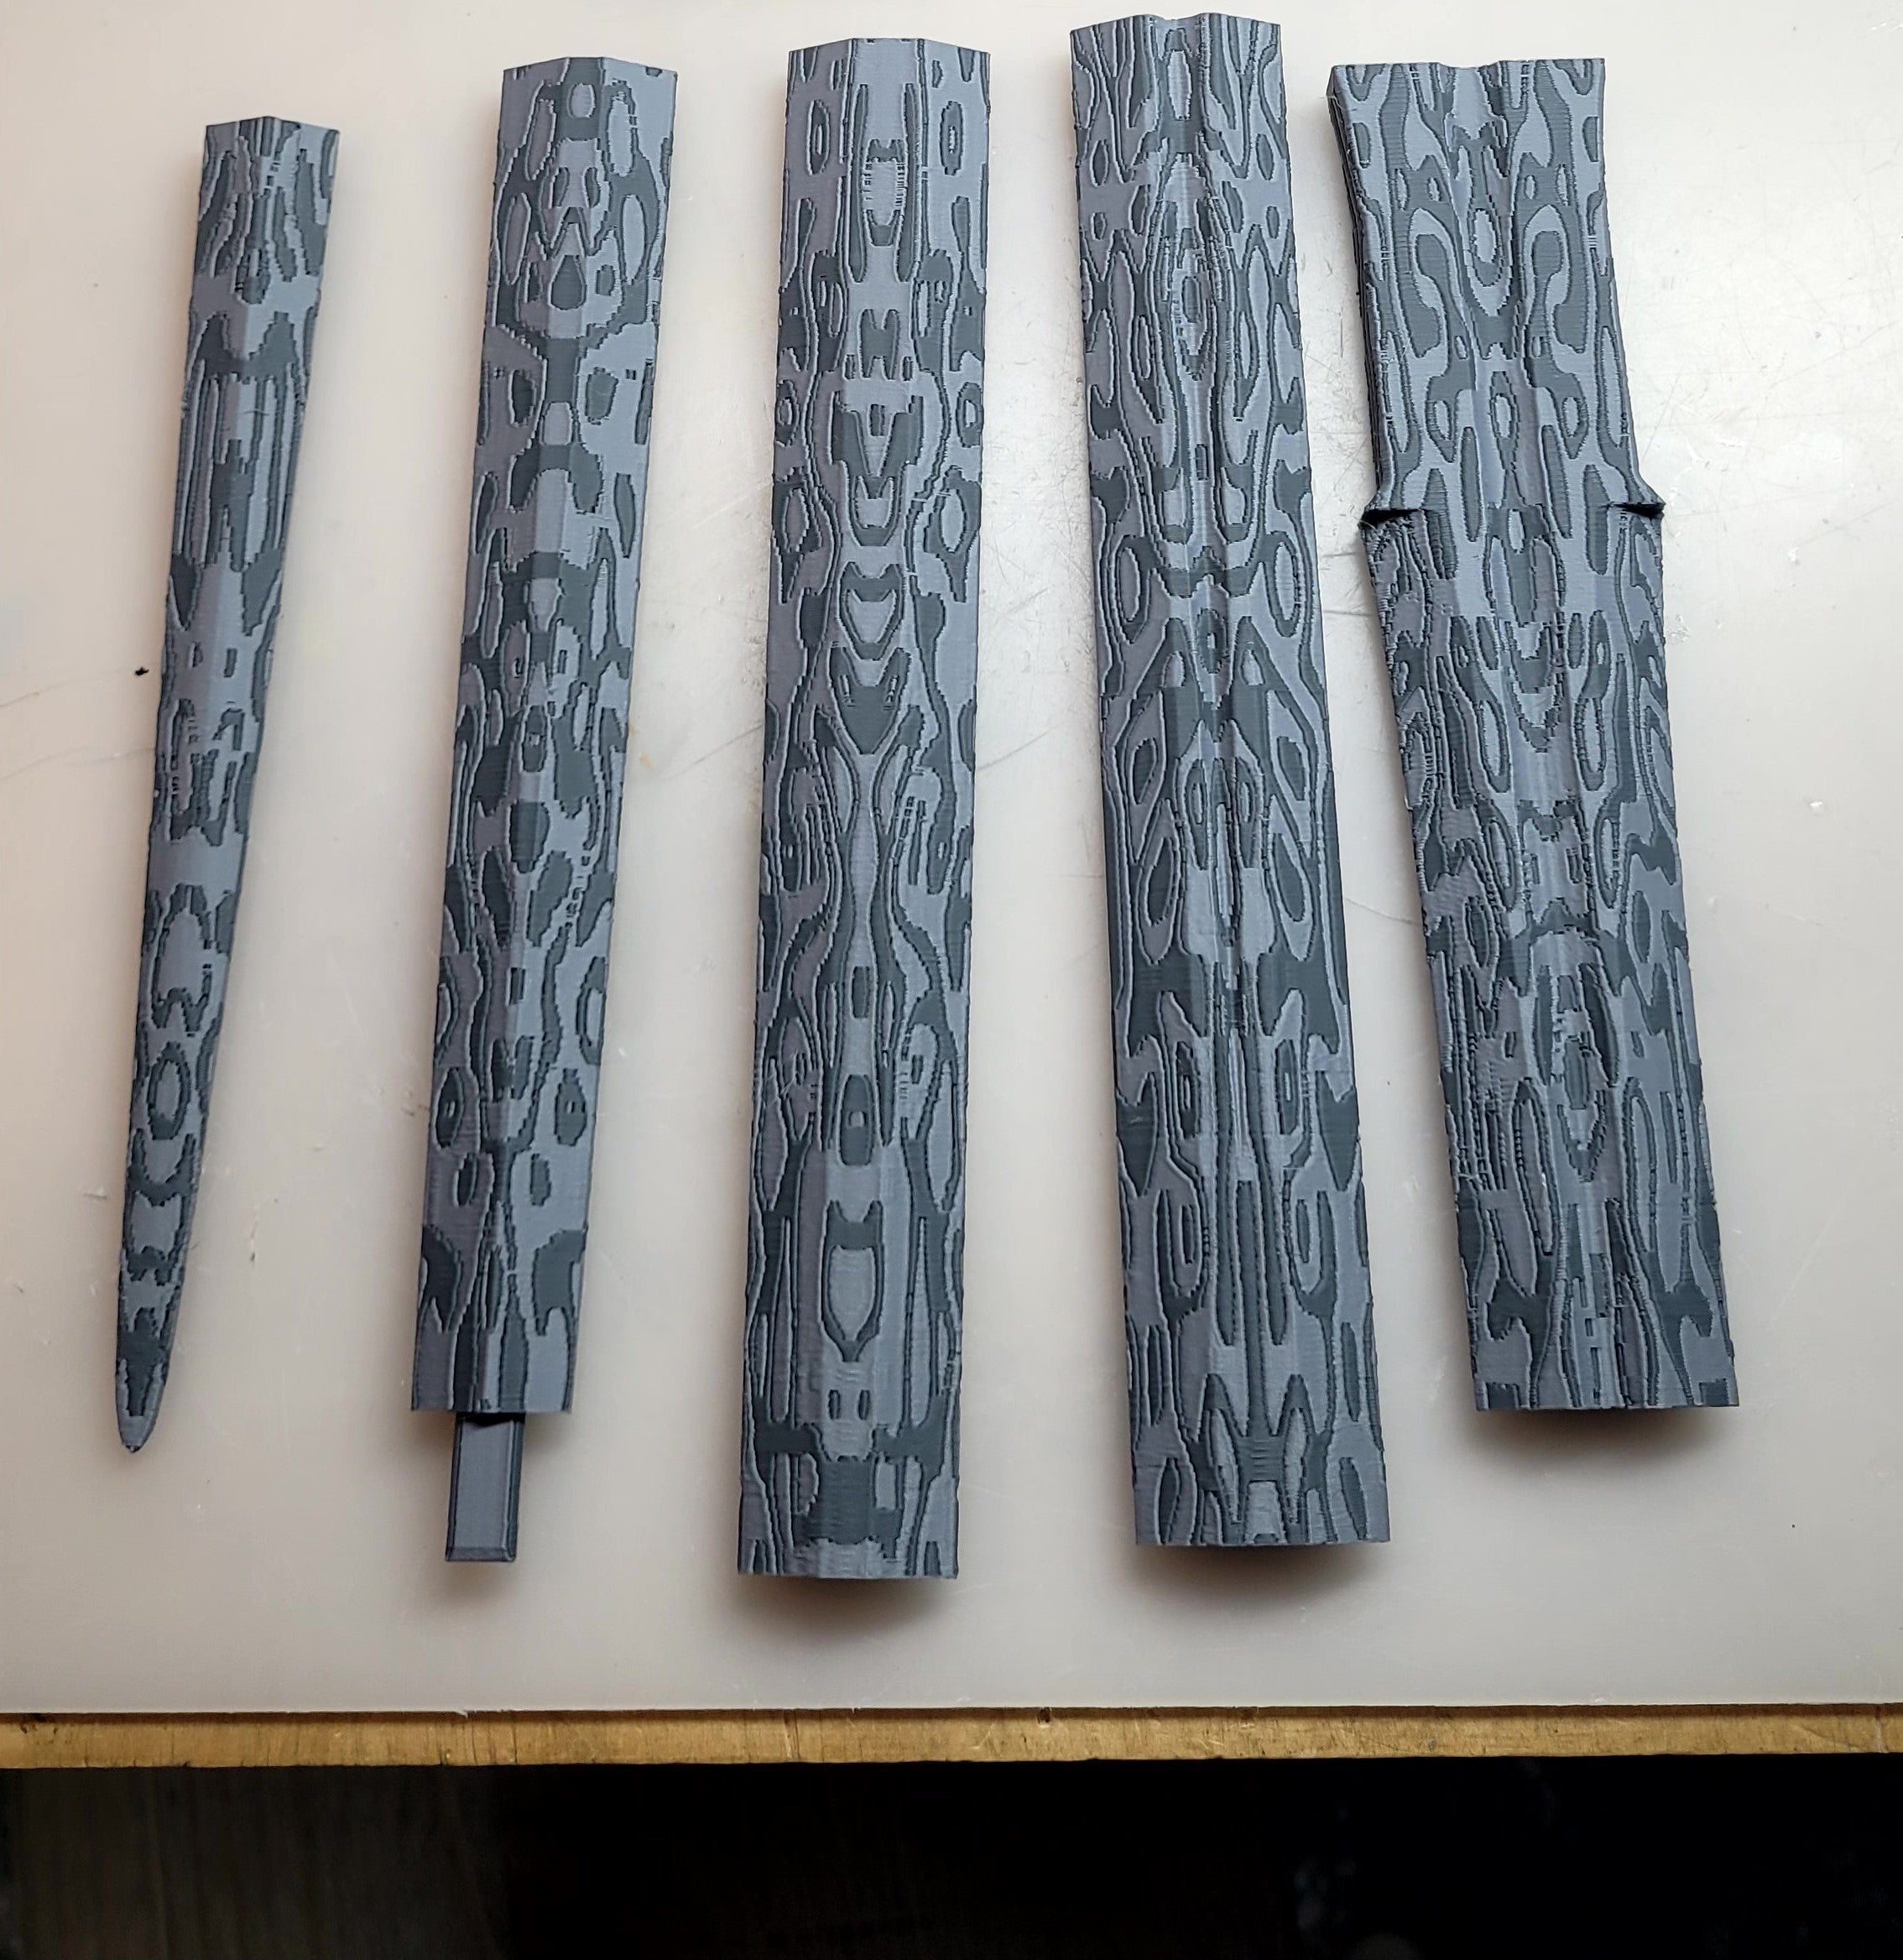
Basic method
Start by sanding all of the contact surfaces until they’re smooth. This will help create a smooth surface for gluing.
Before gluing, test-fit the entire blade. If youŕe building the Dark Sister sword, make sure your 4mm support rods slide into the holes without too much resistance.
Check that all the parts line up correctly. Once you’re happy with the fit, take the blade apart.
Next, sand each part using 80, 150, and 220 grit sandpaper. Avoid sanding the edges of the glue joints, as this can create visible gaps between the pieces.
Prepare your epoxy glue and a small tool for applying it, such as a toothpick, 3D printed spatula, or a brush.
Starting at the tip of the blade, glue the pieces together one by one while inserting the support rods to keep everything aligned. Once all the parts are joined, remove the rods, coat them with glue, and insert them again for the final assembly.
Apply a coat of clear gloss spray paint to make the Damascus pattern stand out.
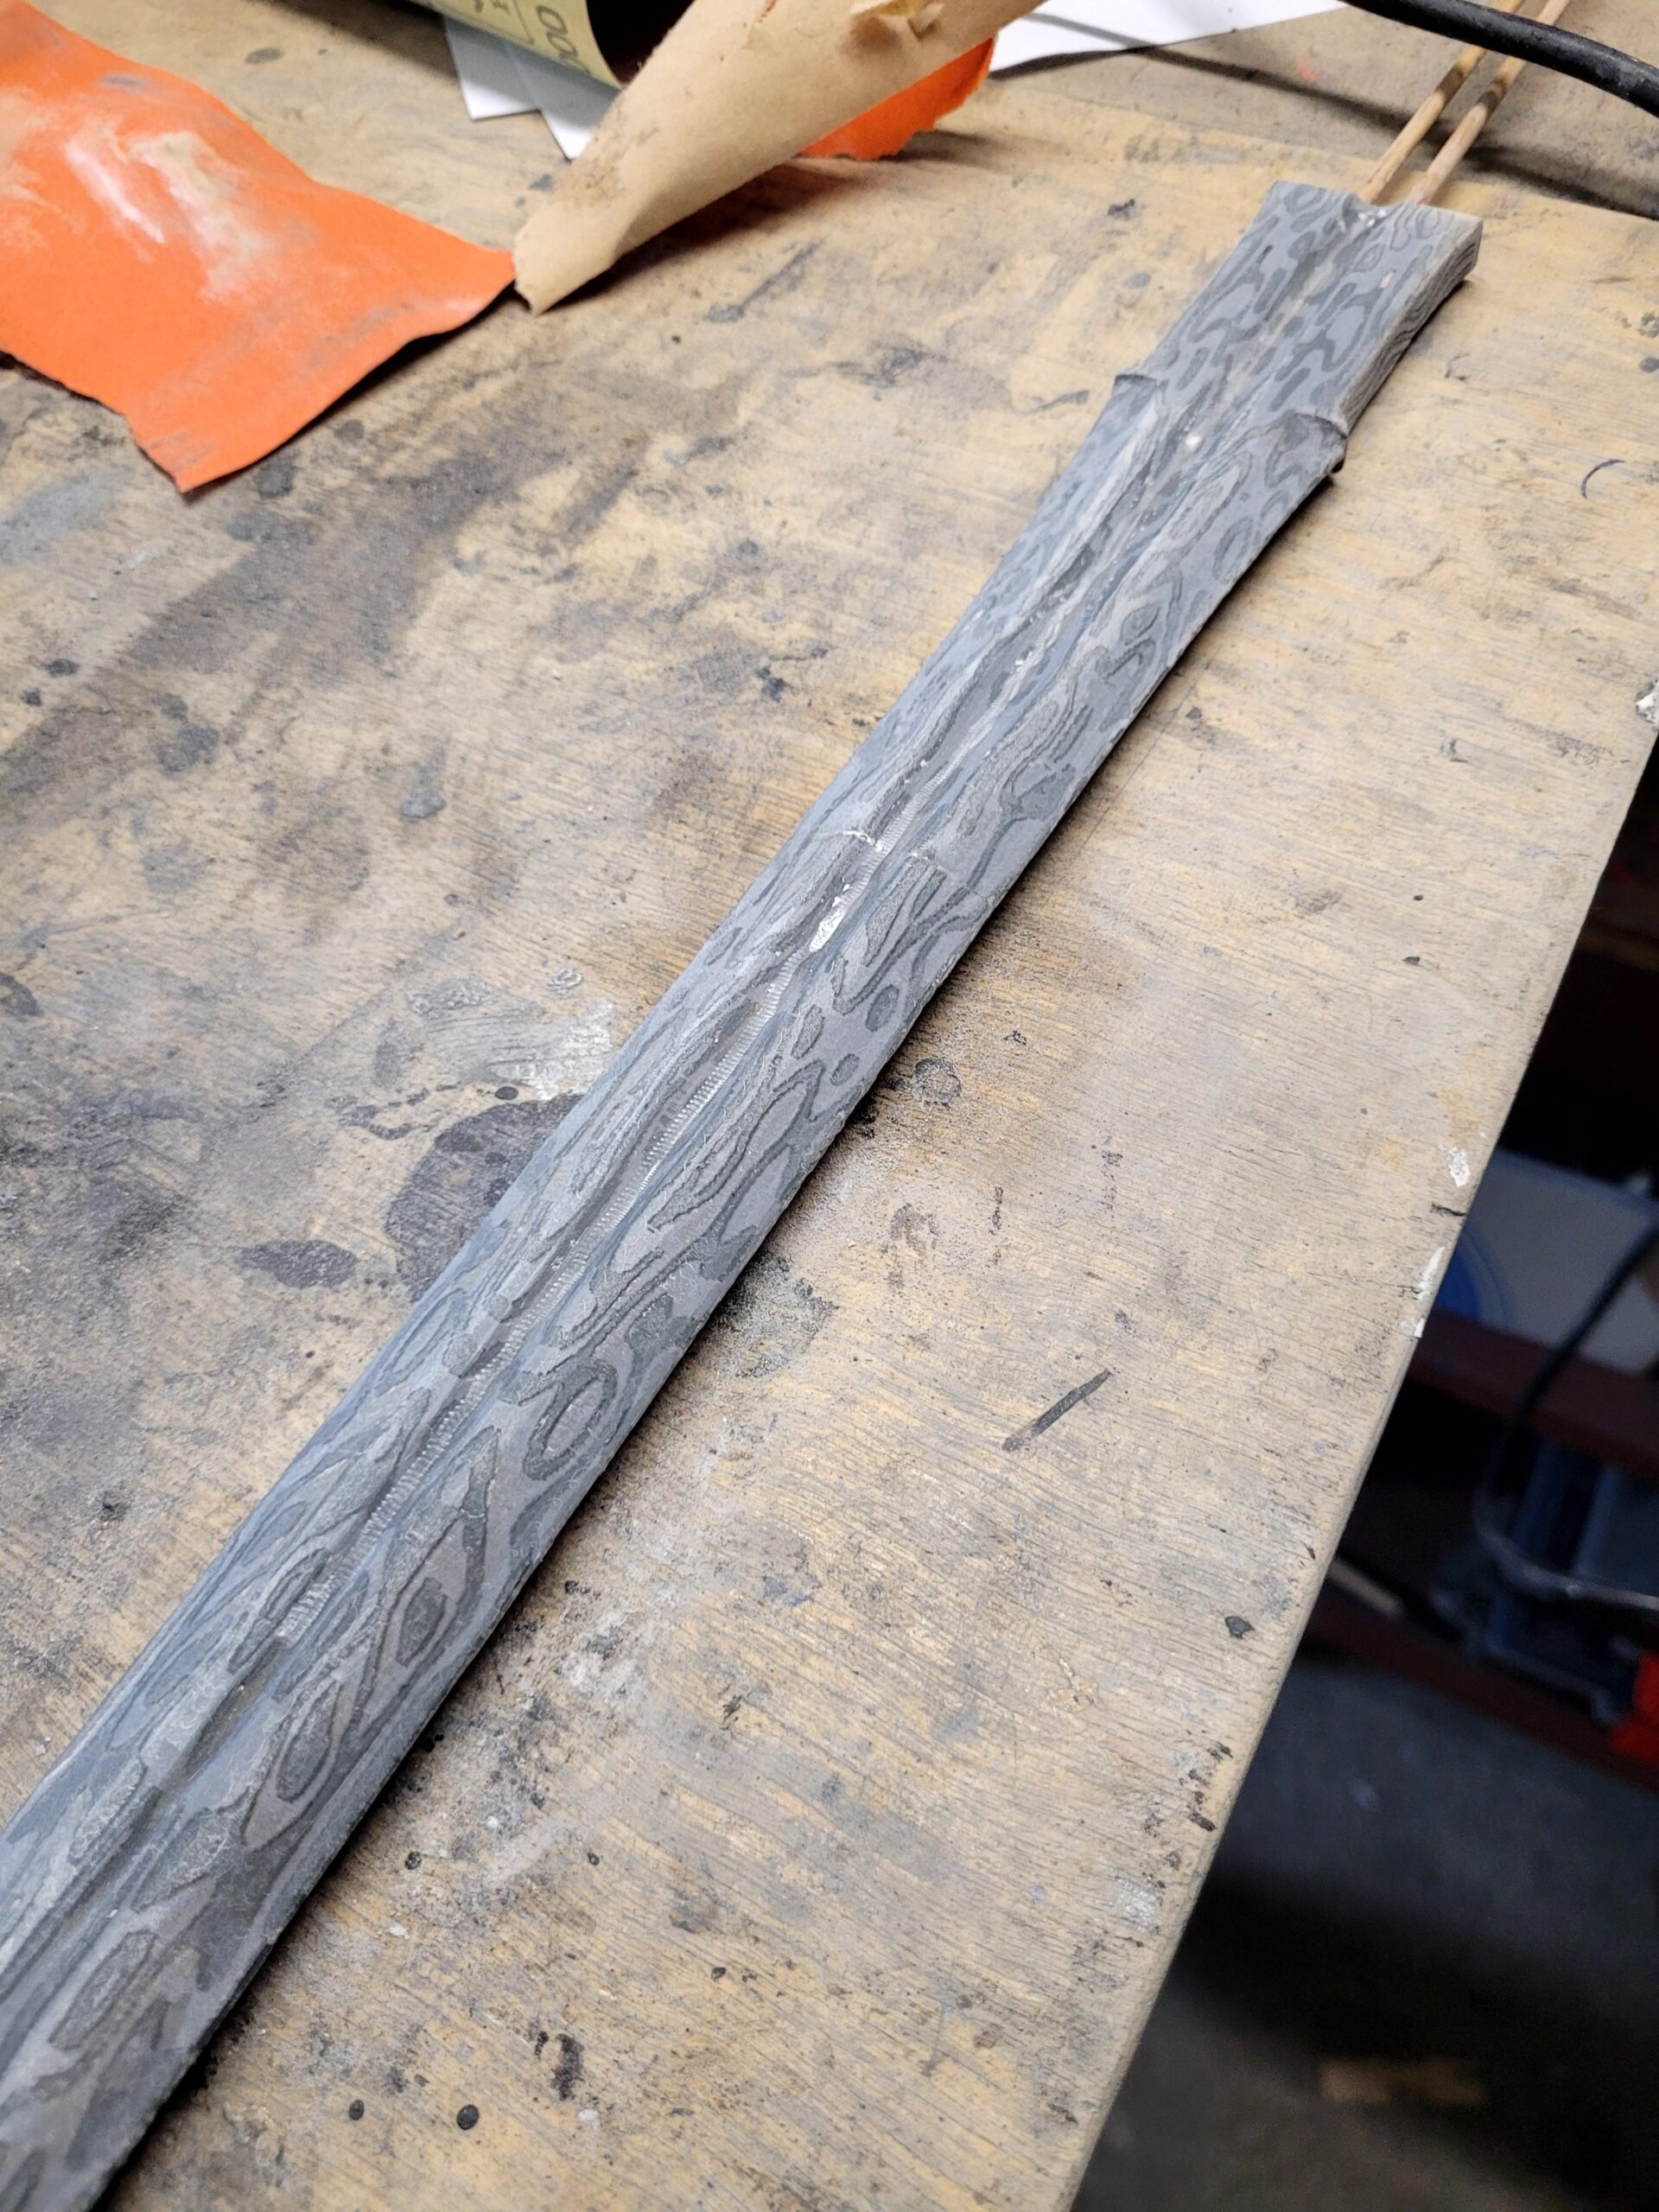 Sanded and assembled blade before glossy spray paint.
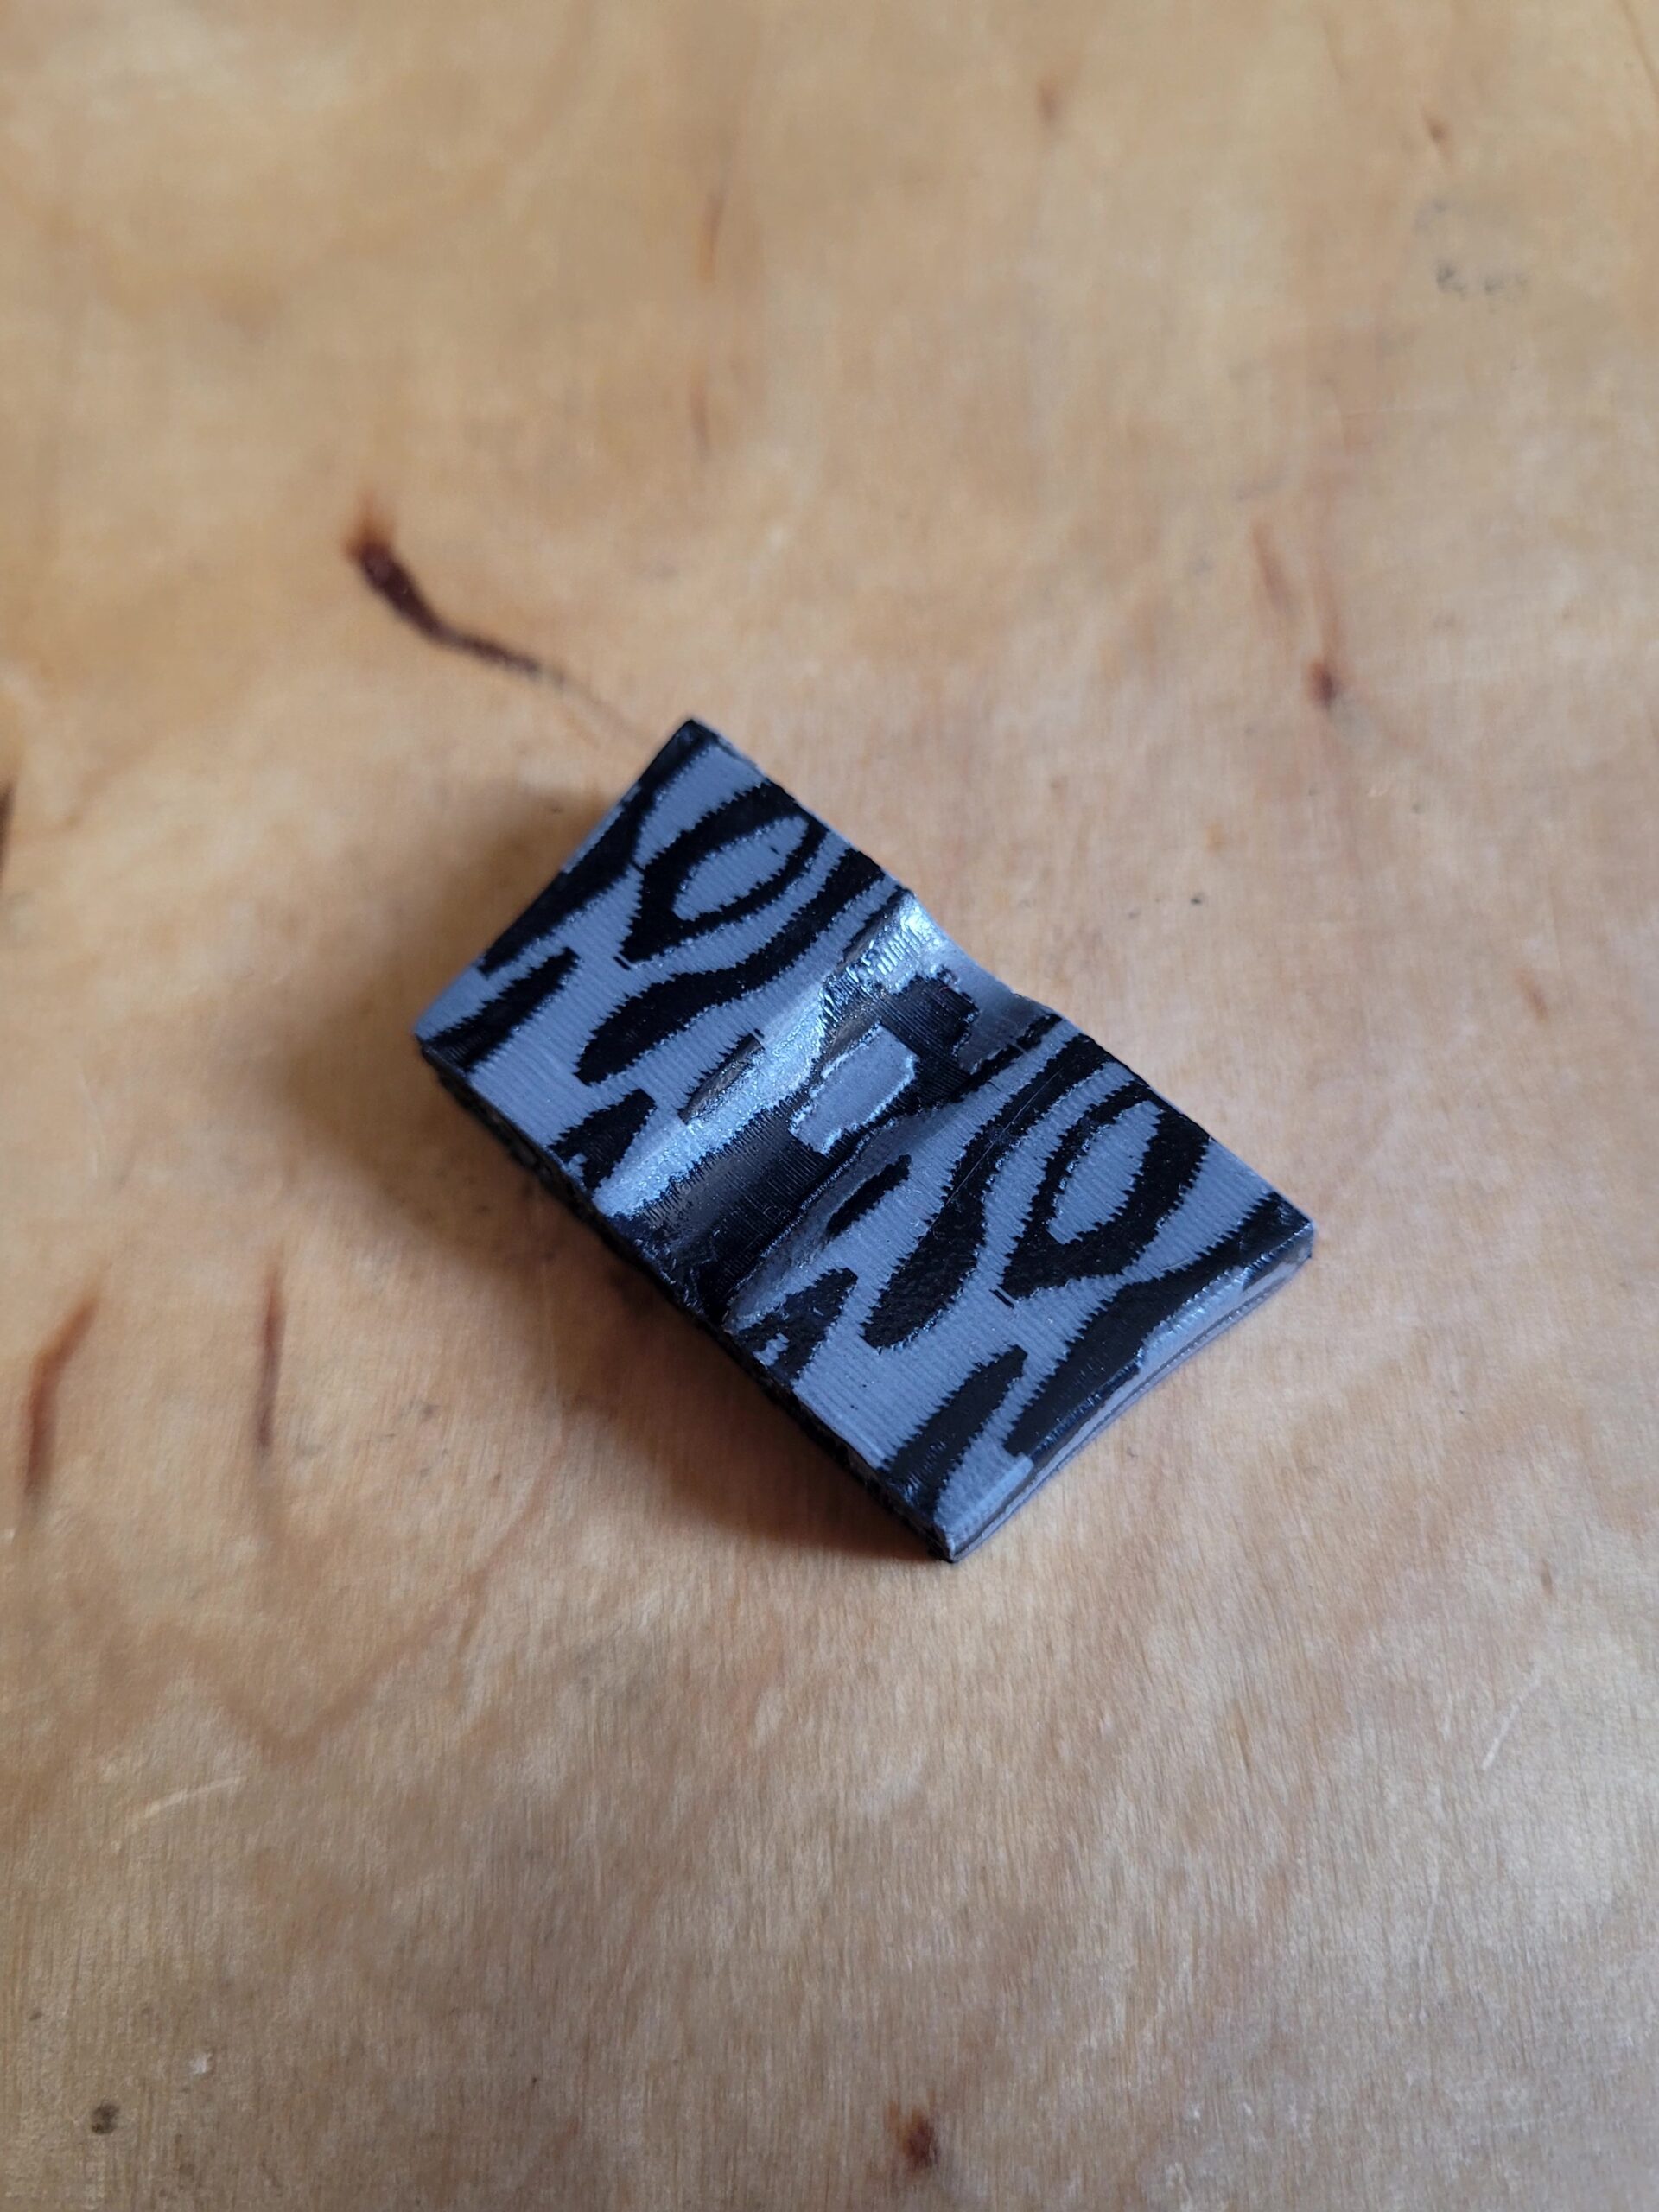
Sanded and coated in spray paint on a testing piece
Advanced Method
Normally, this is where you would use sandable spray filler to hide the seams. However, filler would also cover the Damascus pattern we’re trying to preserve.
Instead of using filler, coat the entire blade with a thin layer of clear resin. Let it cure in direct sunlight or under a UV lamp. We recommend curing each side for at least one hour on a clean, flat surface.
☀️ Watch out! Direct sunlight can cure the resin much faster, but it can also warp or deform your 3D print, especially if it’s made from PLA. Don’t leave the blade in the sun any longer than necessary.
The resin fills small gaps, smooths the surface, and preserves the Damascus pattern, making the next sanding steps much easier.
Once the resin has fully cured, continue sanding with progressively finer grits: 320, 400, 600, 800, and finally 1200.
For each grit, sand the blade dry first, then wet. Let the blade dry completely before moving on to the next grit and repeat the process until the surface is smooth and evenly polished.
To finish the blade, apply a coat of clear gloss varnish. For an even more metallic look, you can lightly dust the edges with silver spray paint. Keep the coat very light so the Damascus pattern remains clearly visible.
Result:

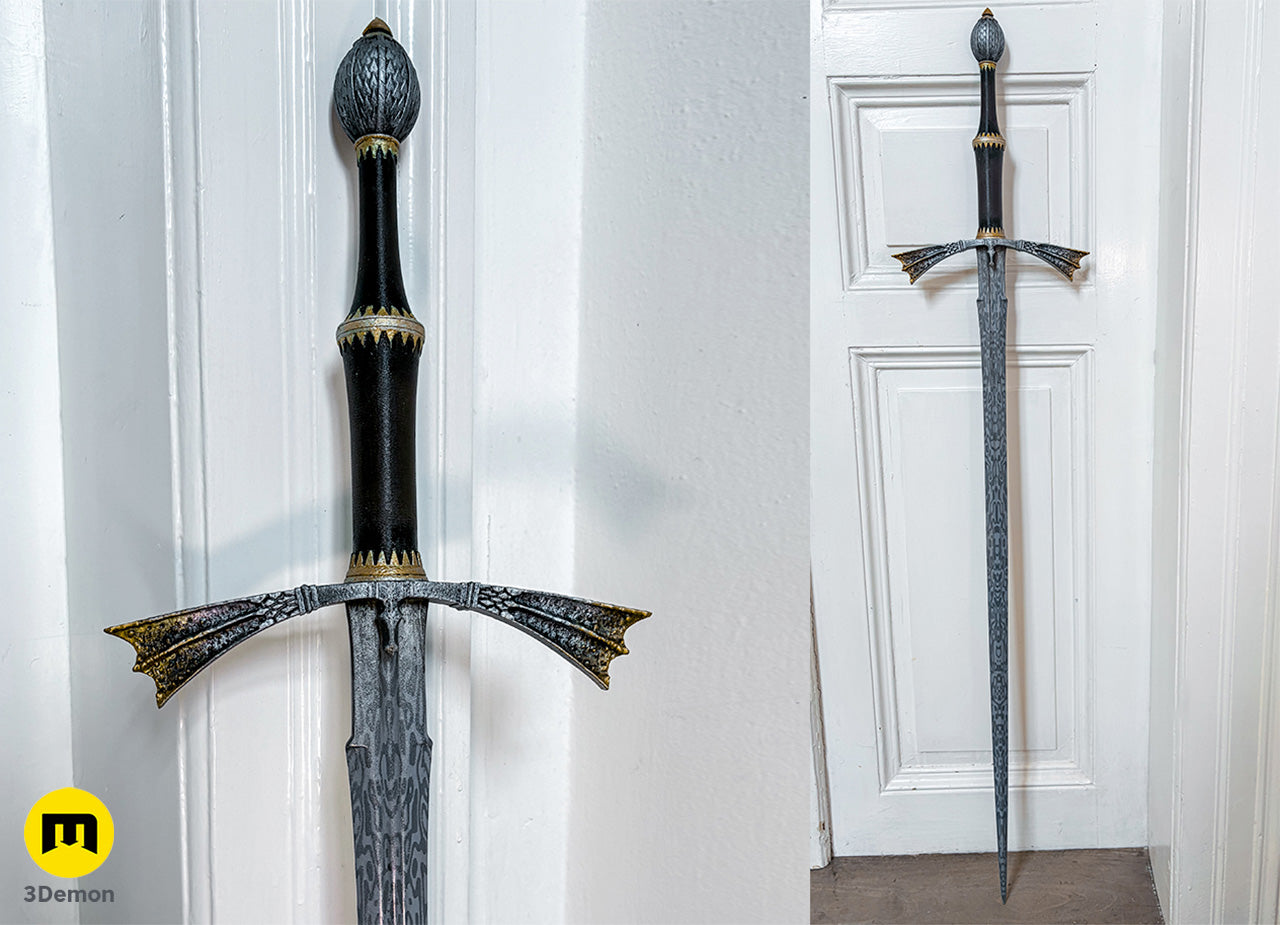
I hope you found this tutorial helpful and that it inspires you to create your own amazing Damascus props! If you make one, be sure to tag us on social media – we’d love to see your work and share it with the world.
Happy printing! ✨
Leave a Comment